
Any assembly problems?
Get Help

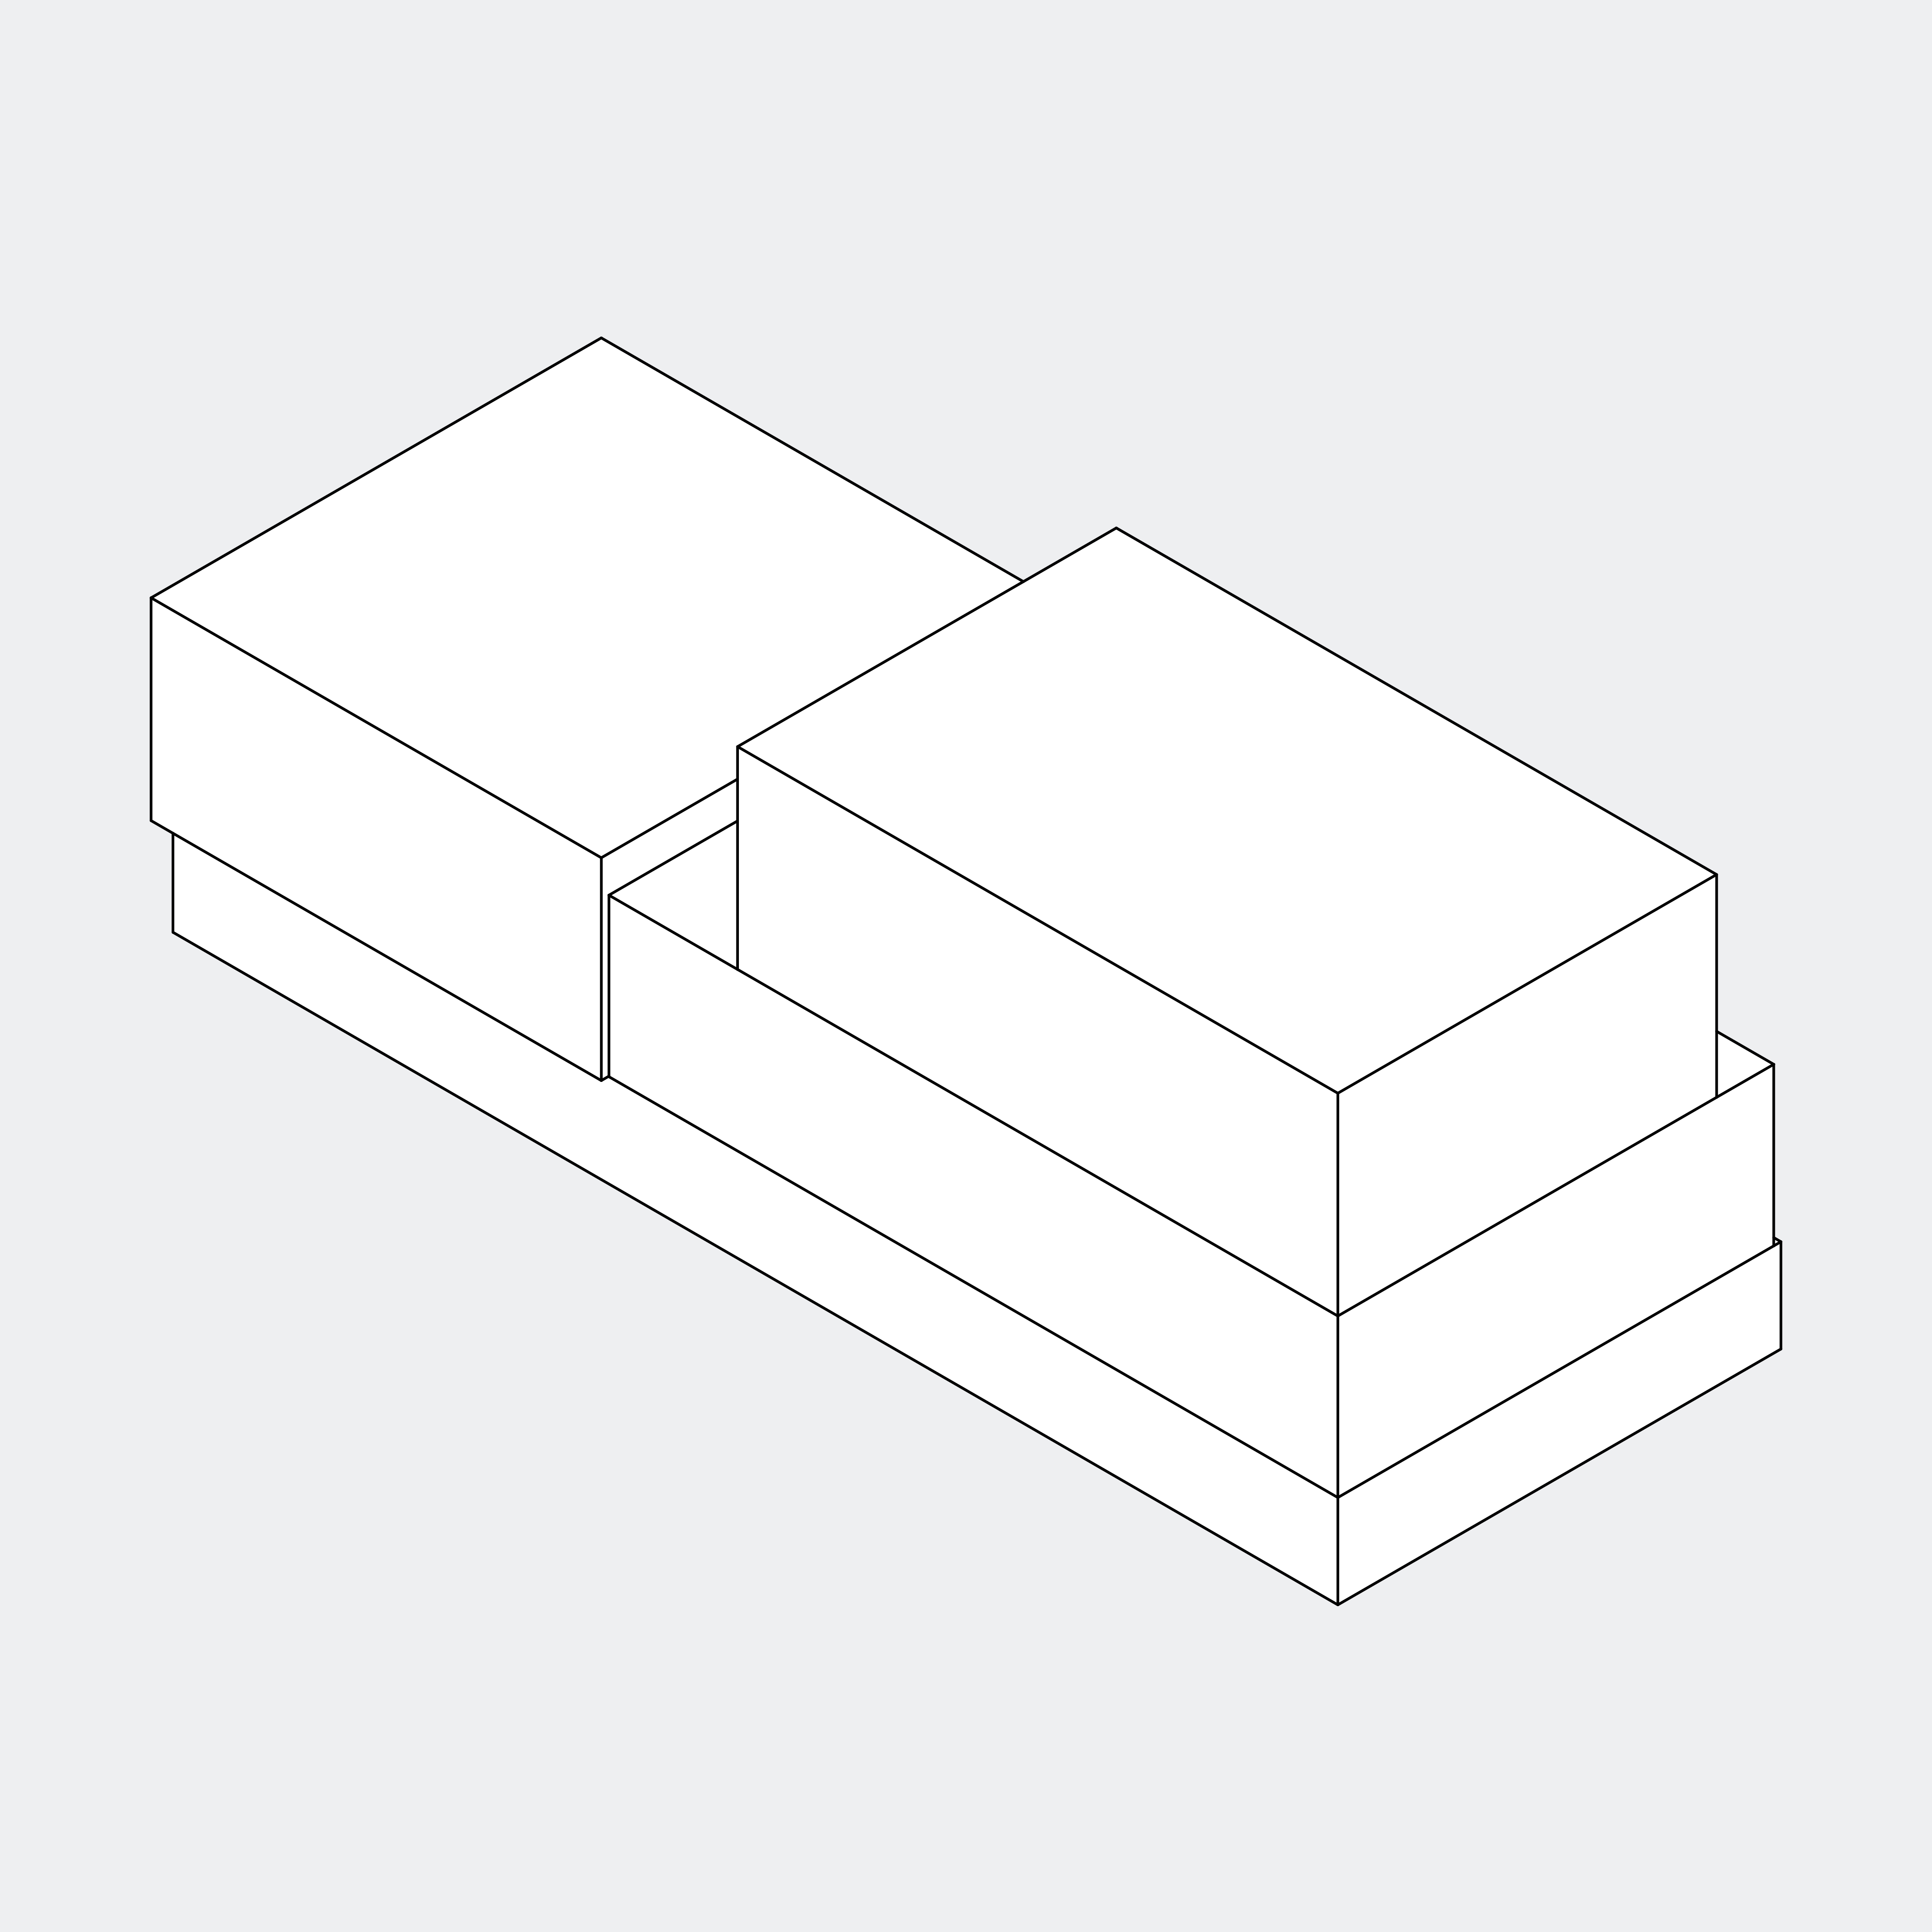

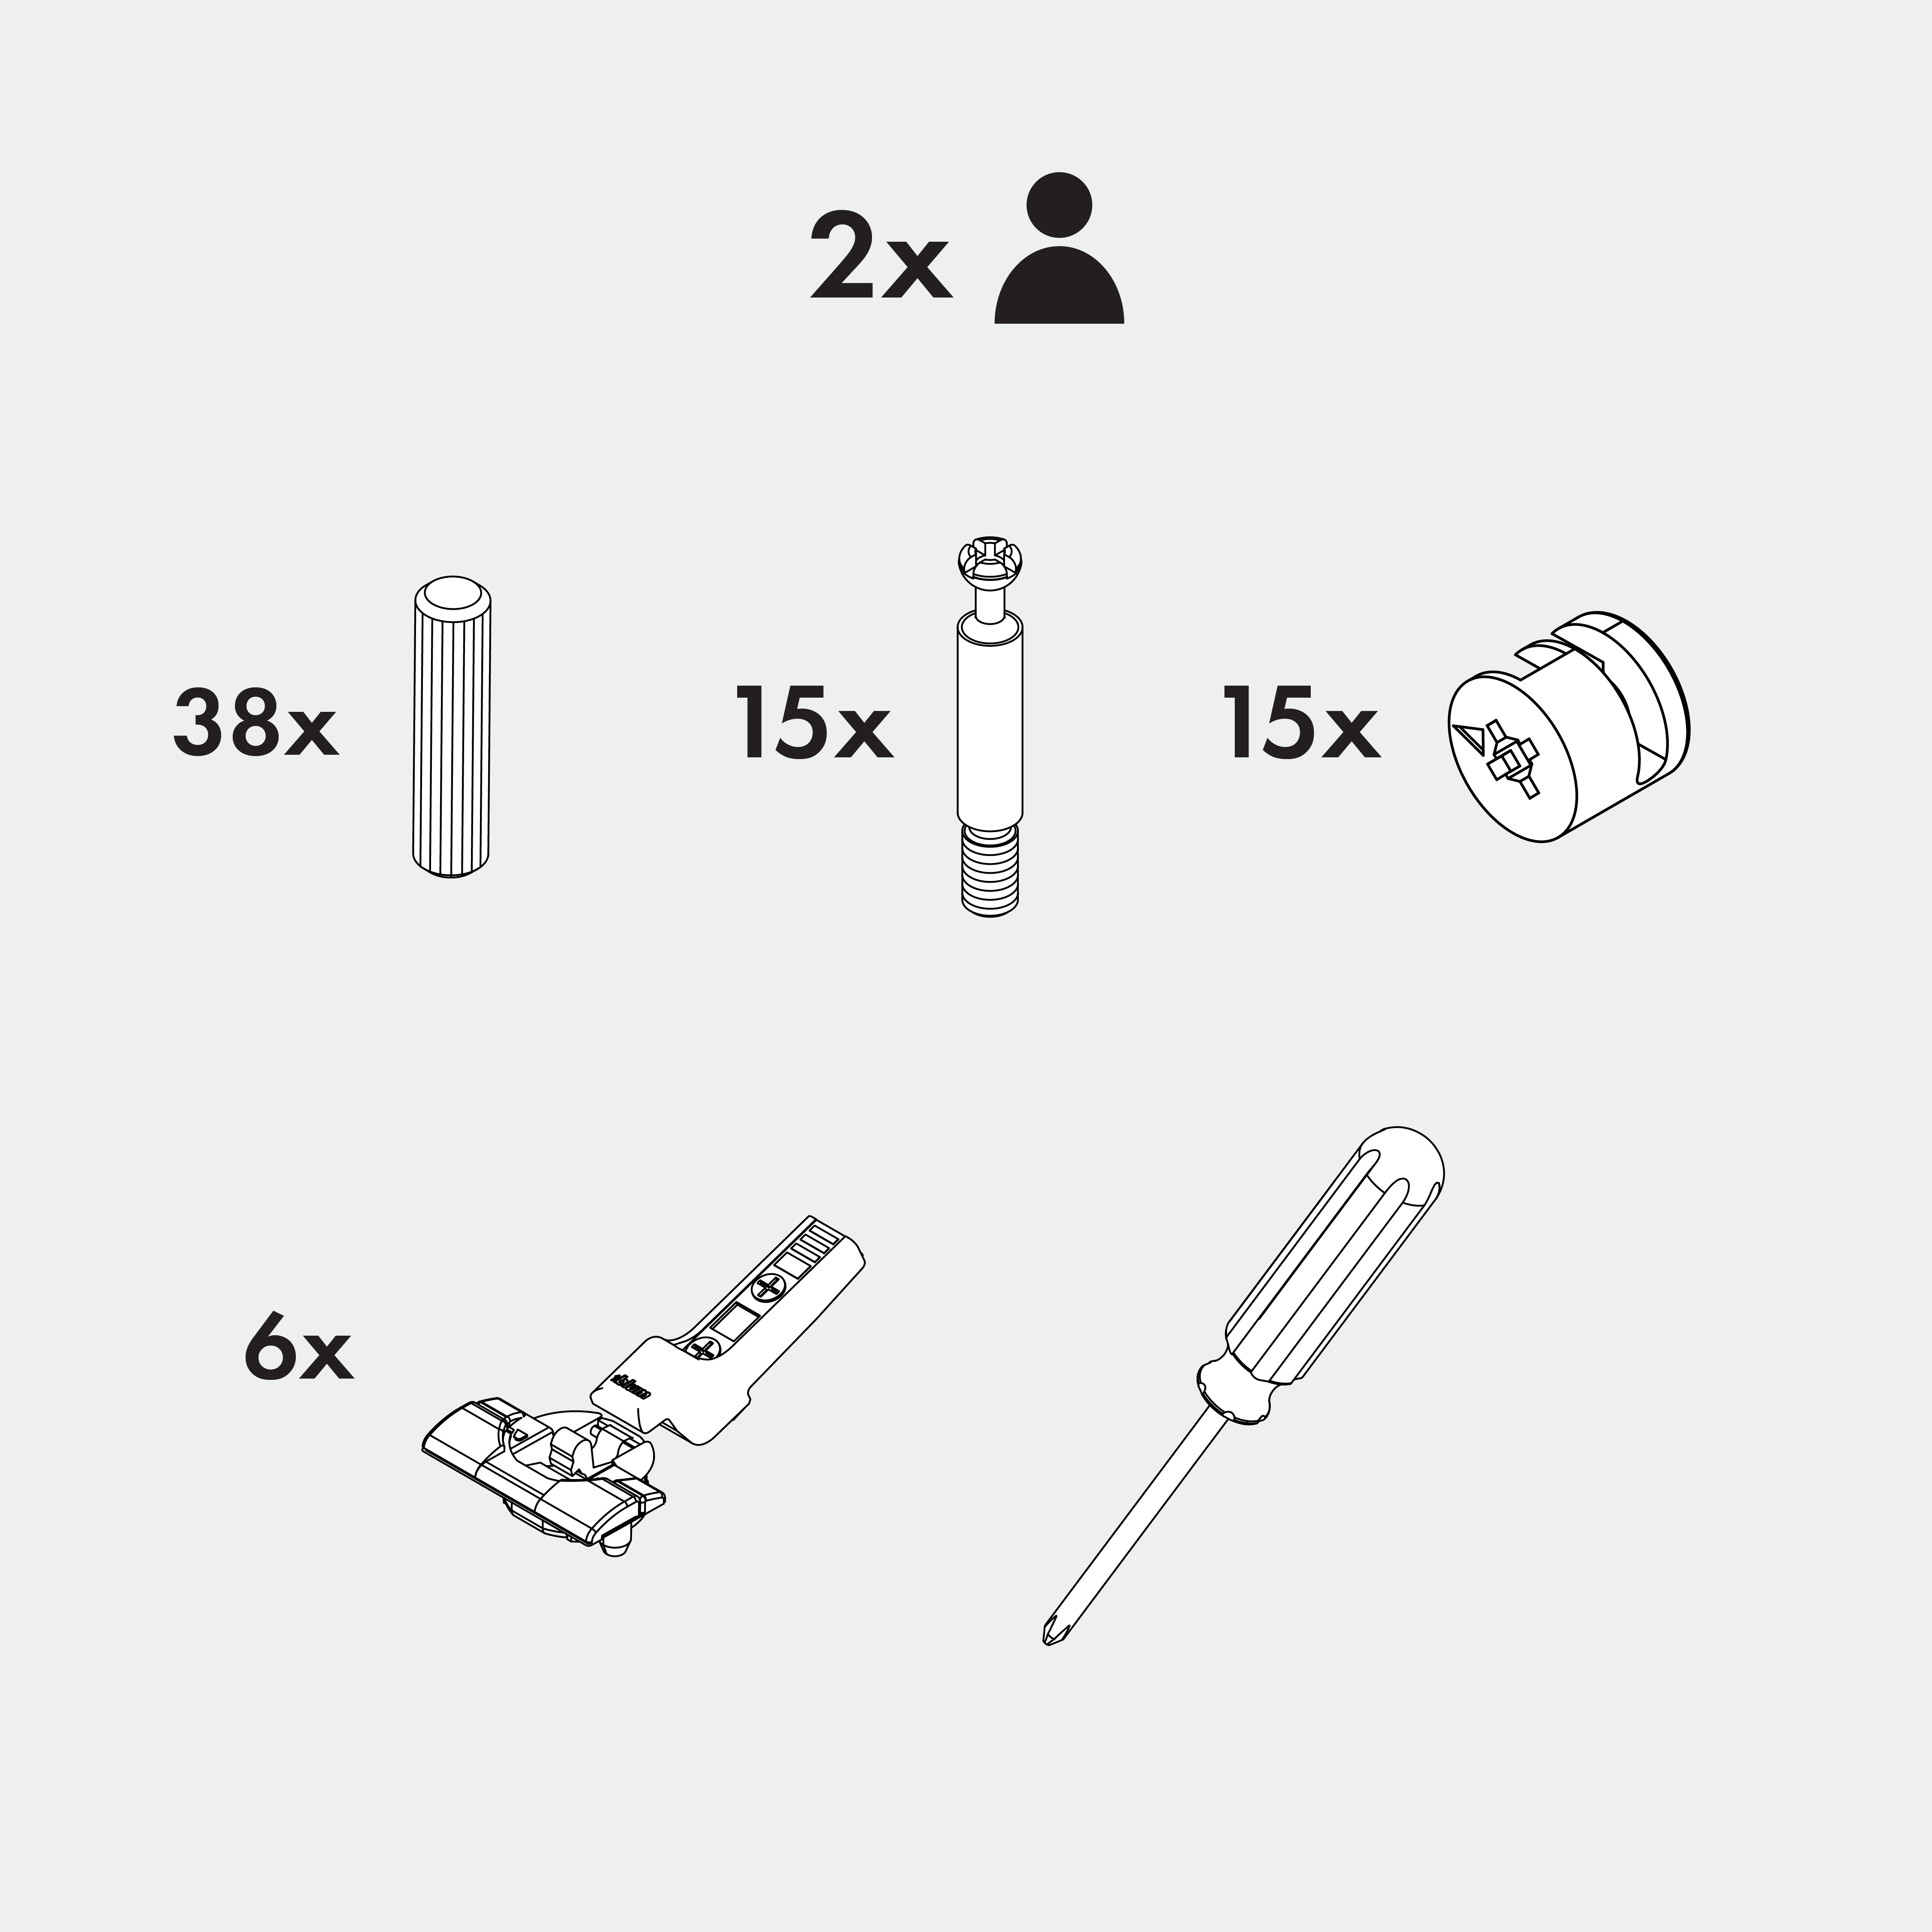
Check if you’ve received all 4 boxes without any damages. If so, you’re good to go! Remember to assemble on top of the cardboard packaging to protect floor from damage.

None
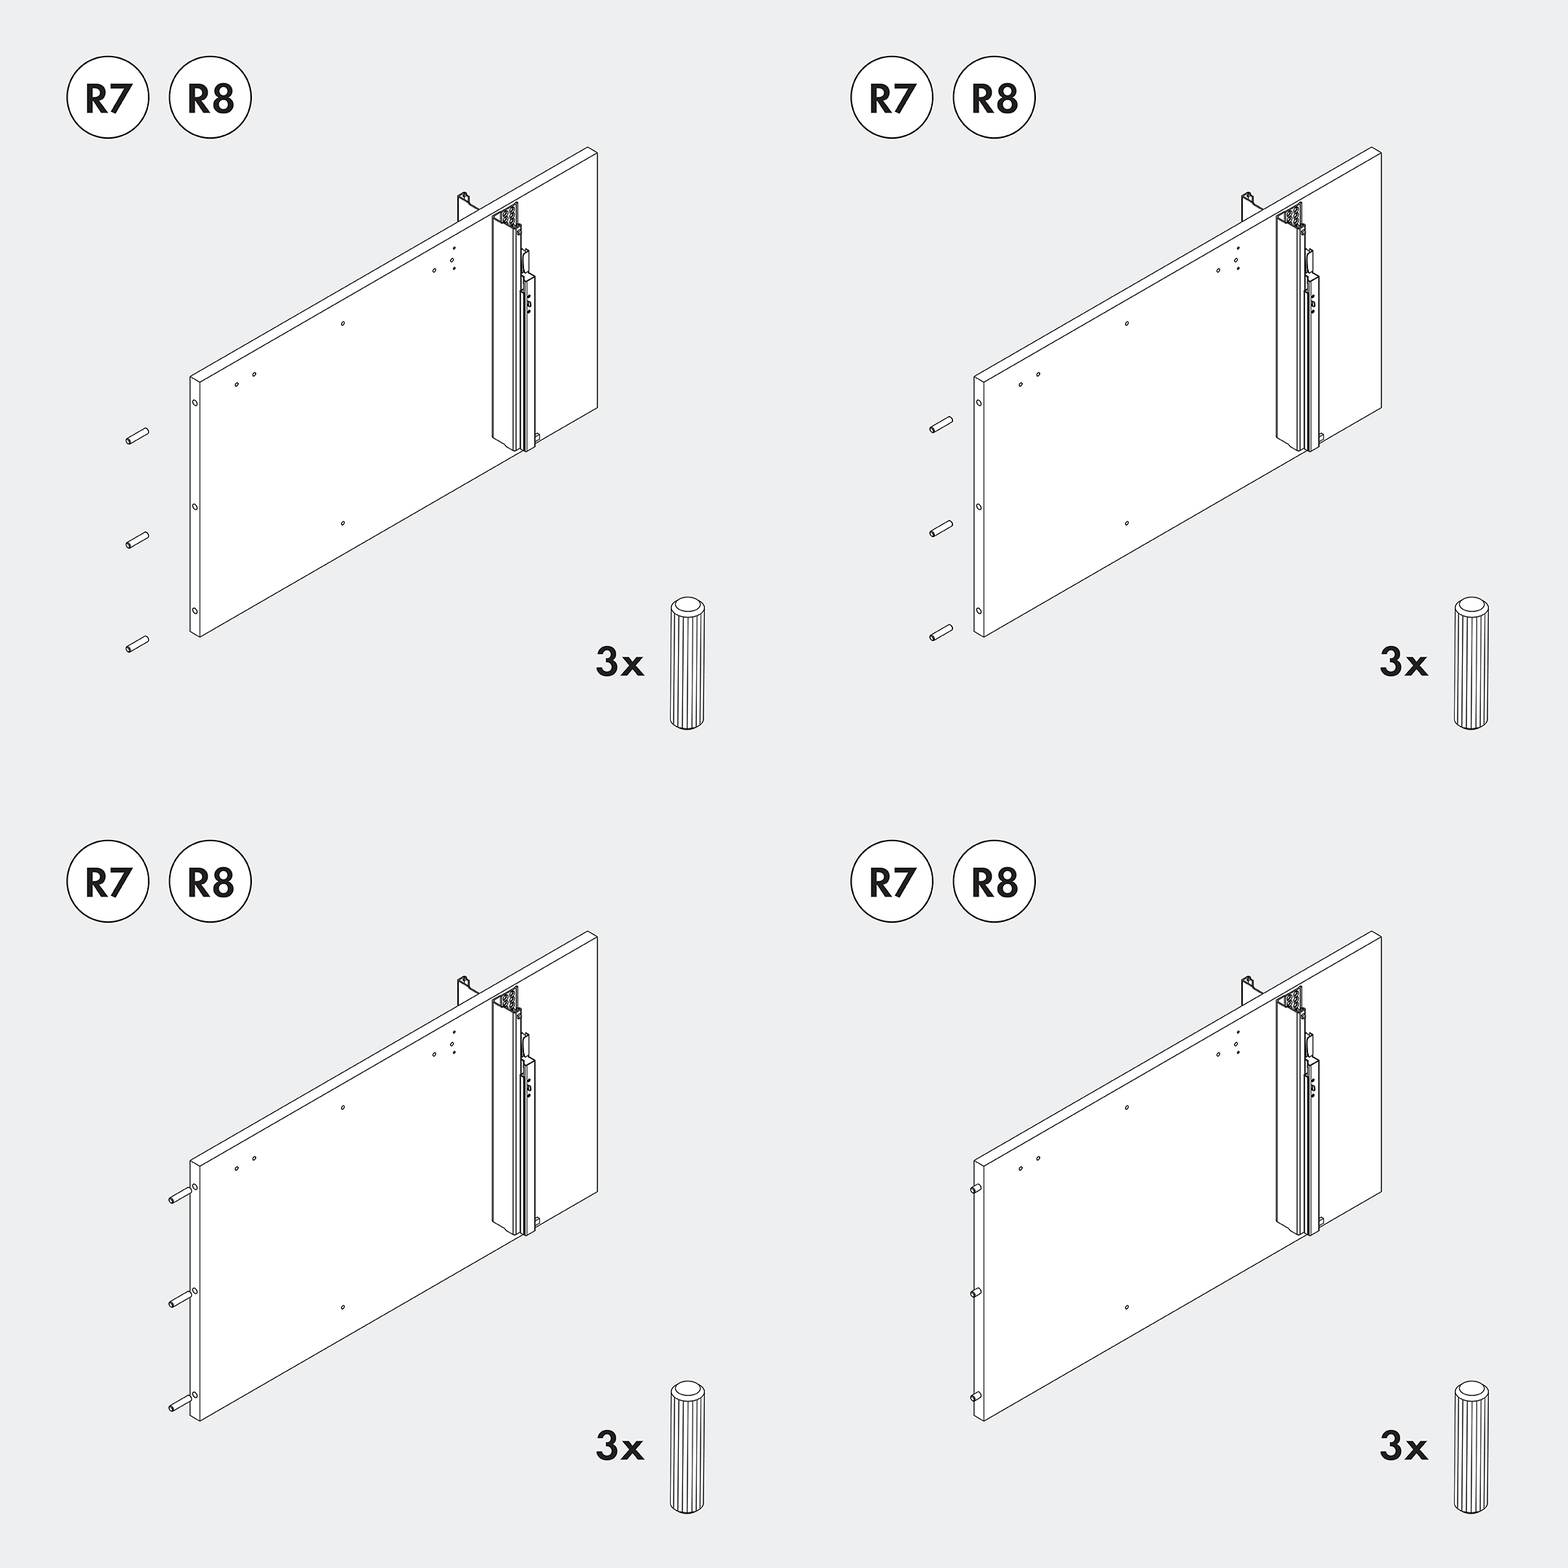
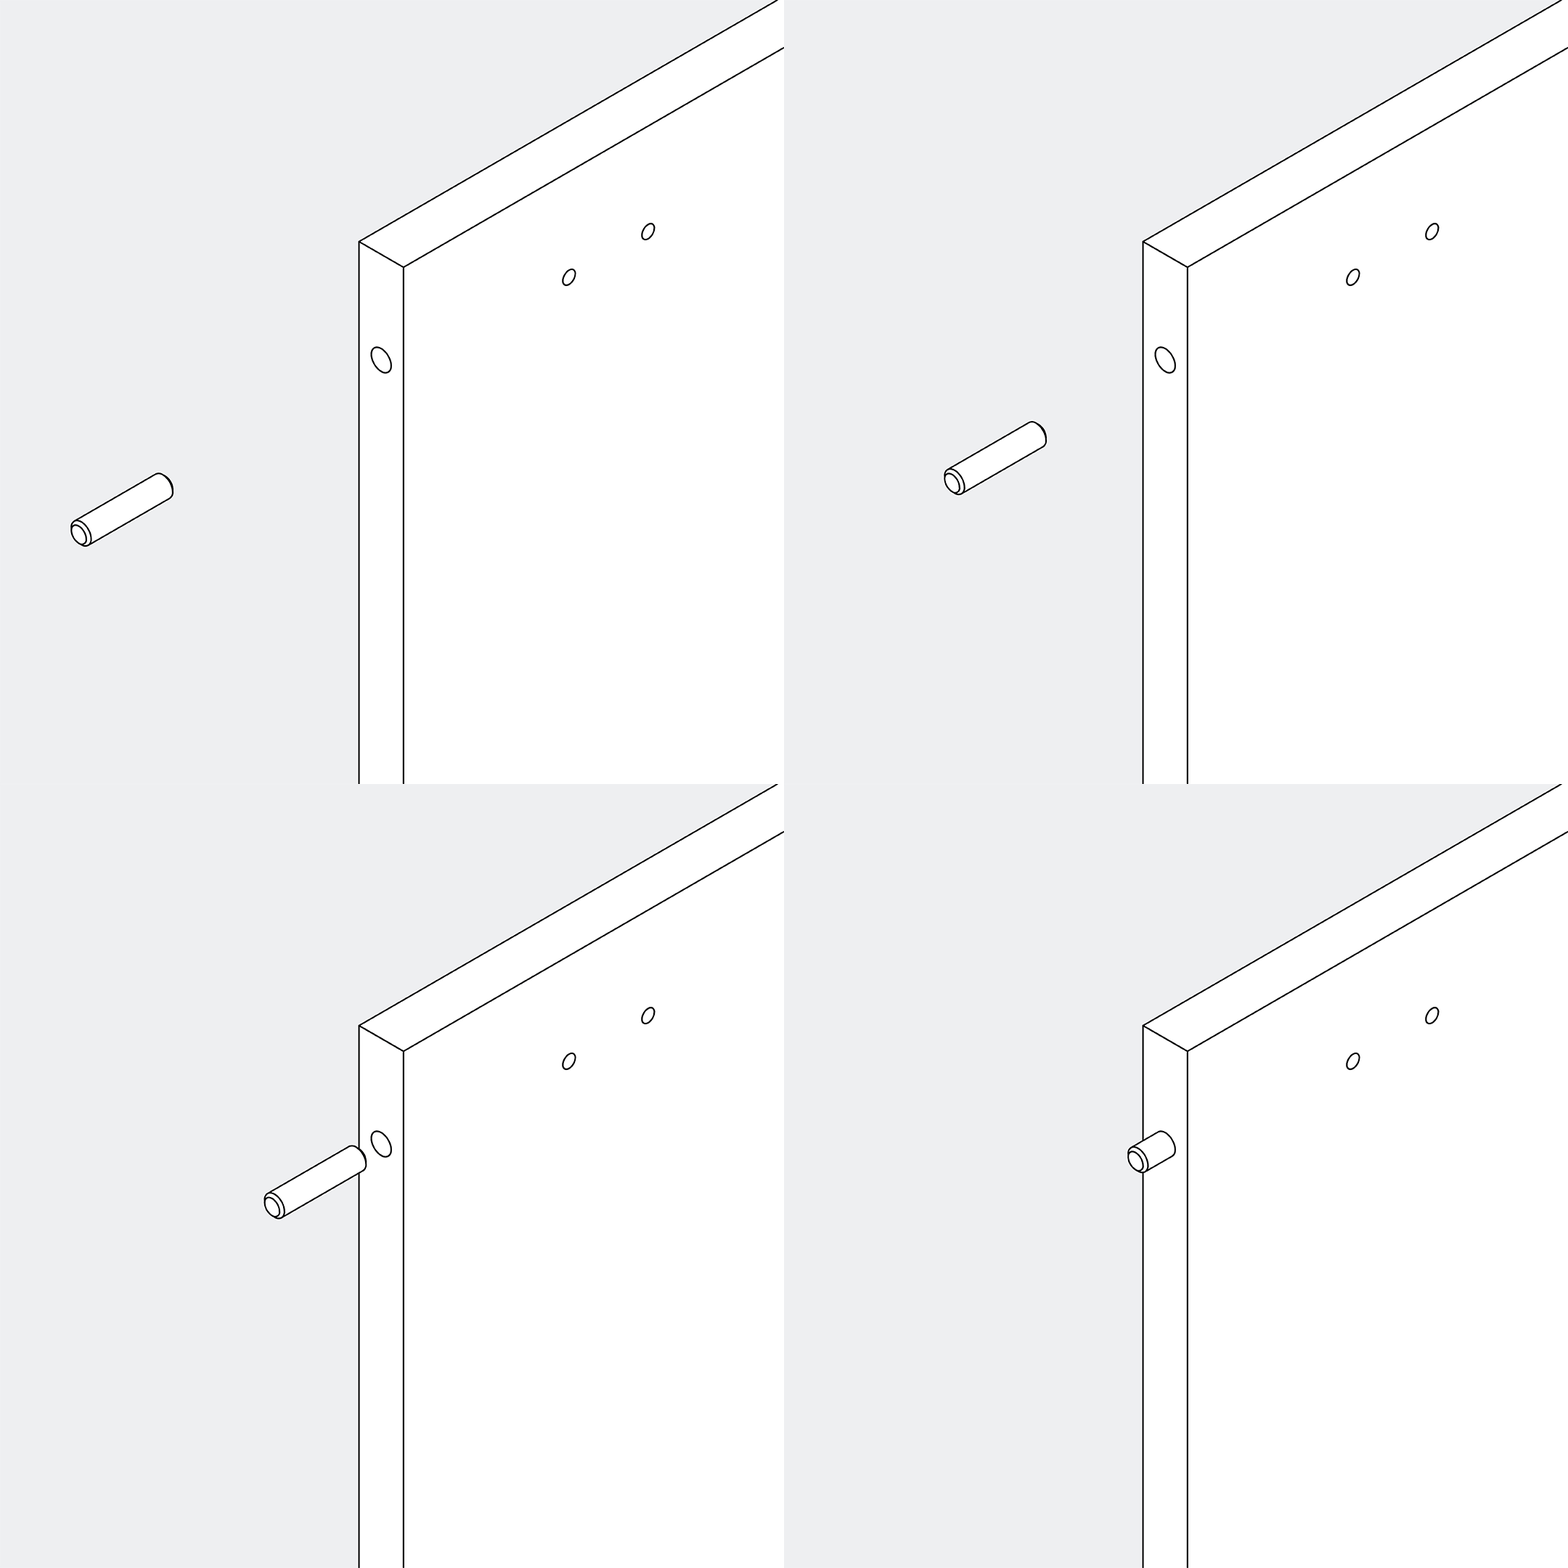
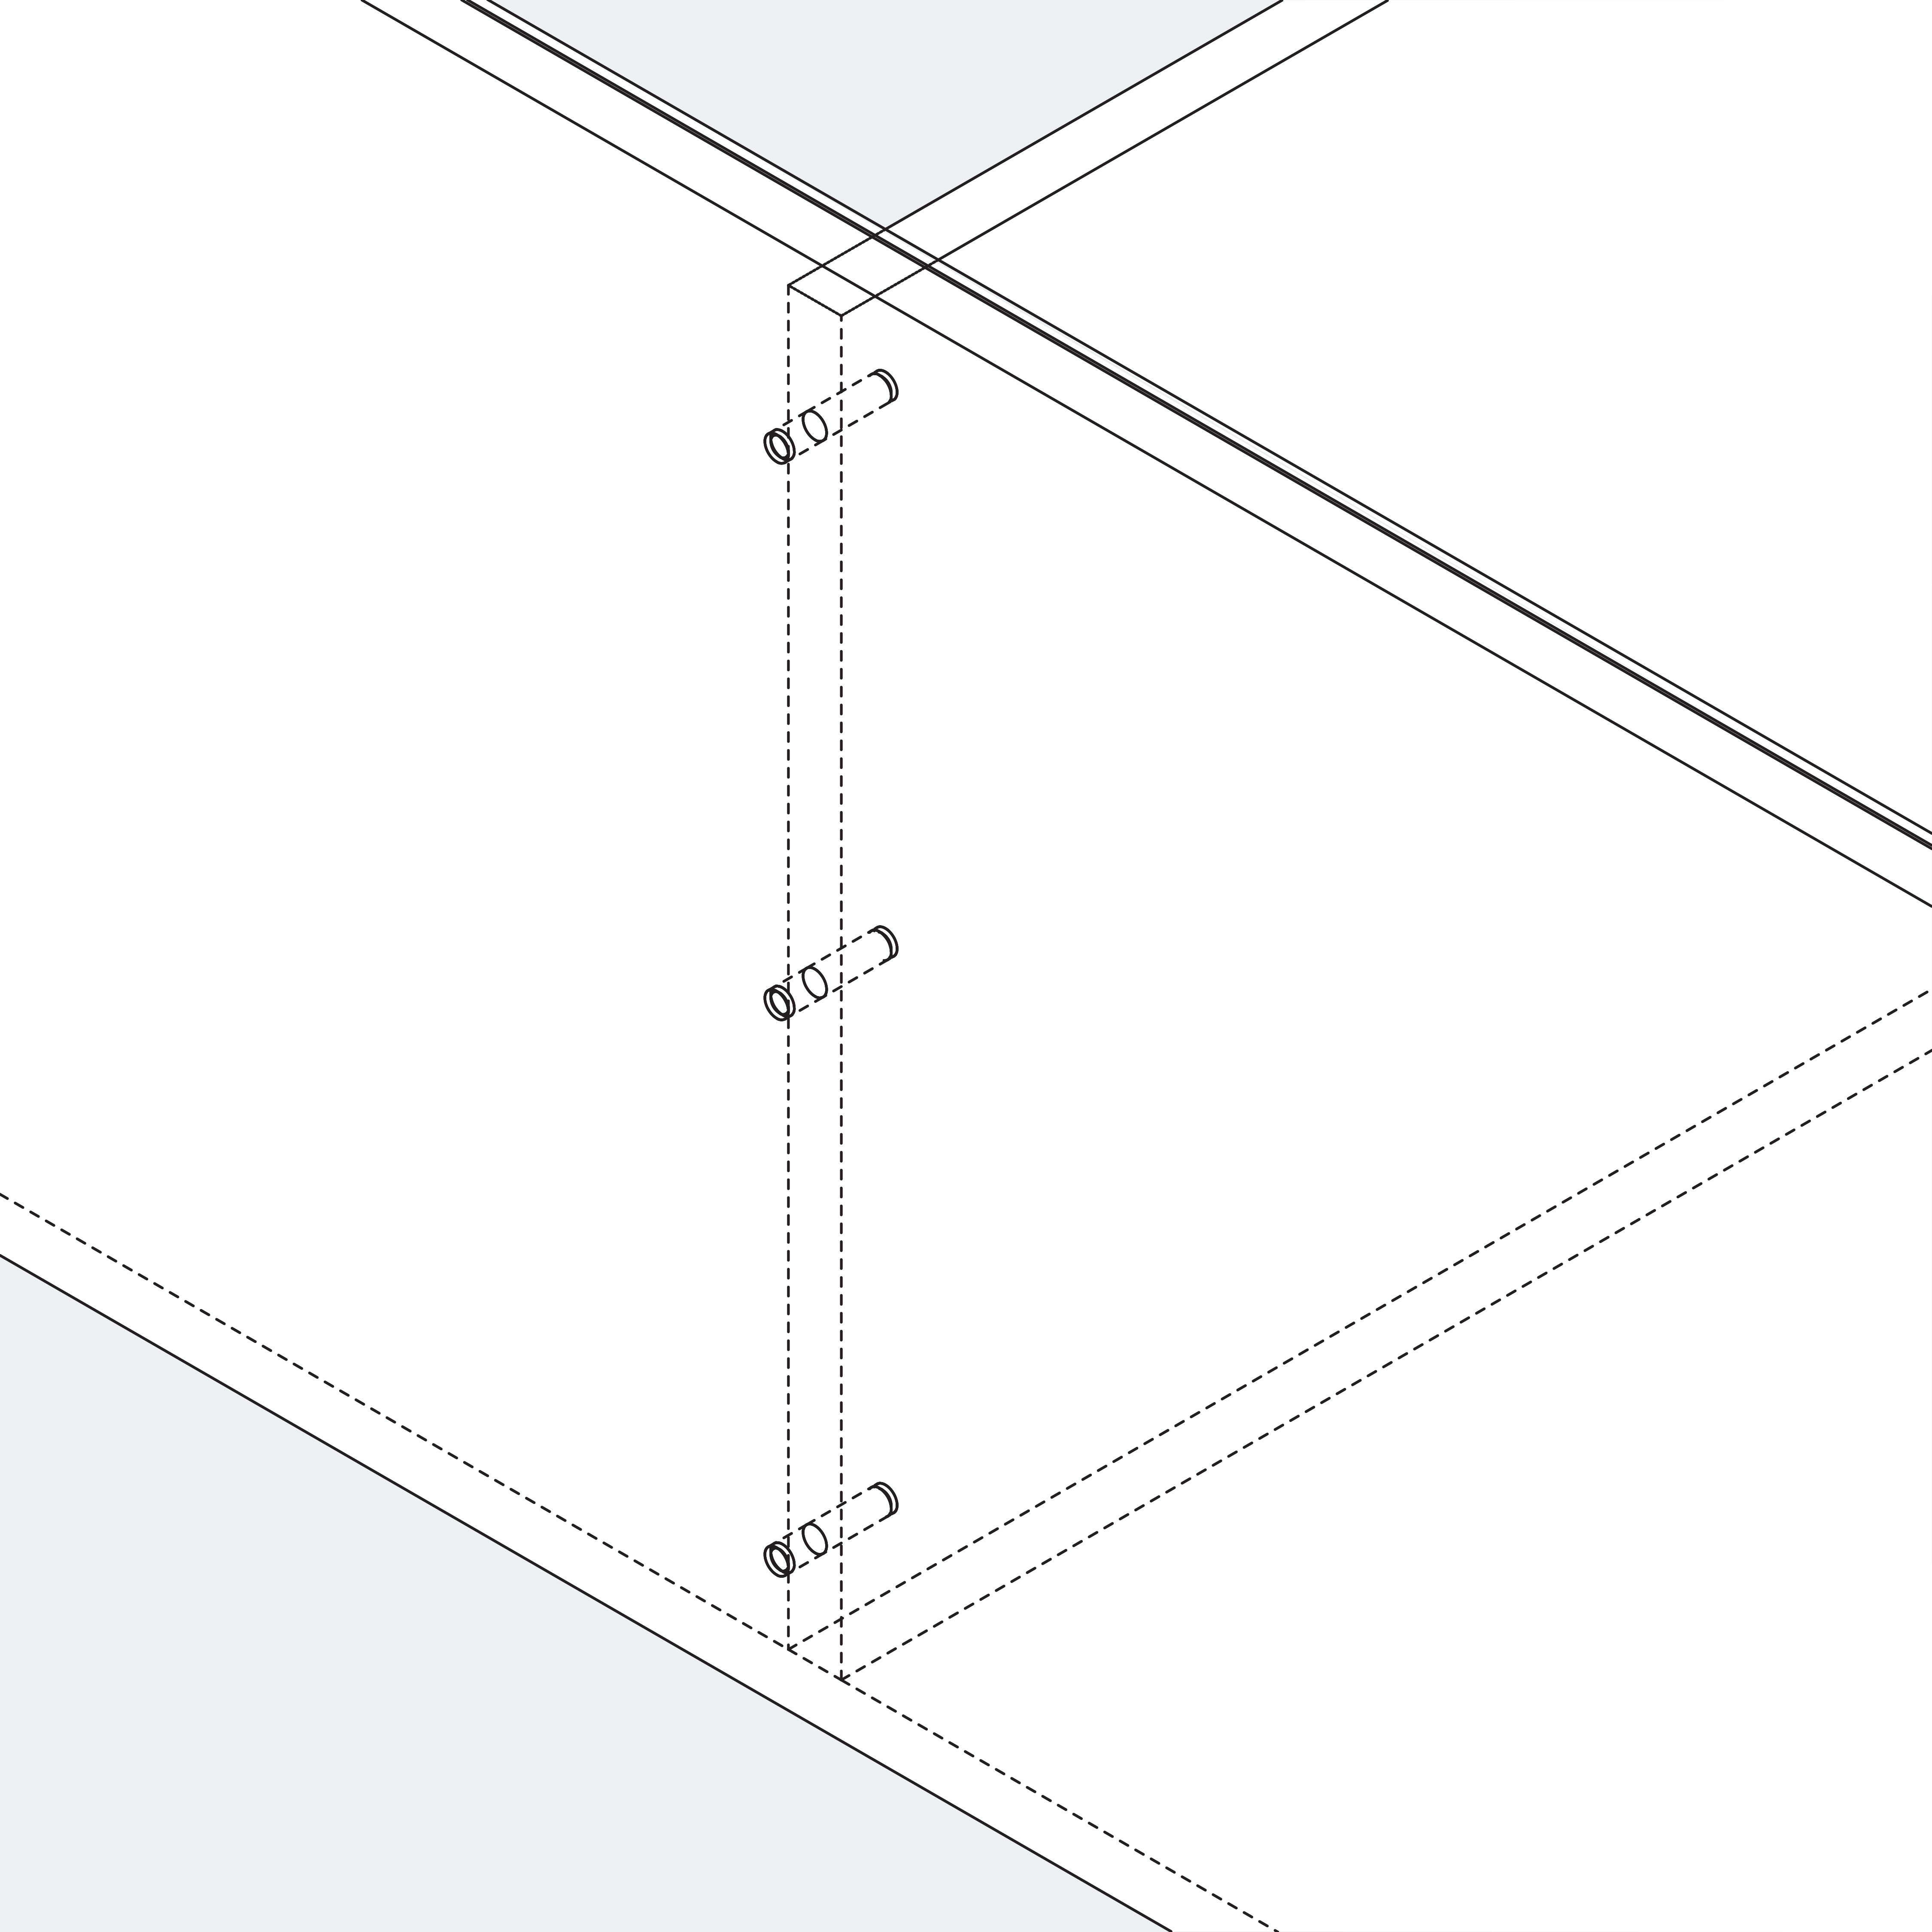
Insert 3 wooden dowels into R7 and R8, as shown in the picture.
None
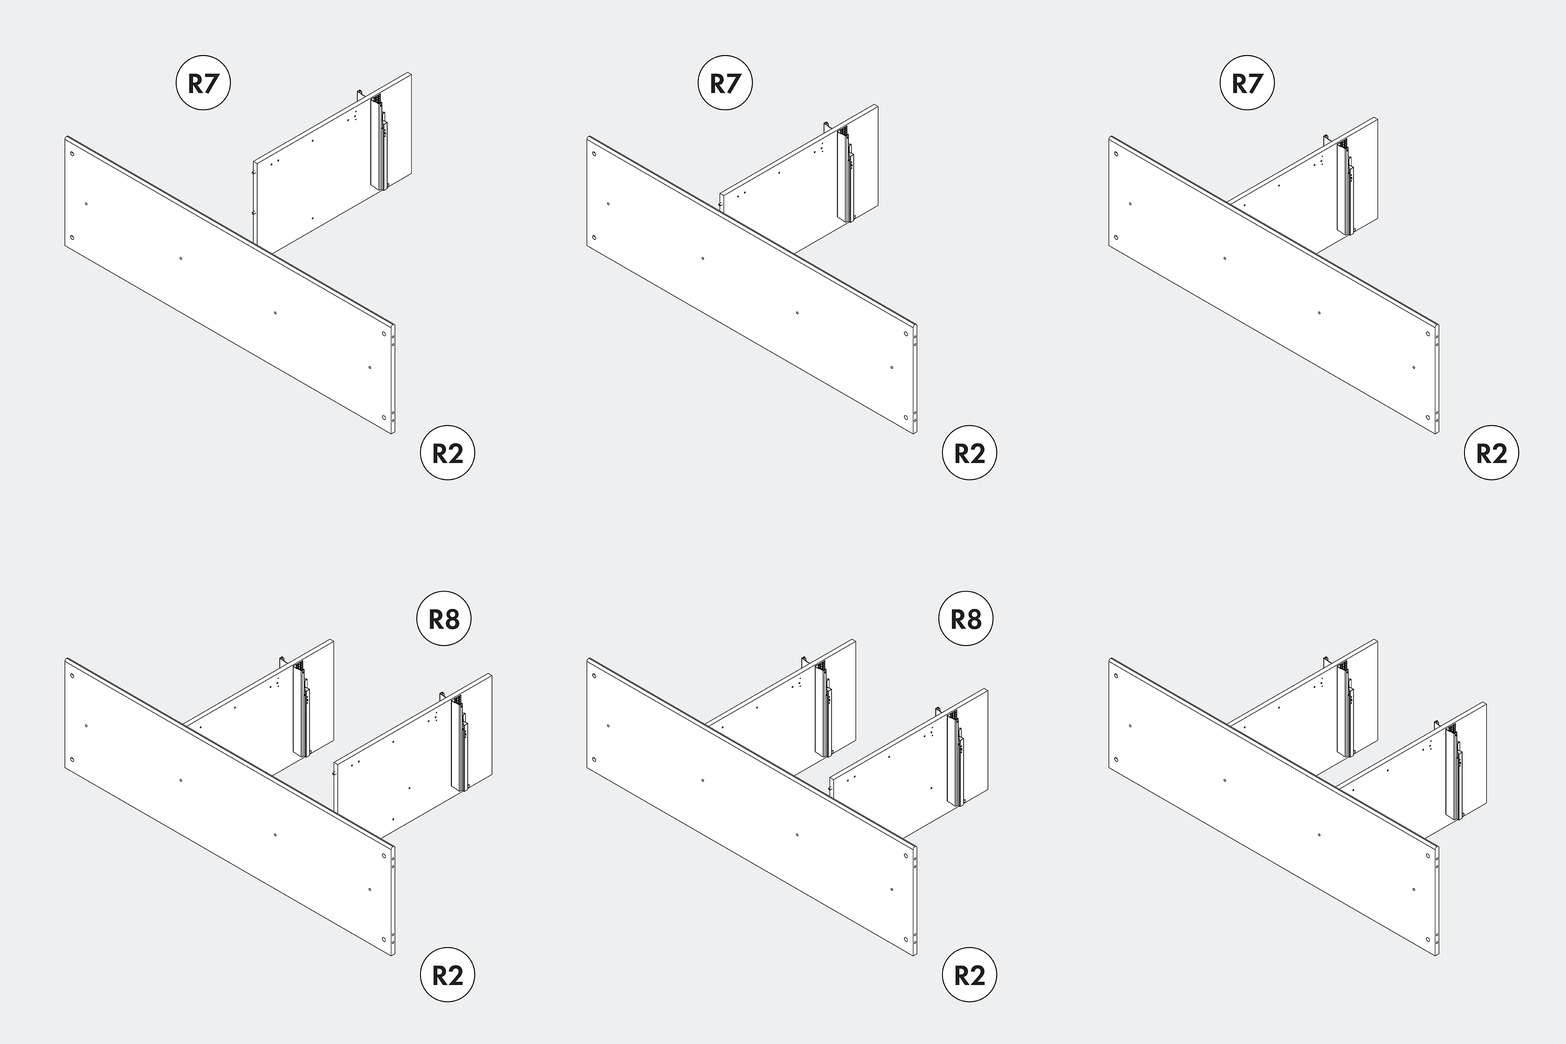
Take R2, place it on its long edge, and slide R7 and R8 into position.
None
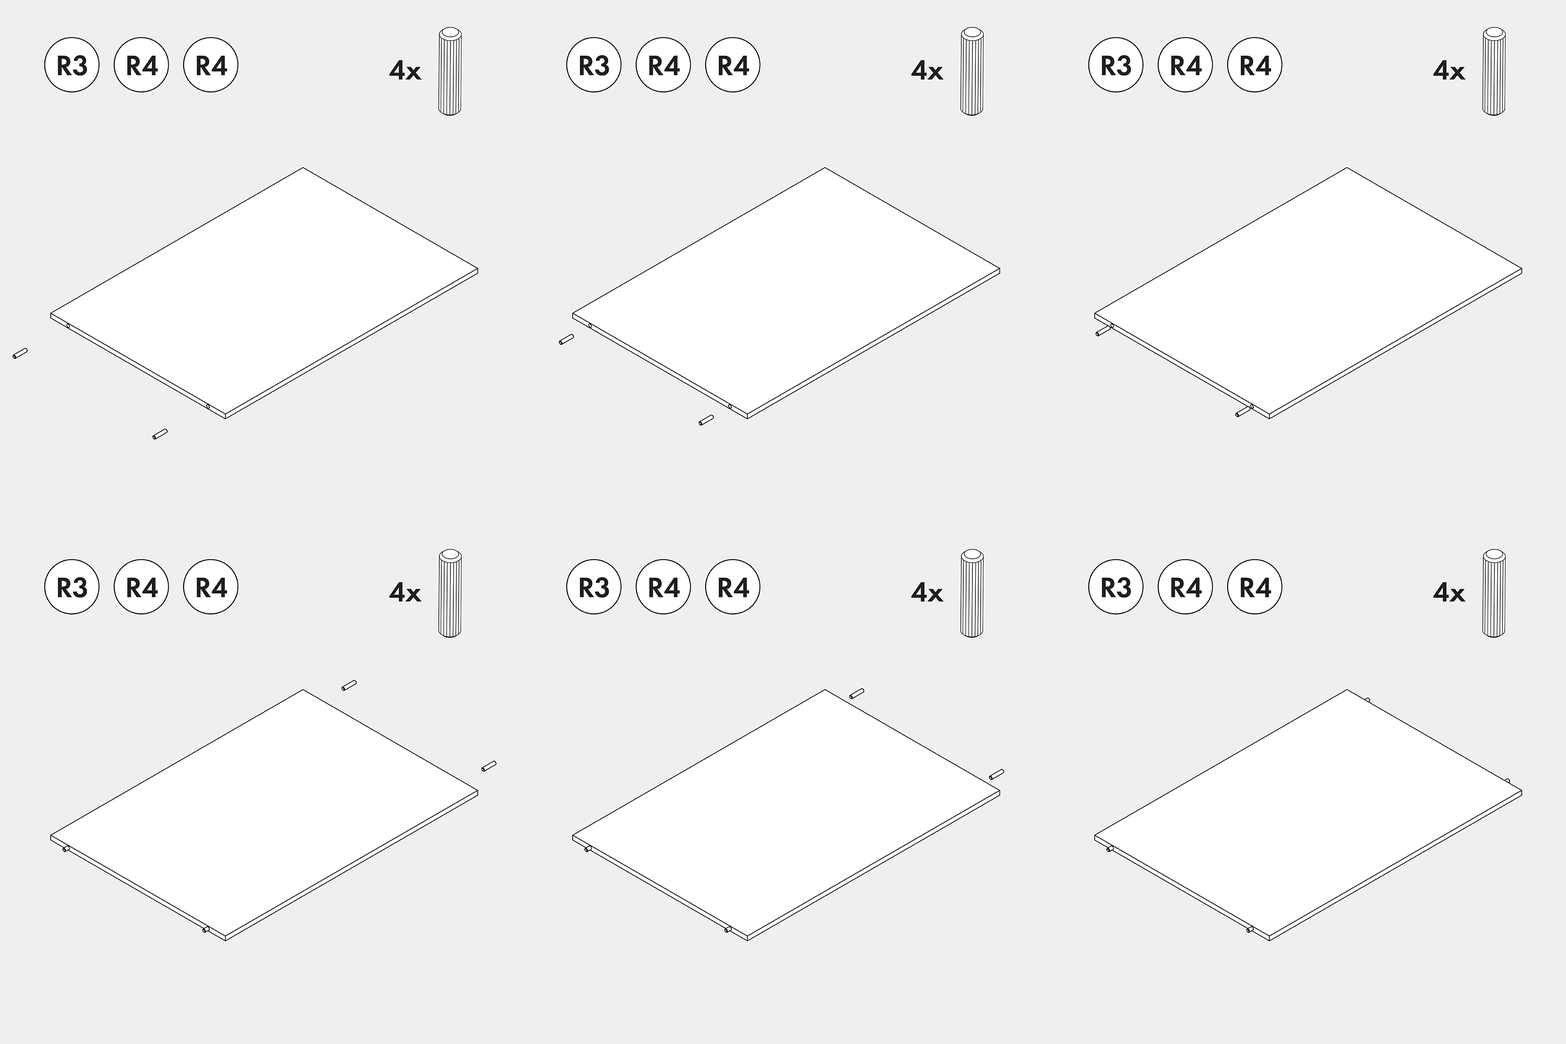
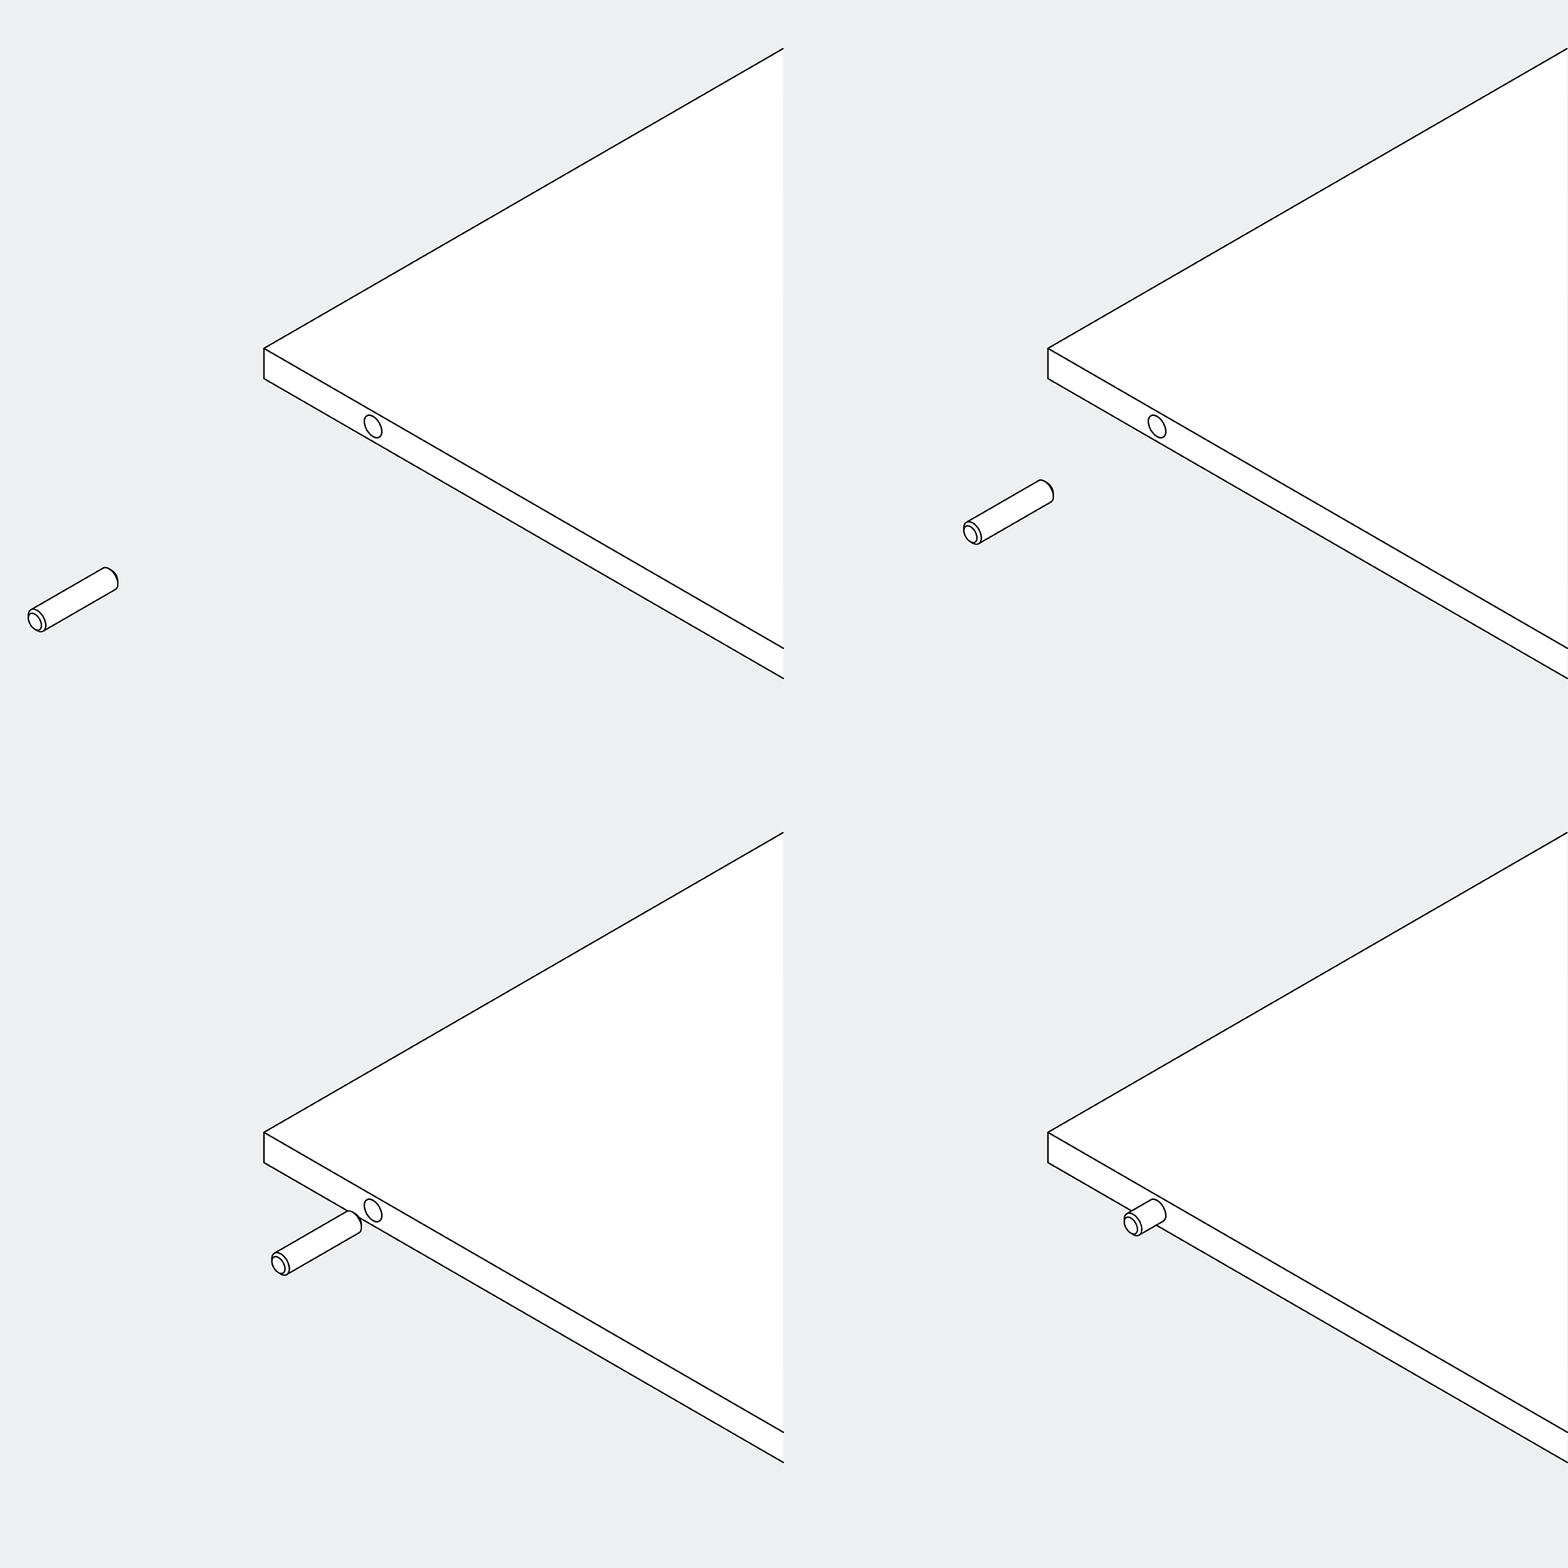
Insert 4 wooden dowels into each of the 3 back parts: R3 and 2x R4.
None
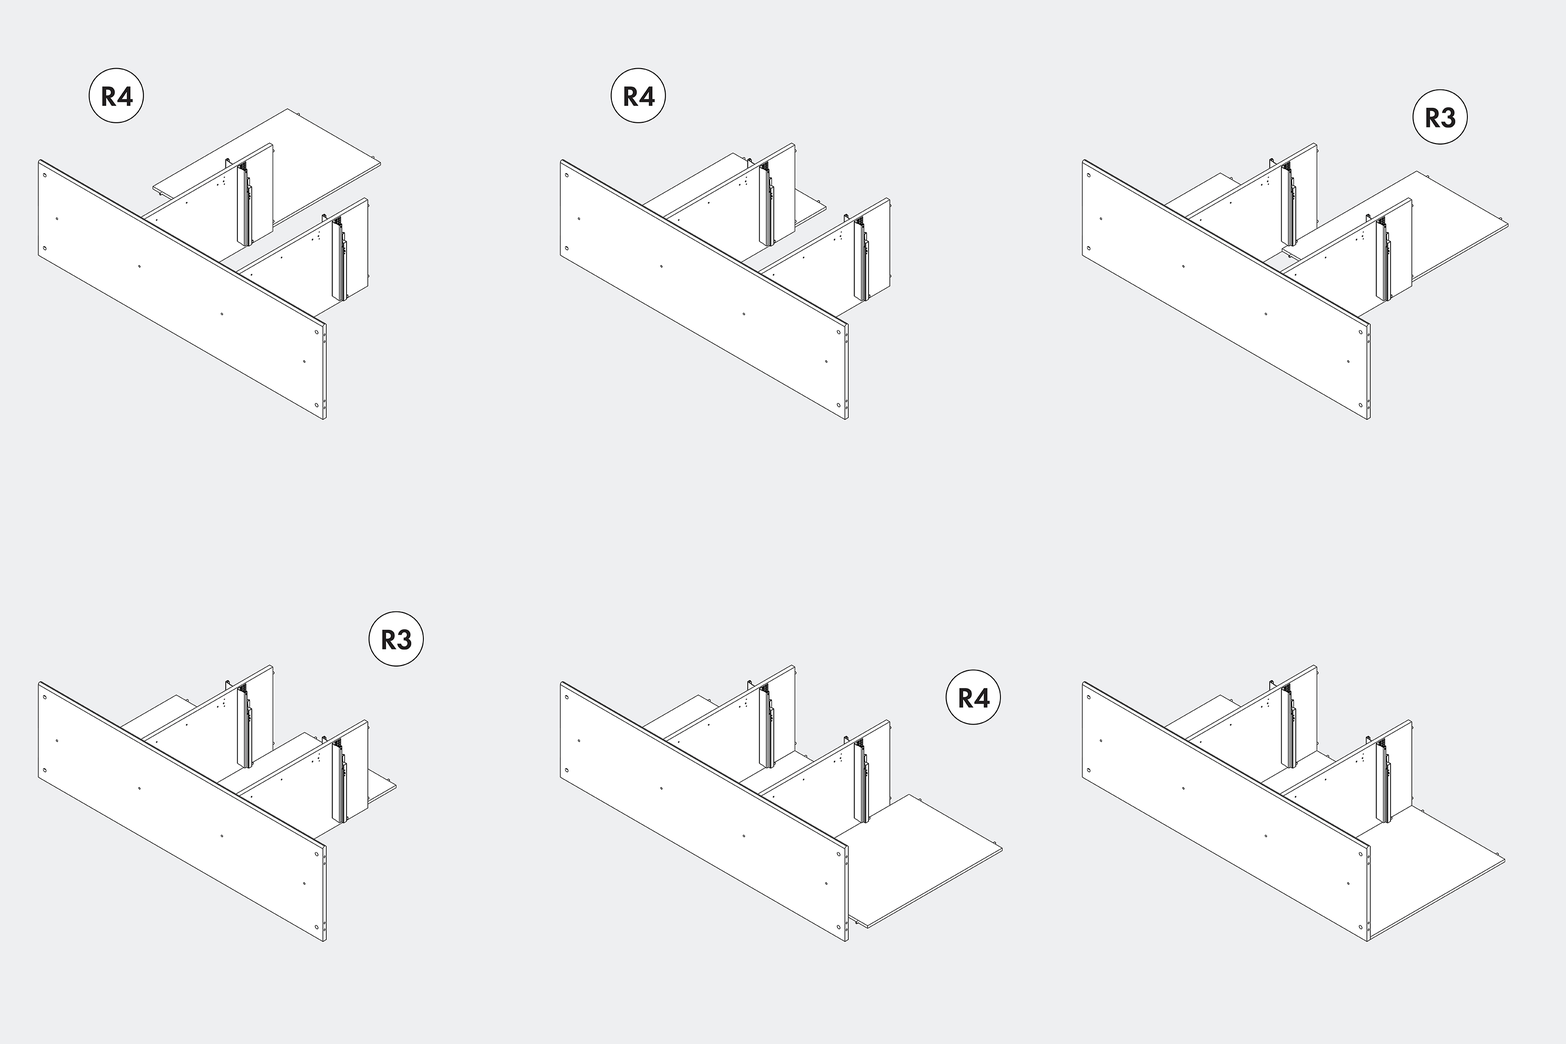
Slide the back parts into place. Note that they are different: 1x R3 – middle 2x R4 – left + right
None
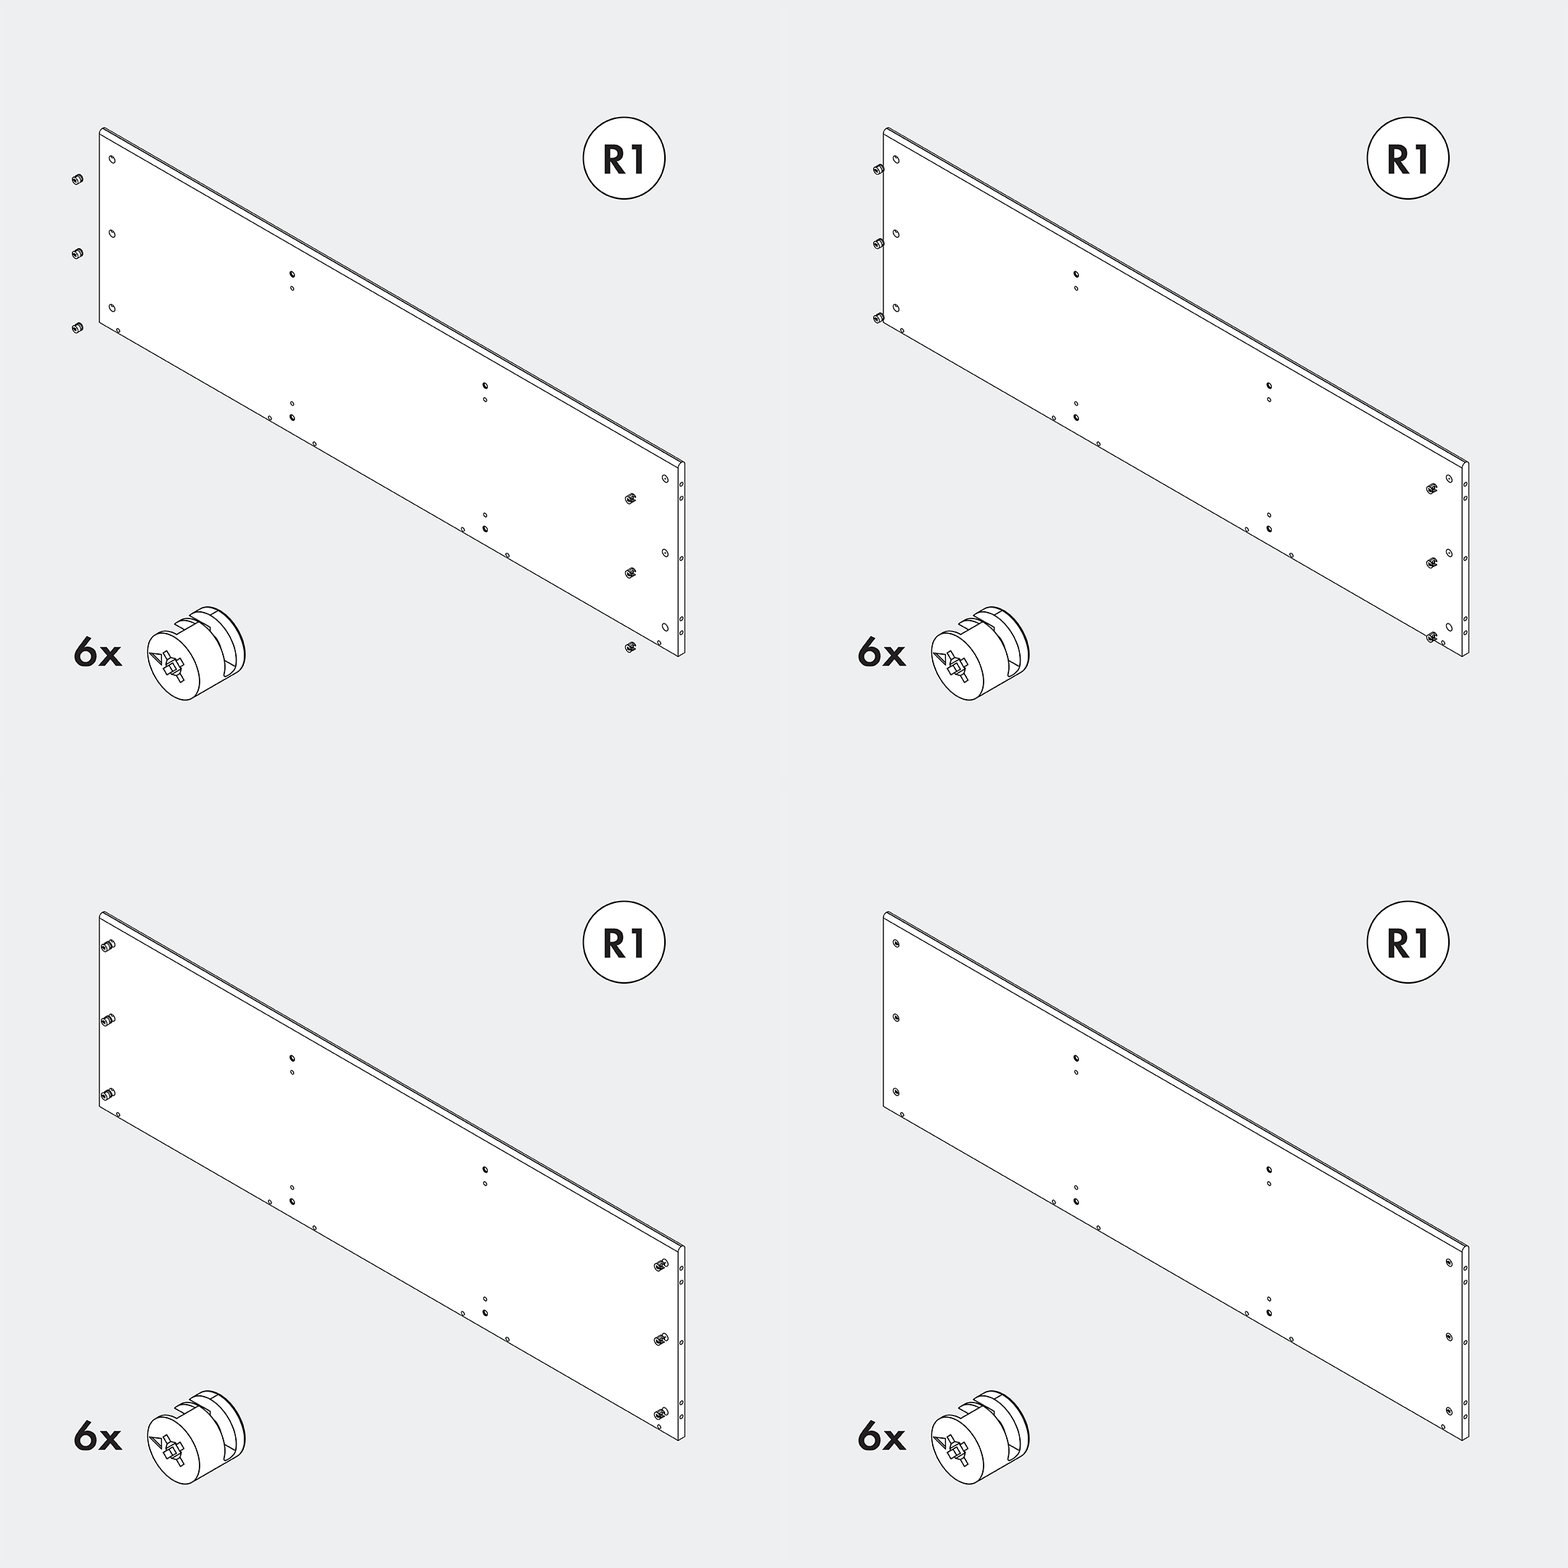
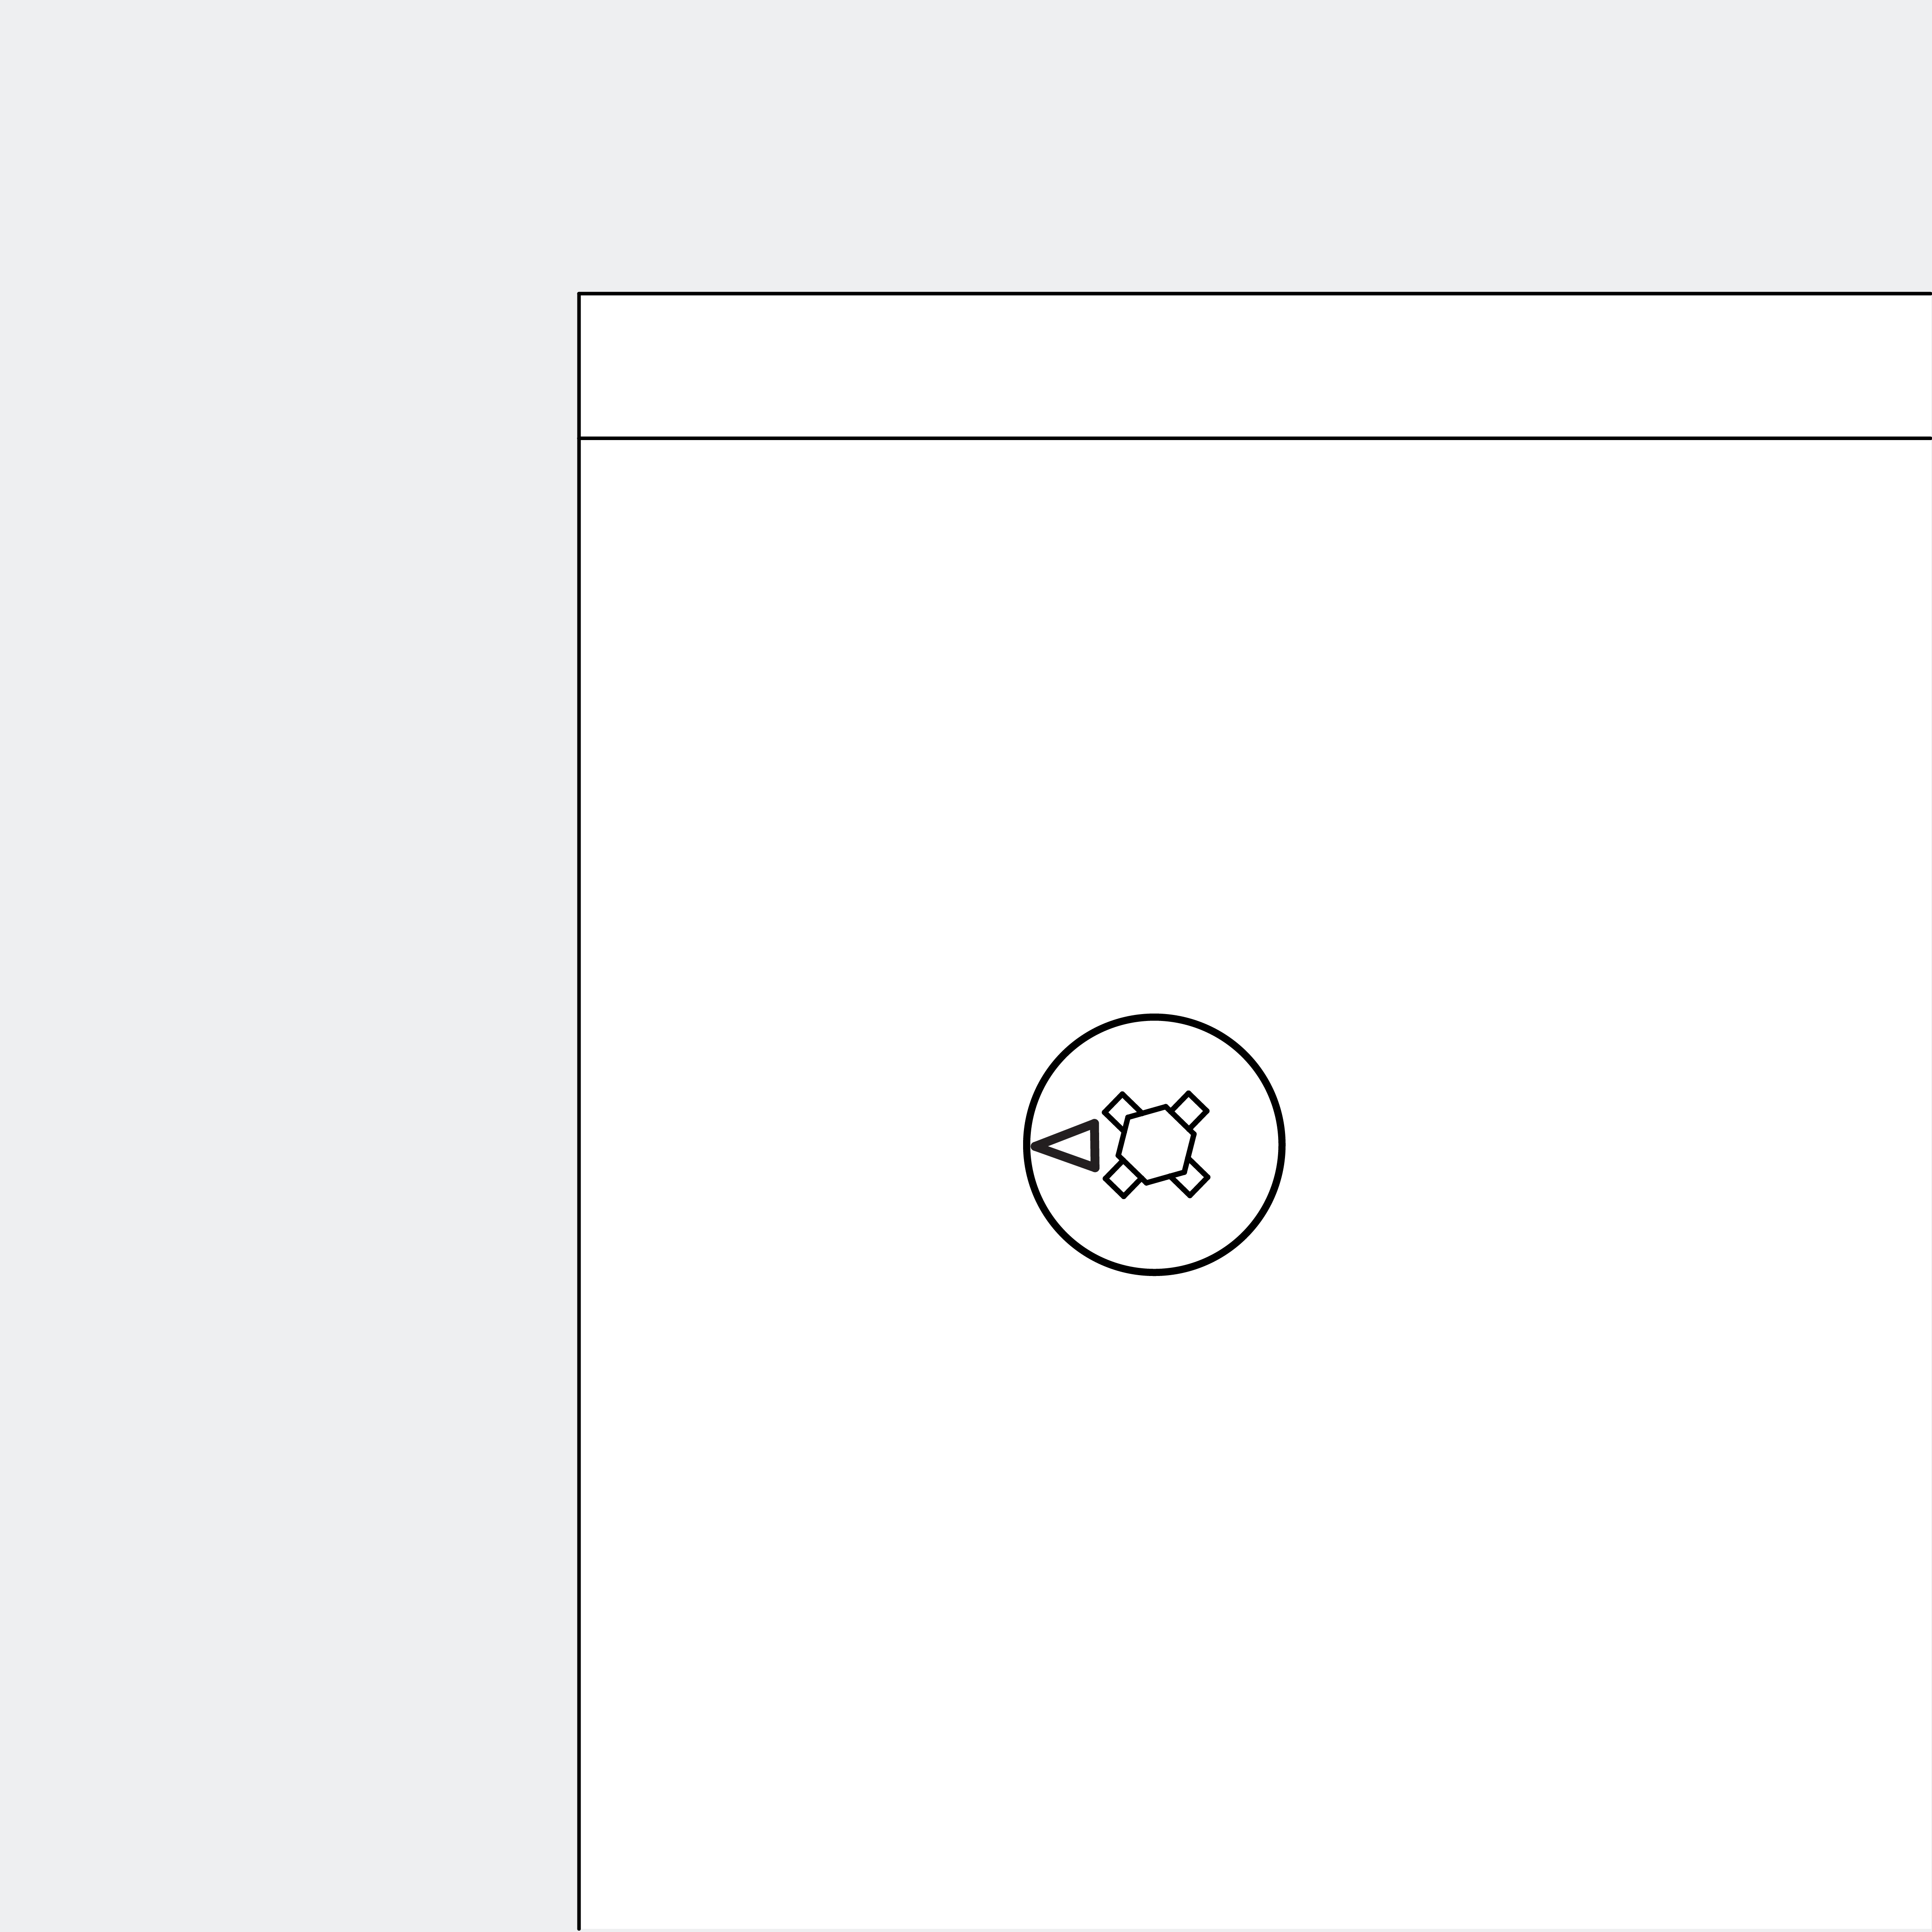
Insert 6 metal cam locks into R1, making sure the arrow on each cam lock points outwards.
None
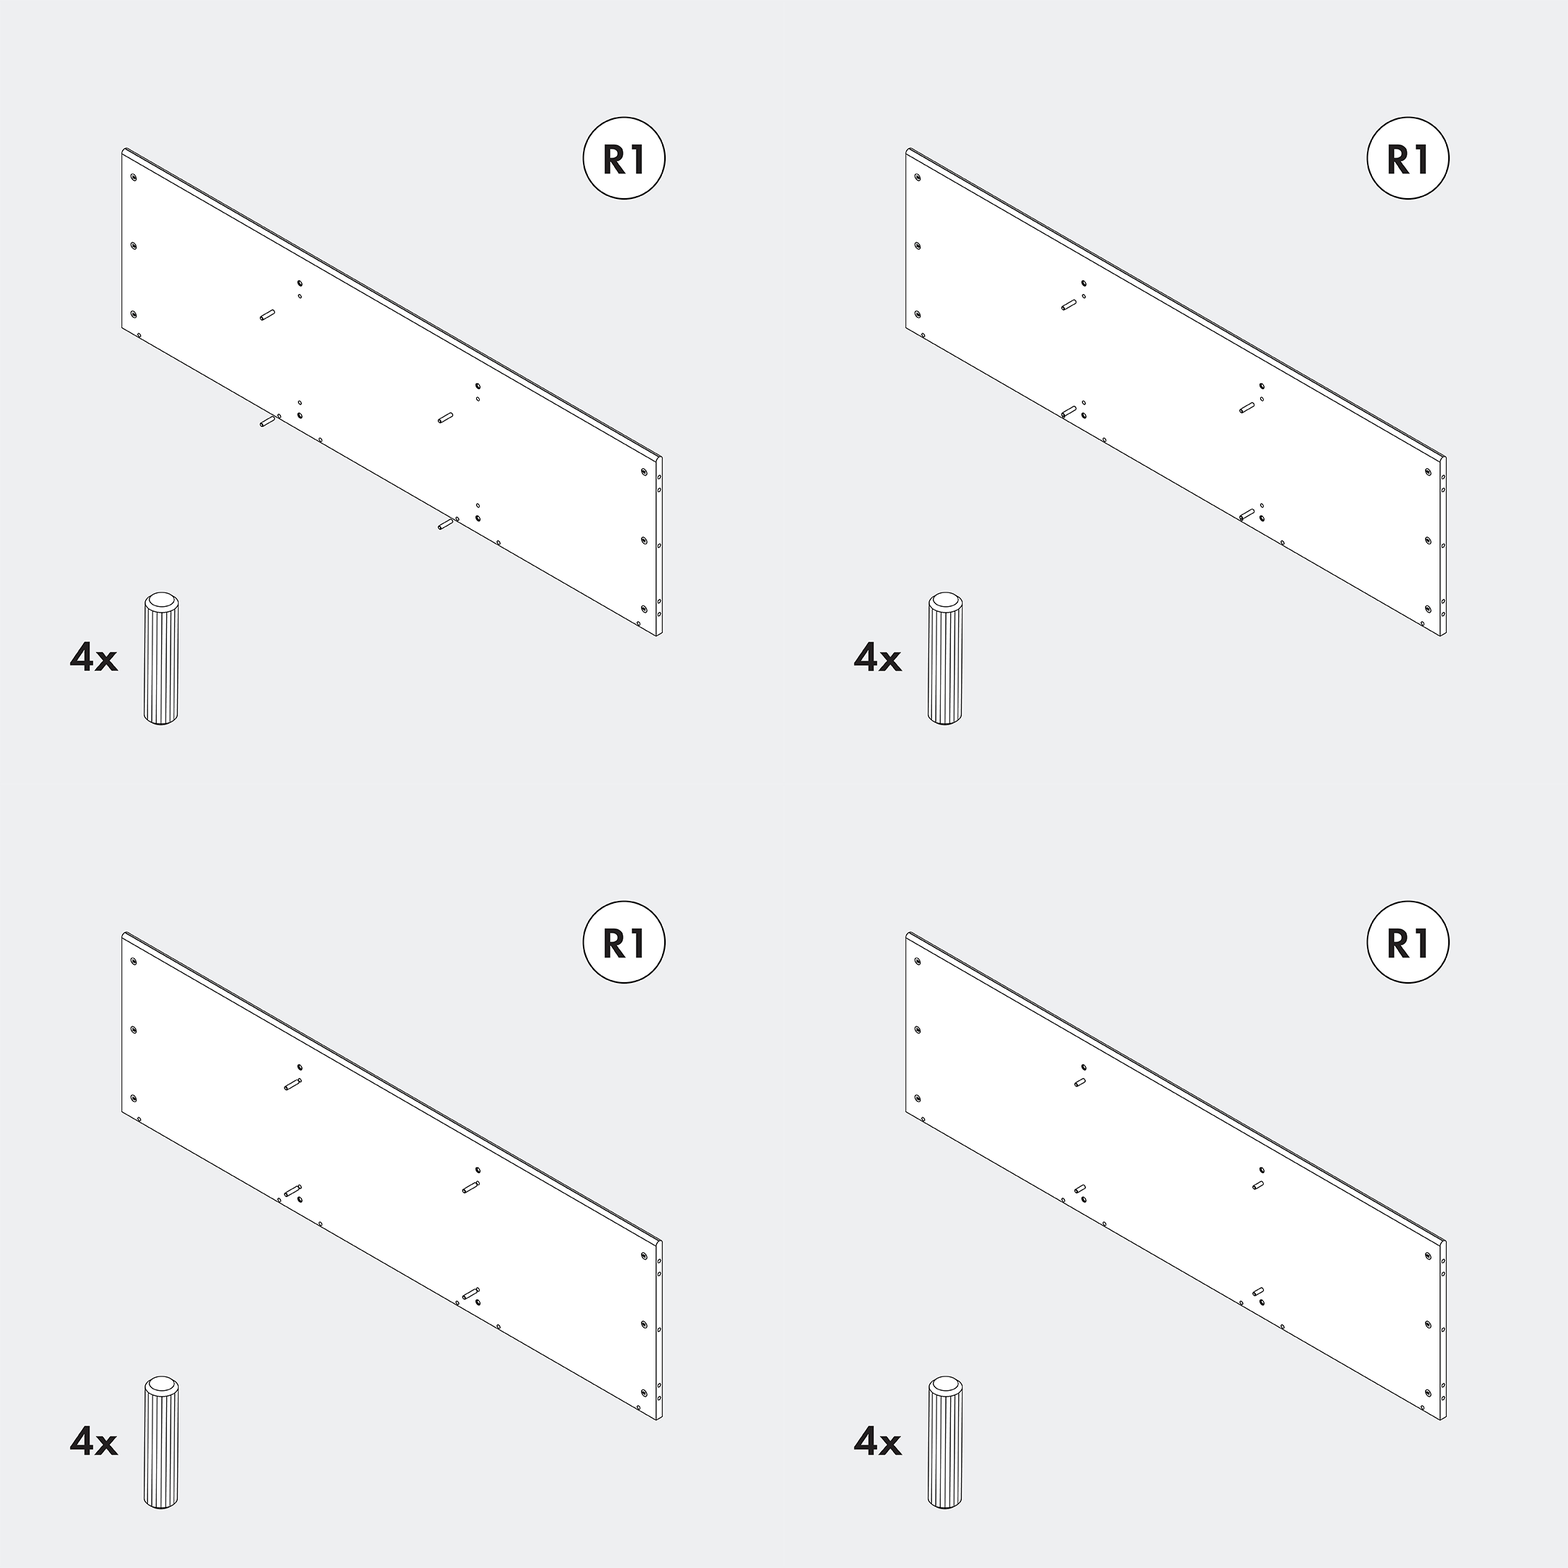
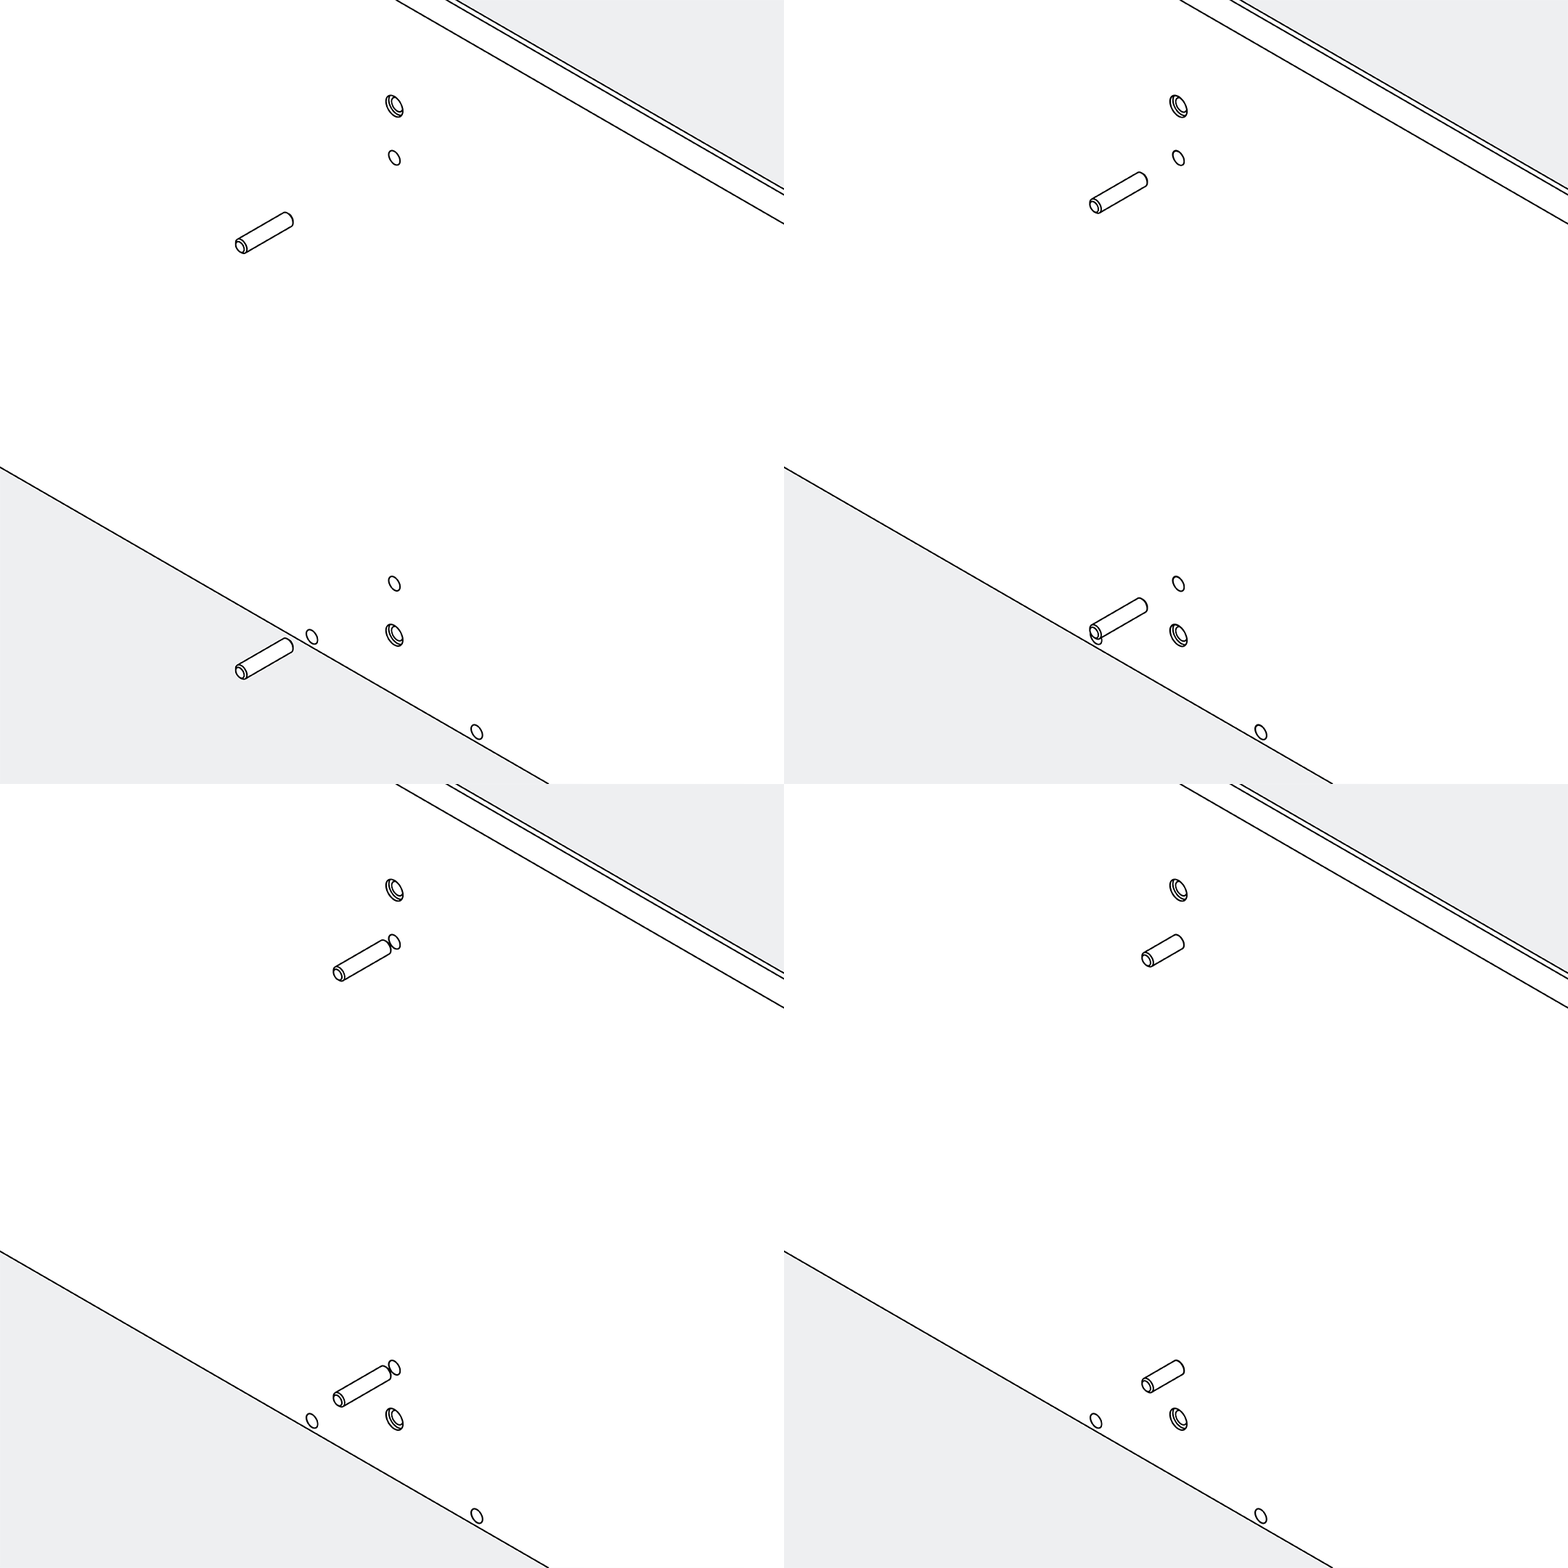
Insert 4 wooden dowels into the right holes in R1.
None
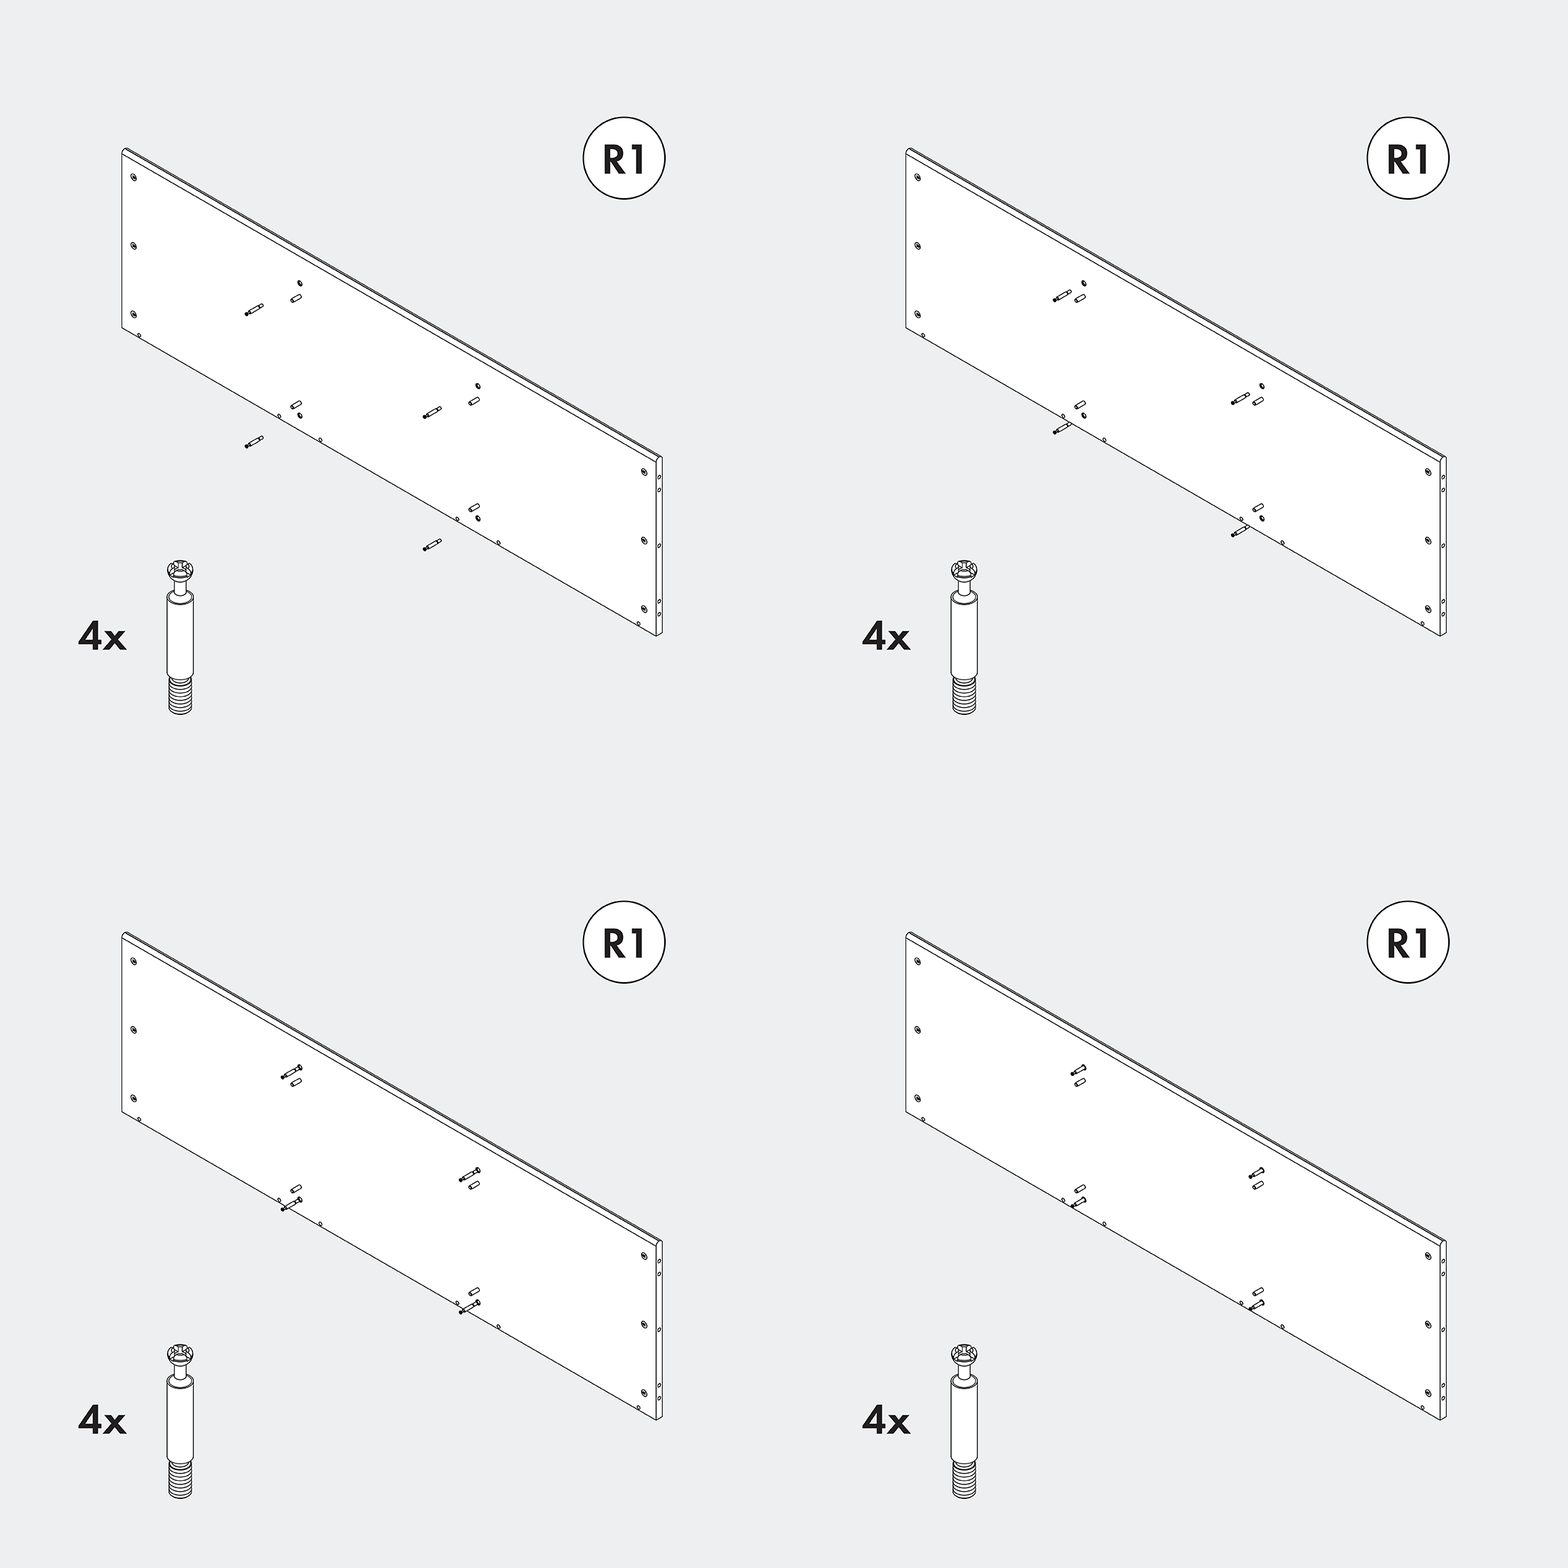
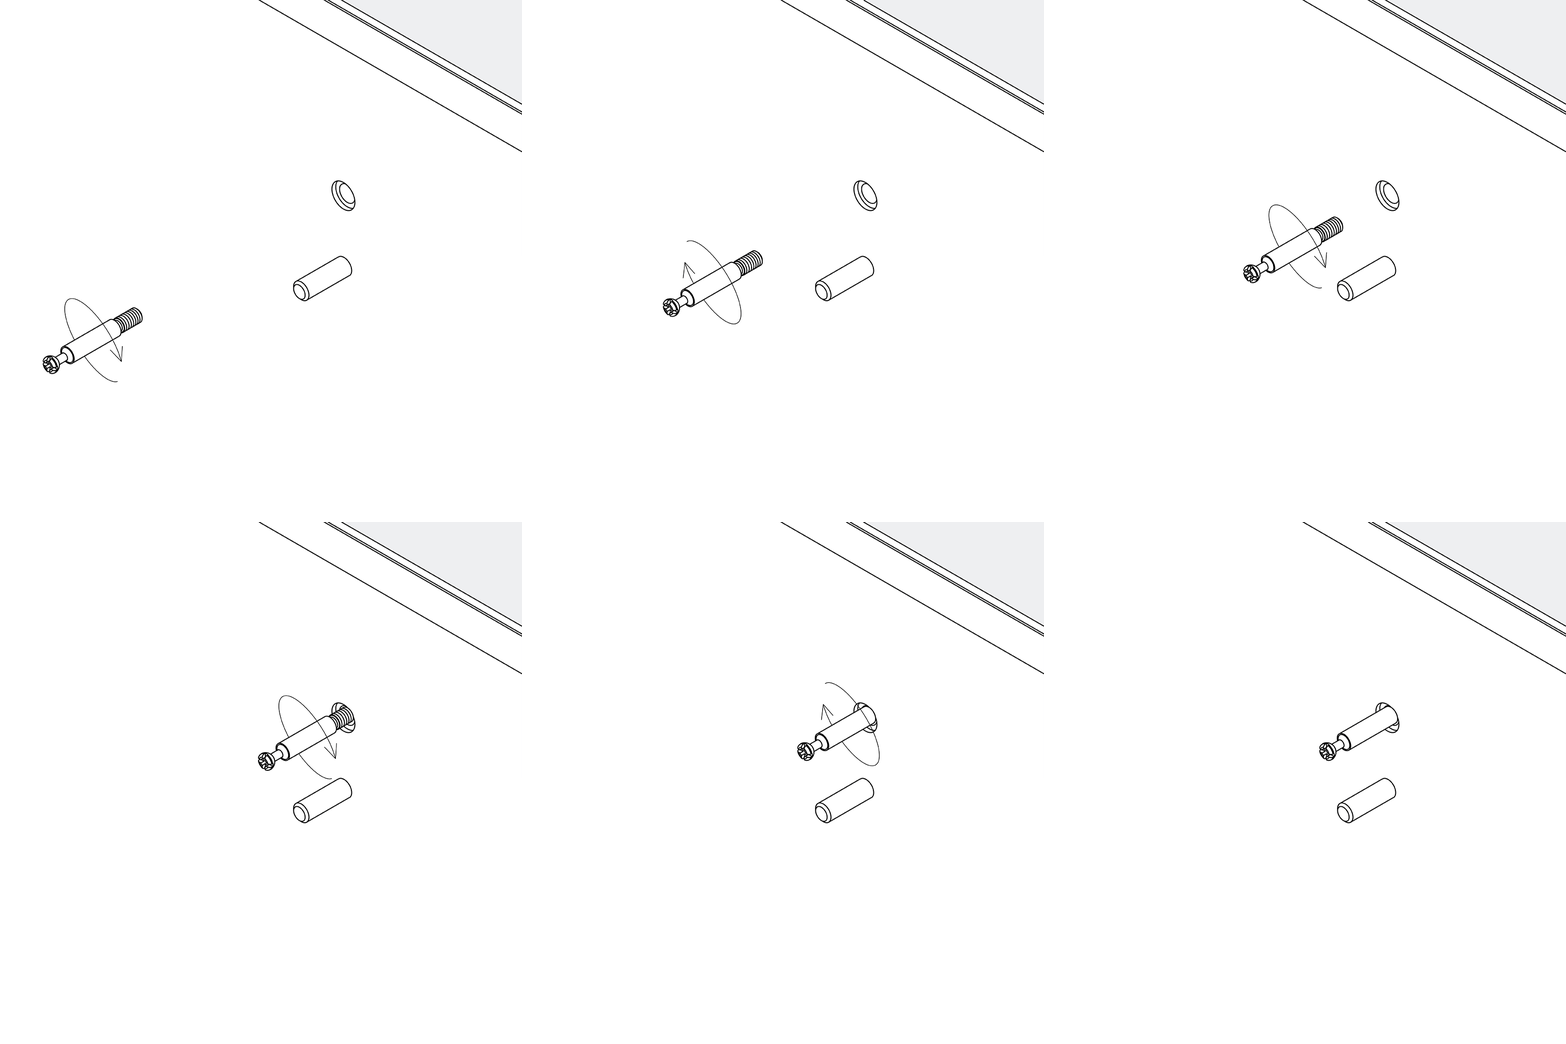
Screw 4 metal cam bolts into R1.
None
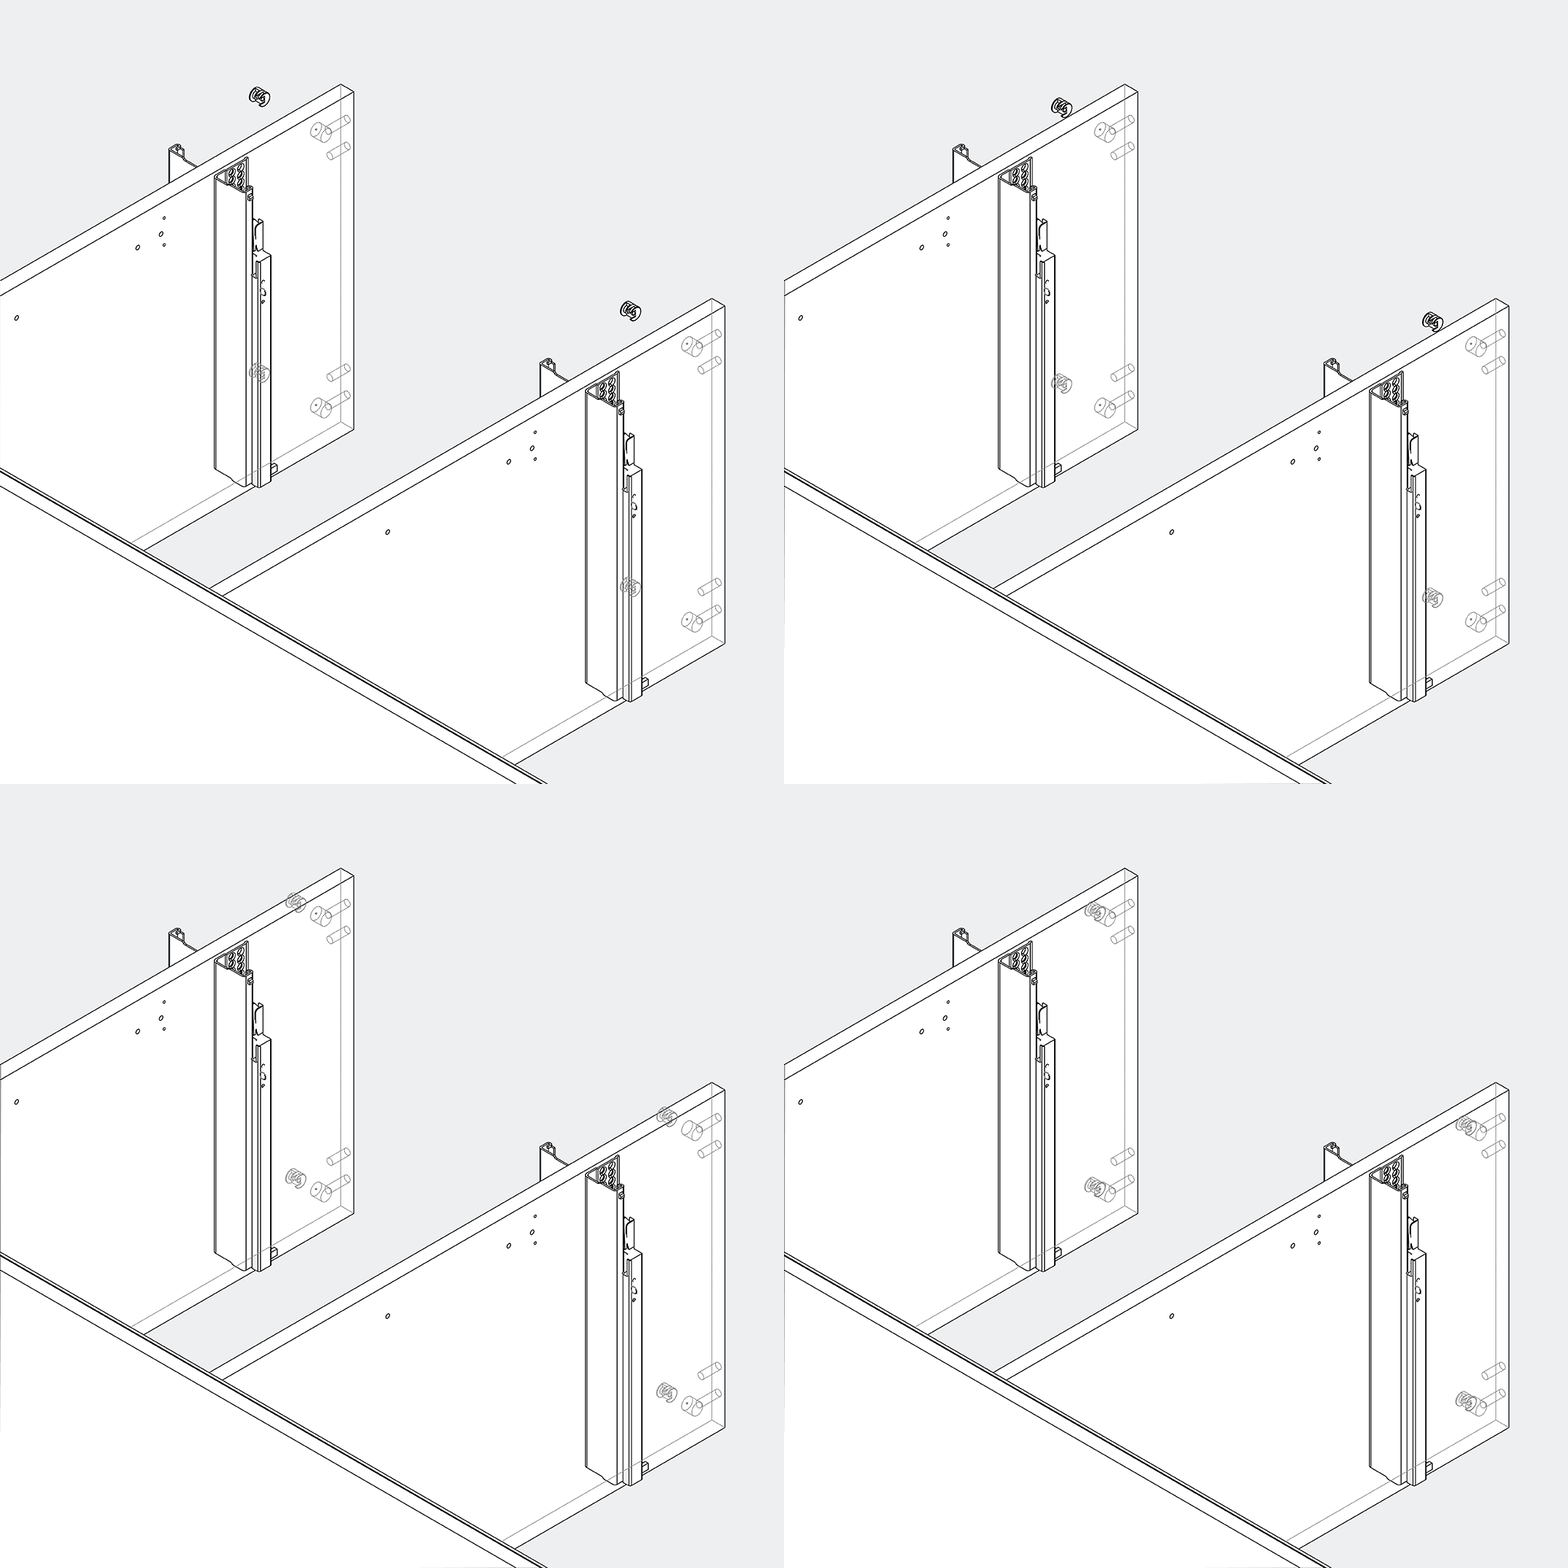
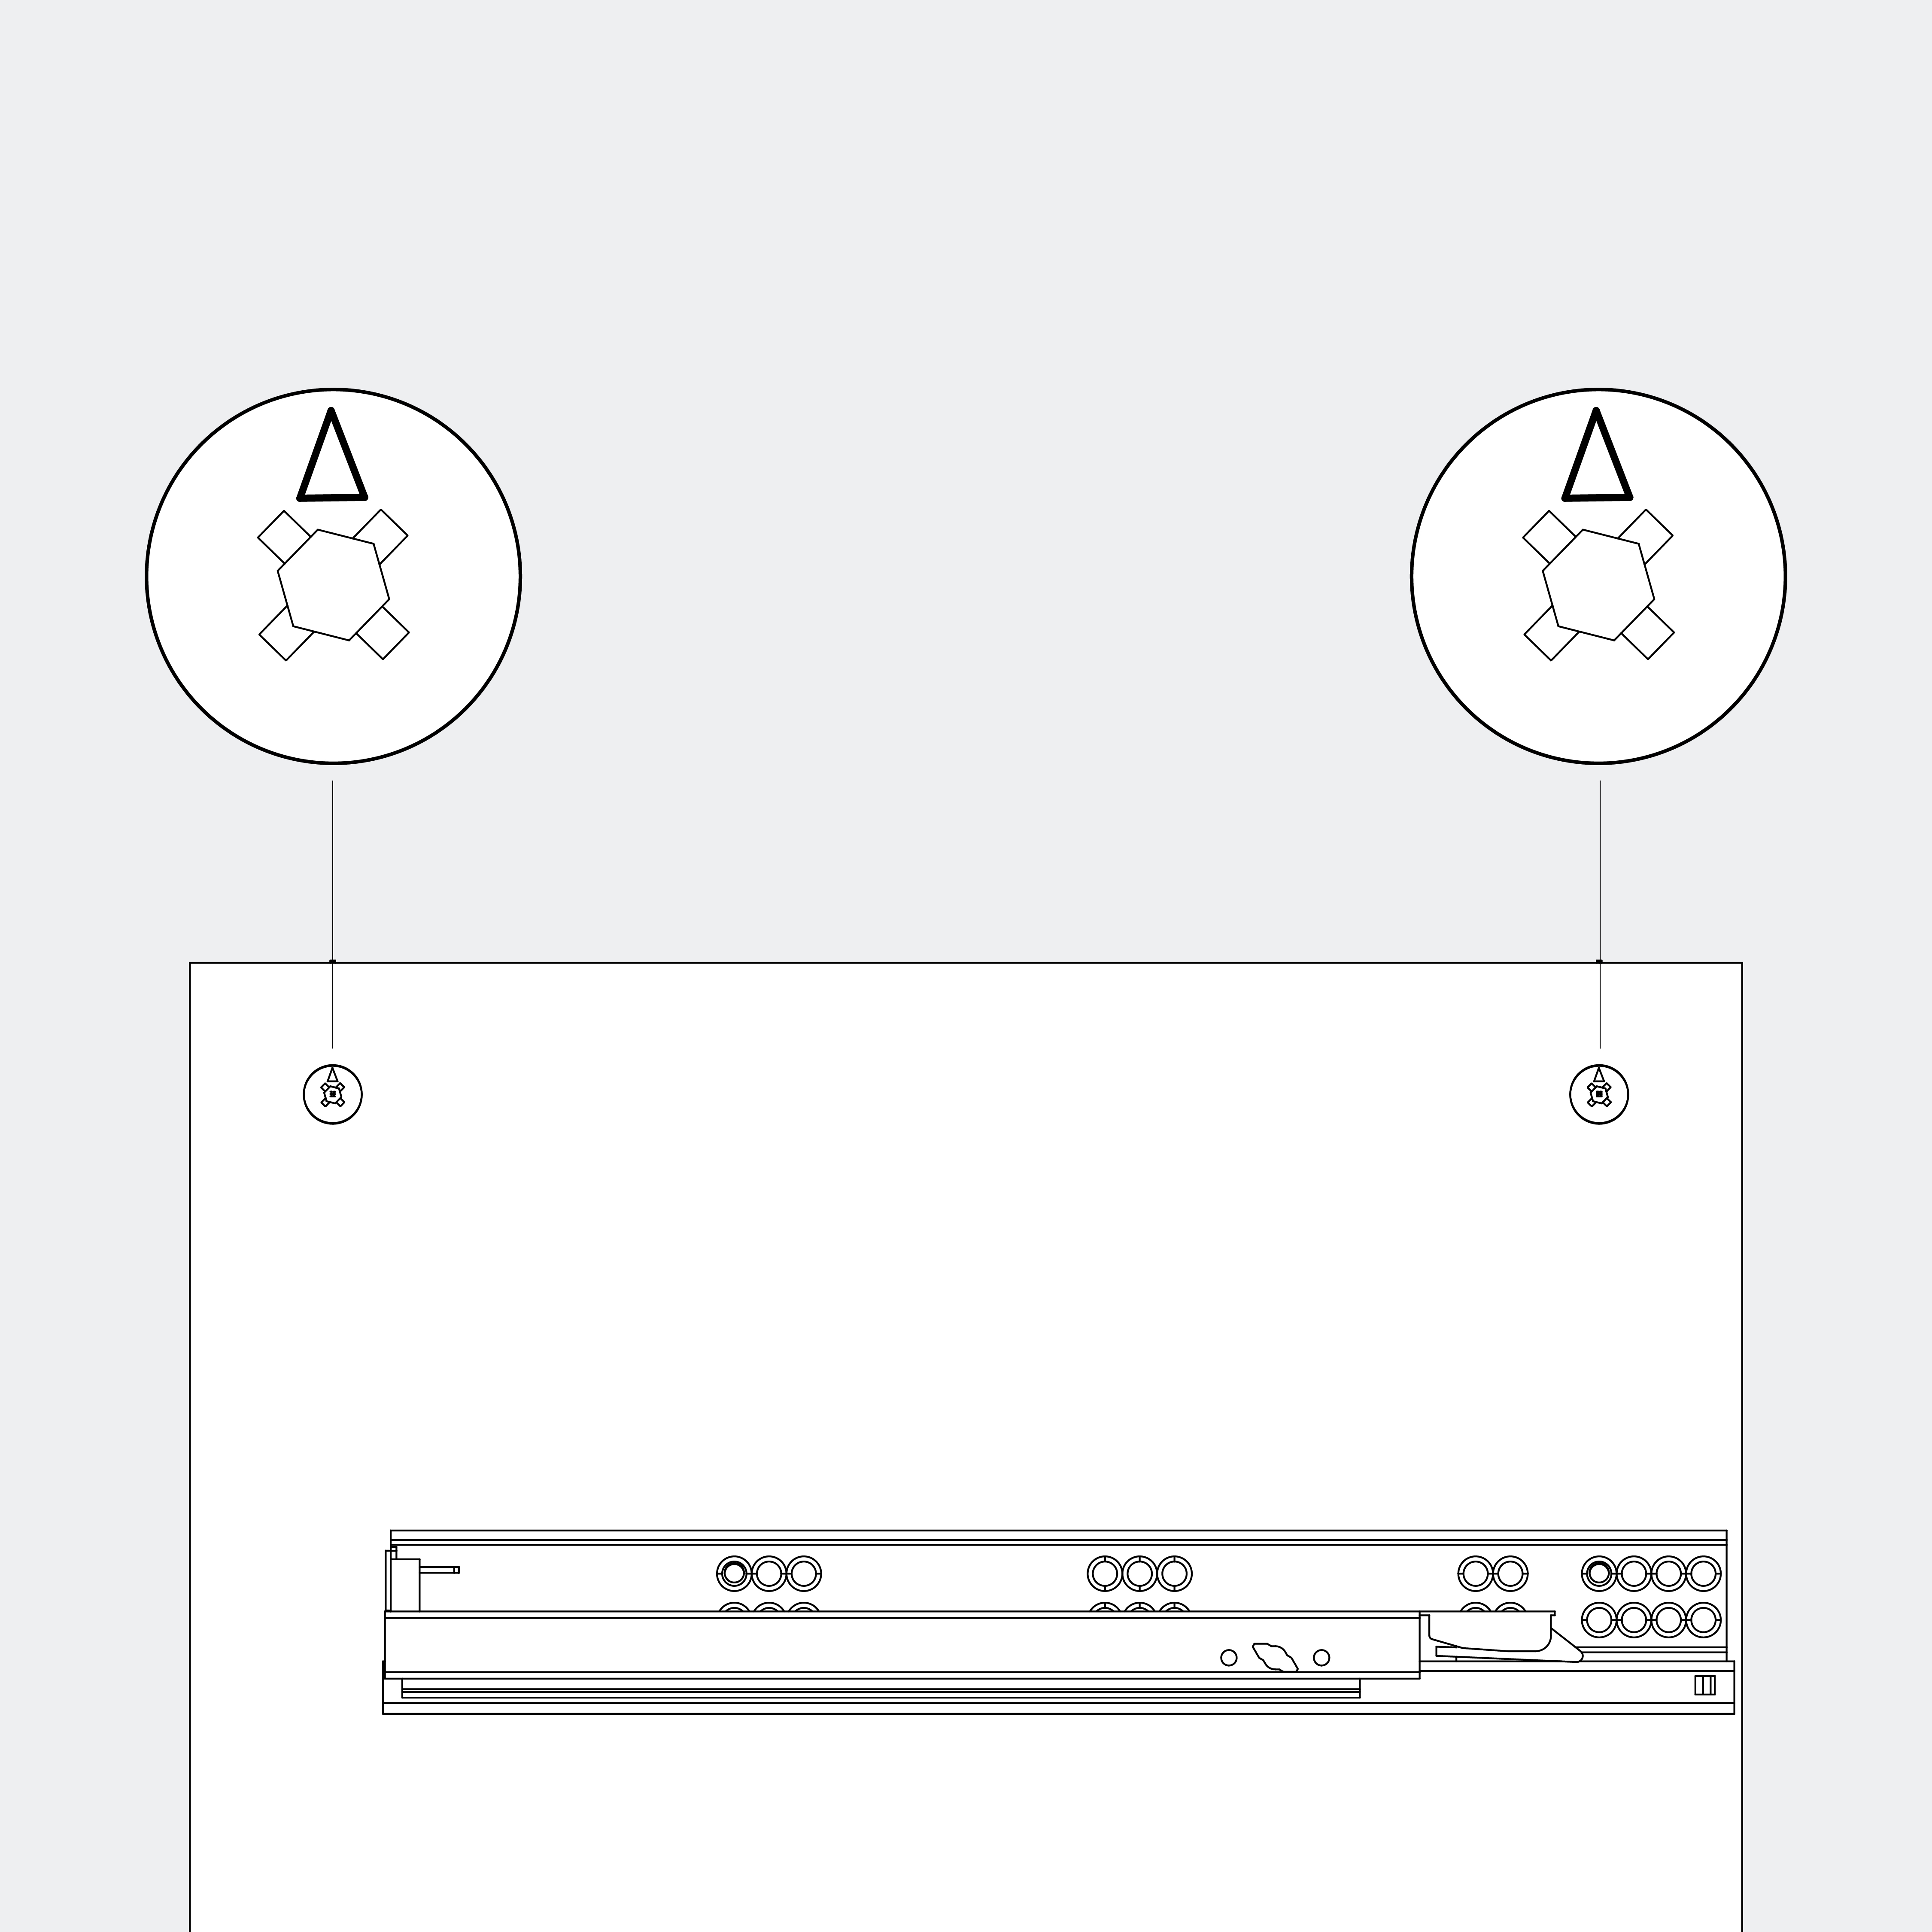
Insert 4 metal cam locks into R7 and R8, making sure the arrow points outwards.
None
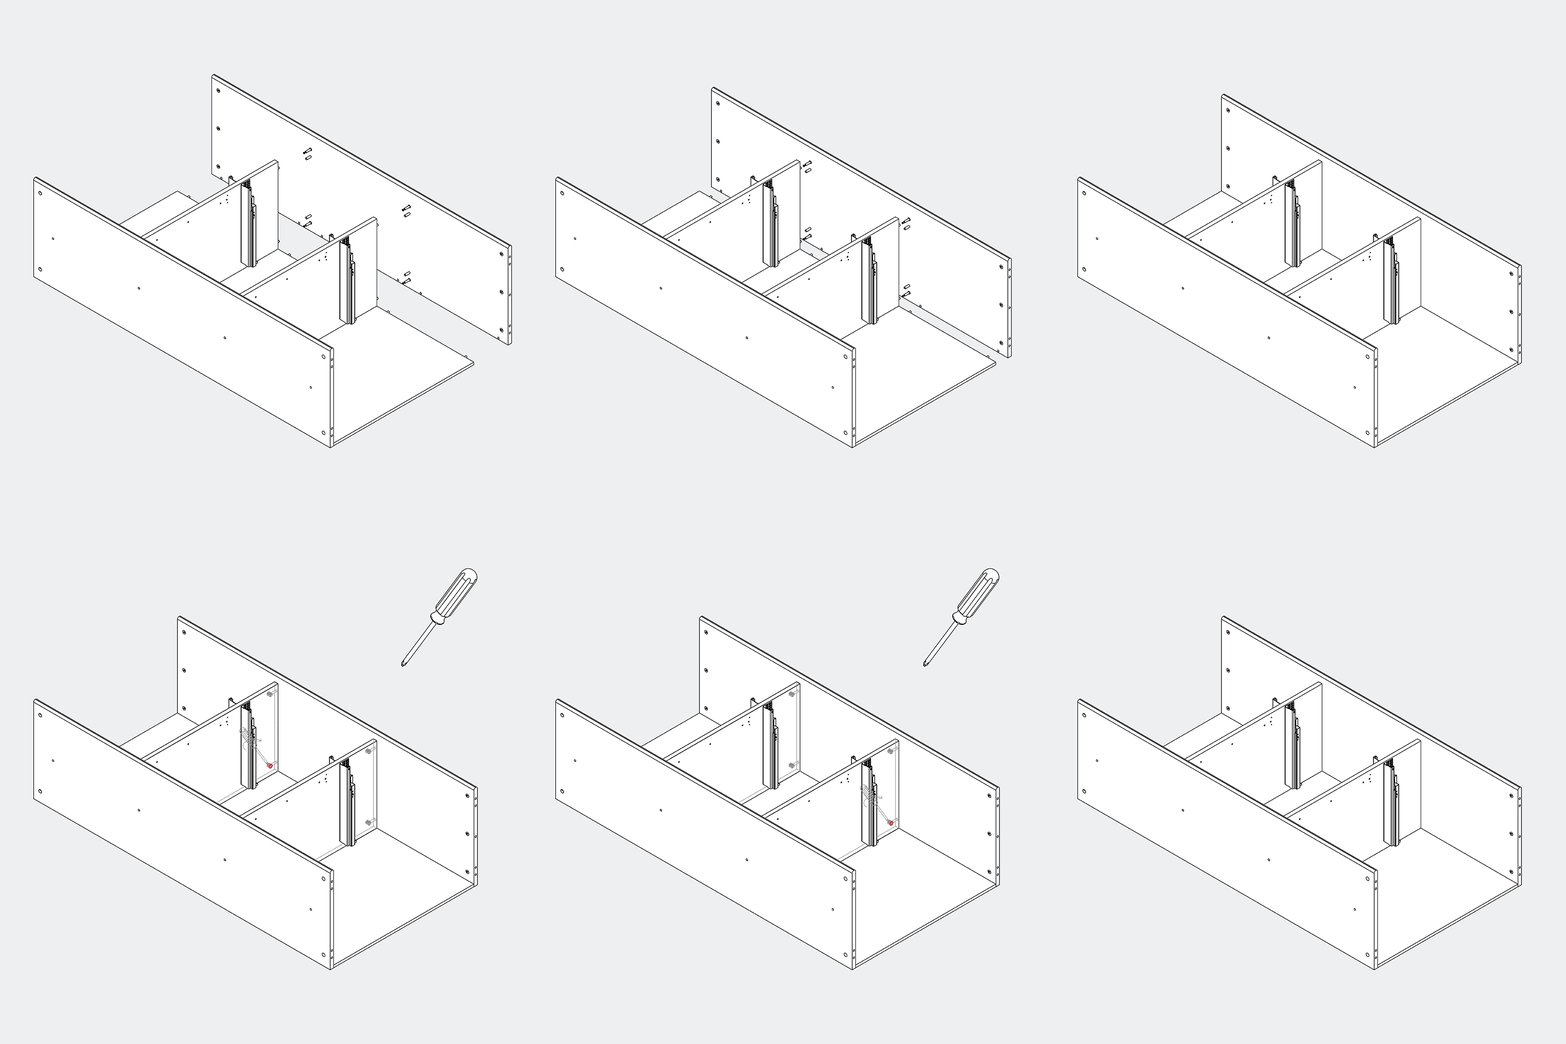
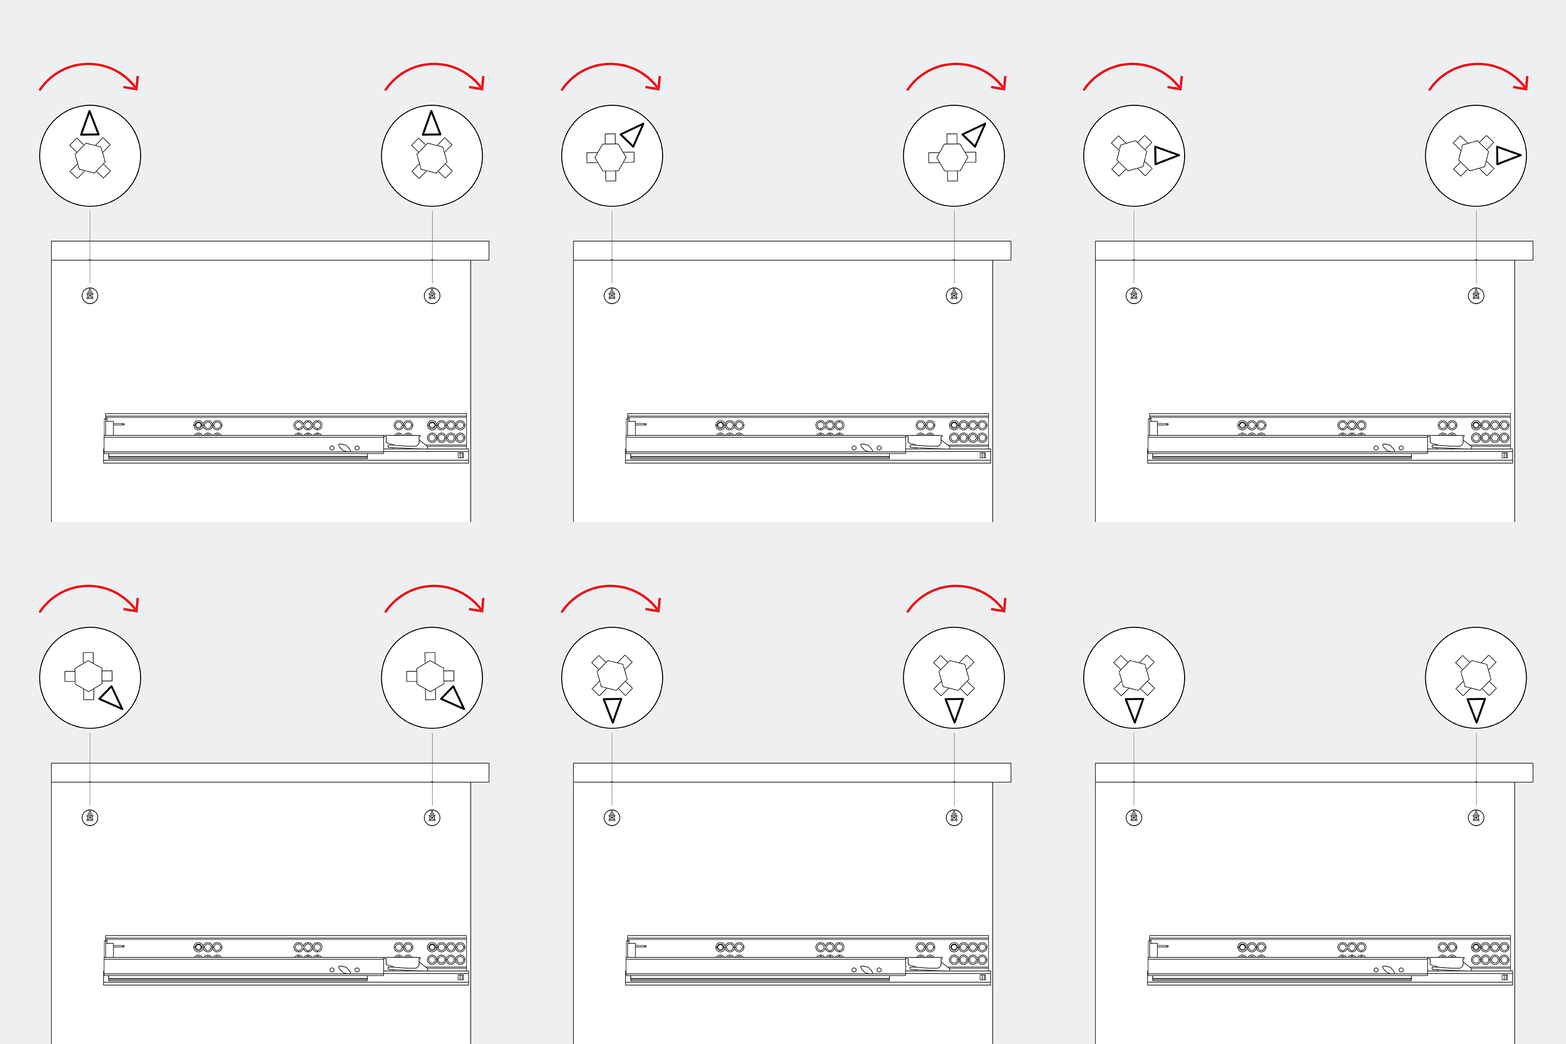
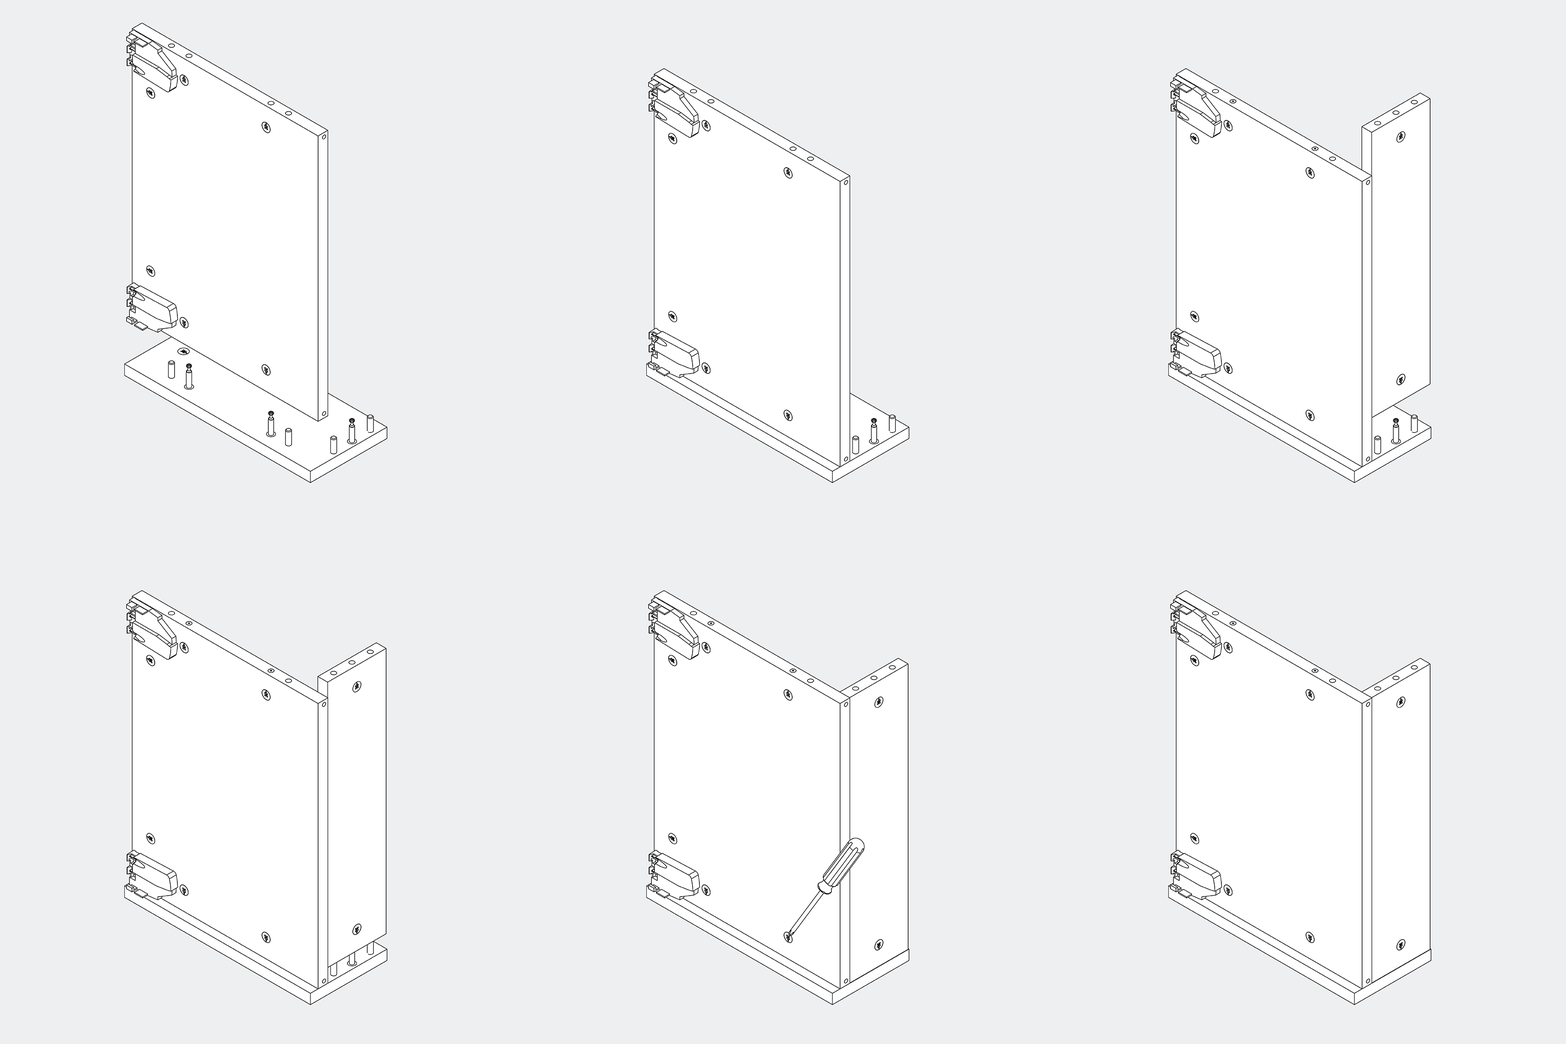
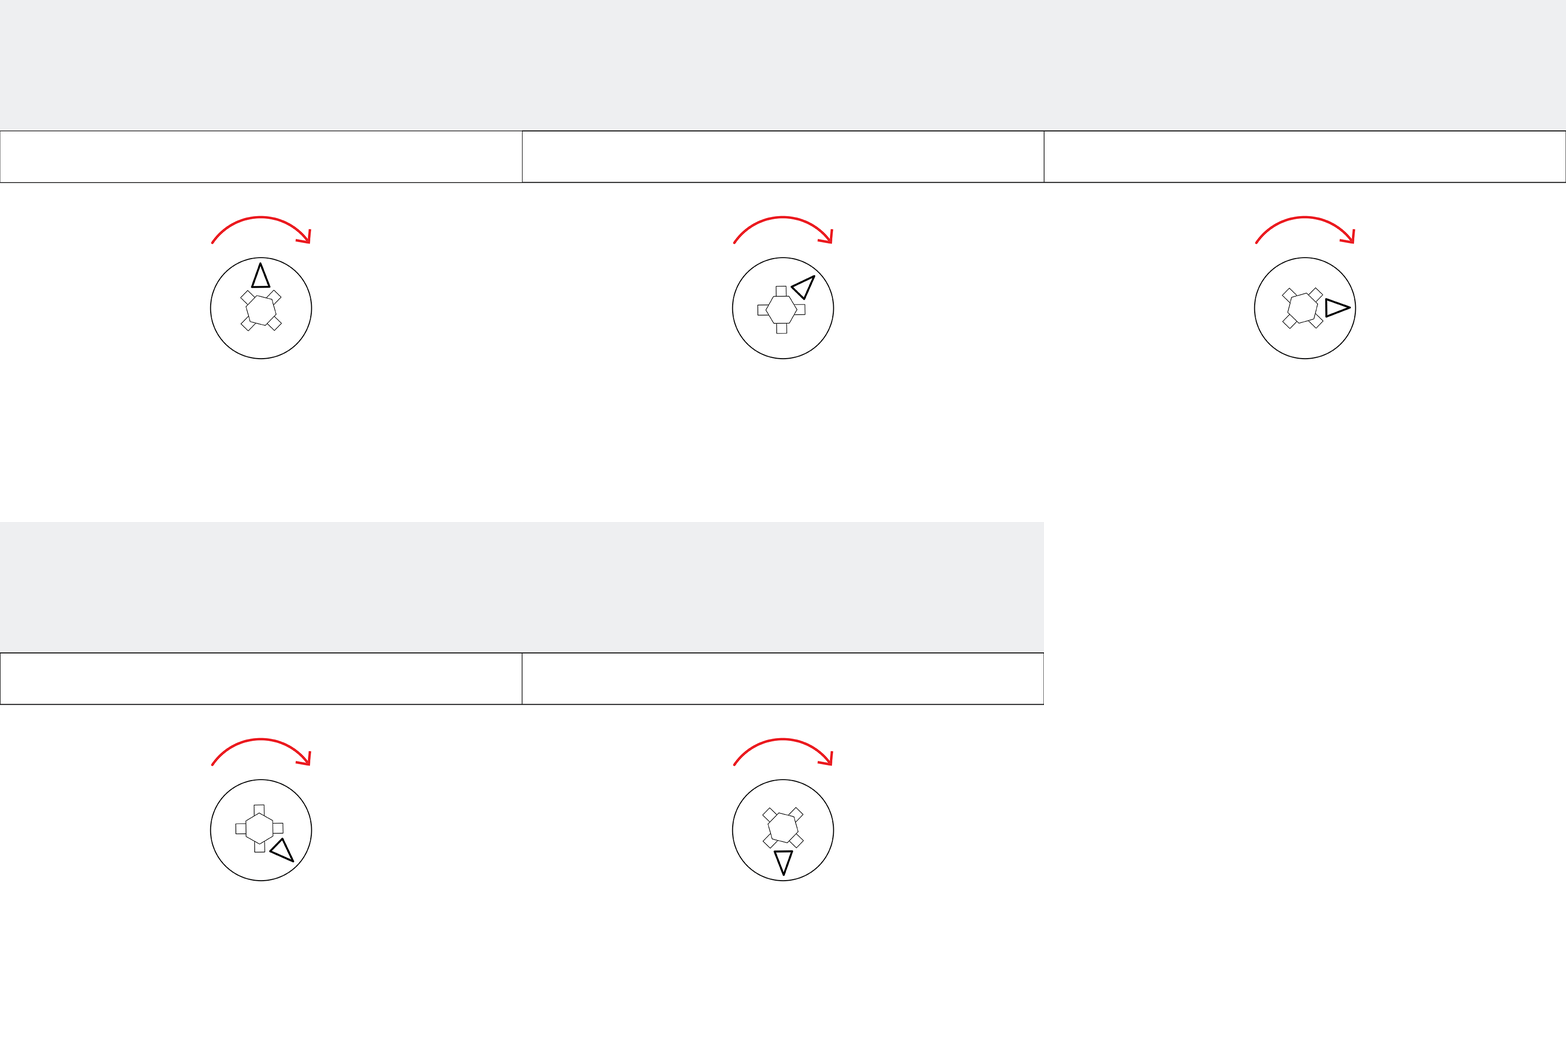
Place R1 onto the unit and screw the metal cam locks. Turn each metal cam lock by approximately 180°, until you feel resistance.
None
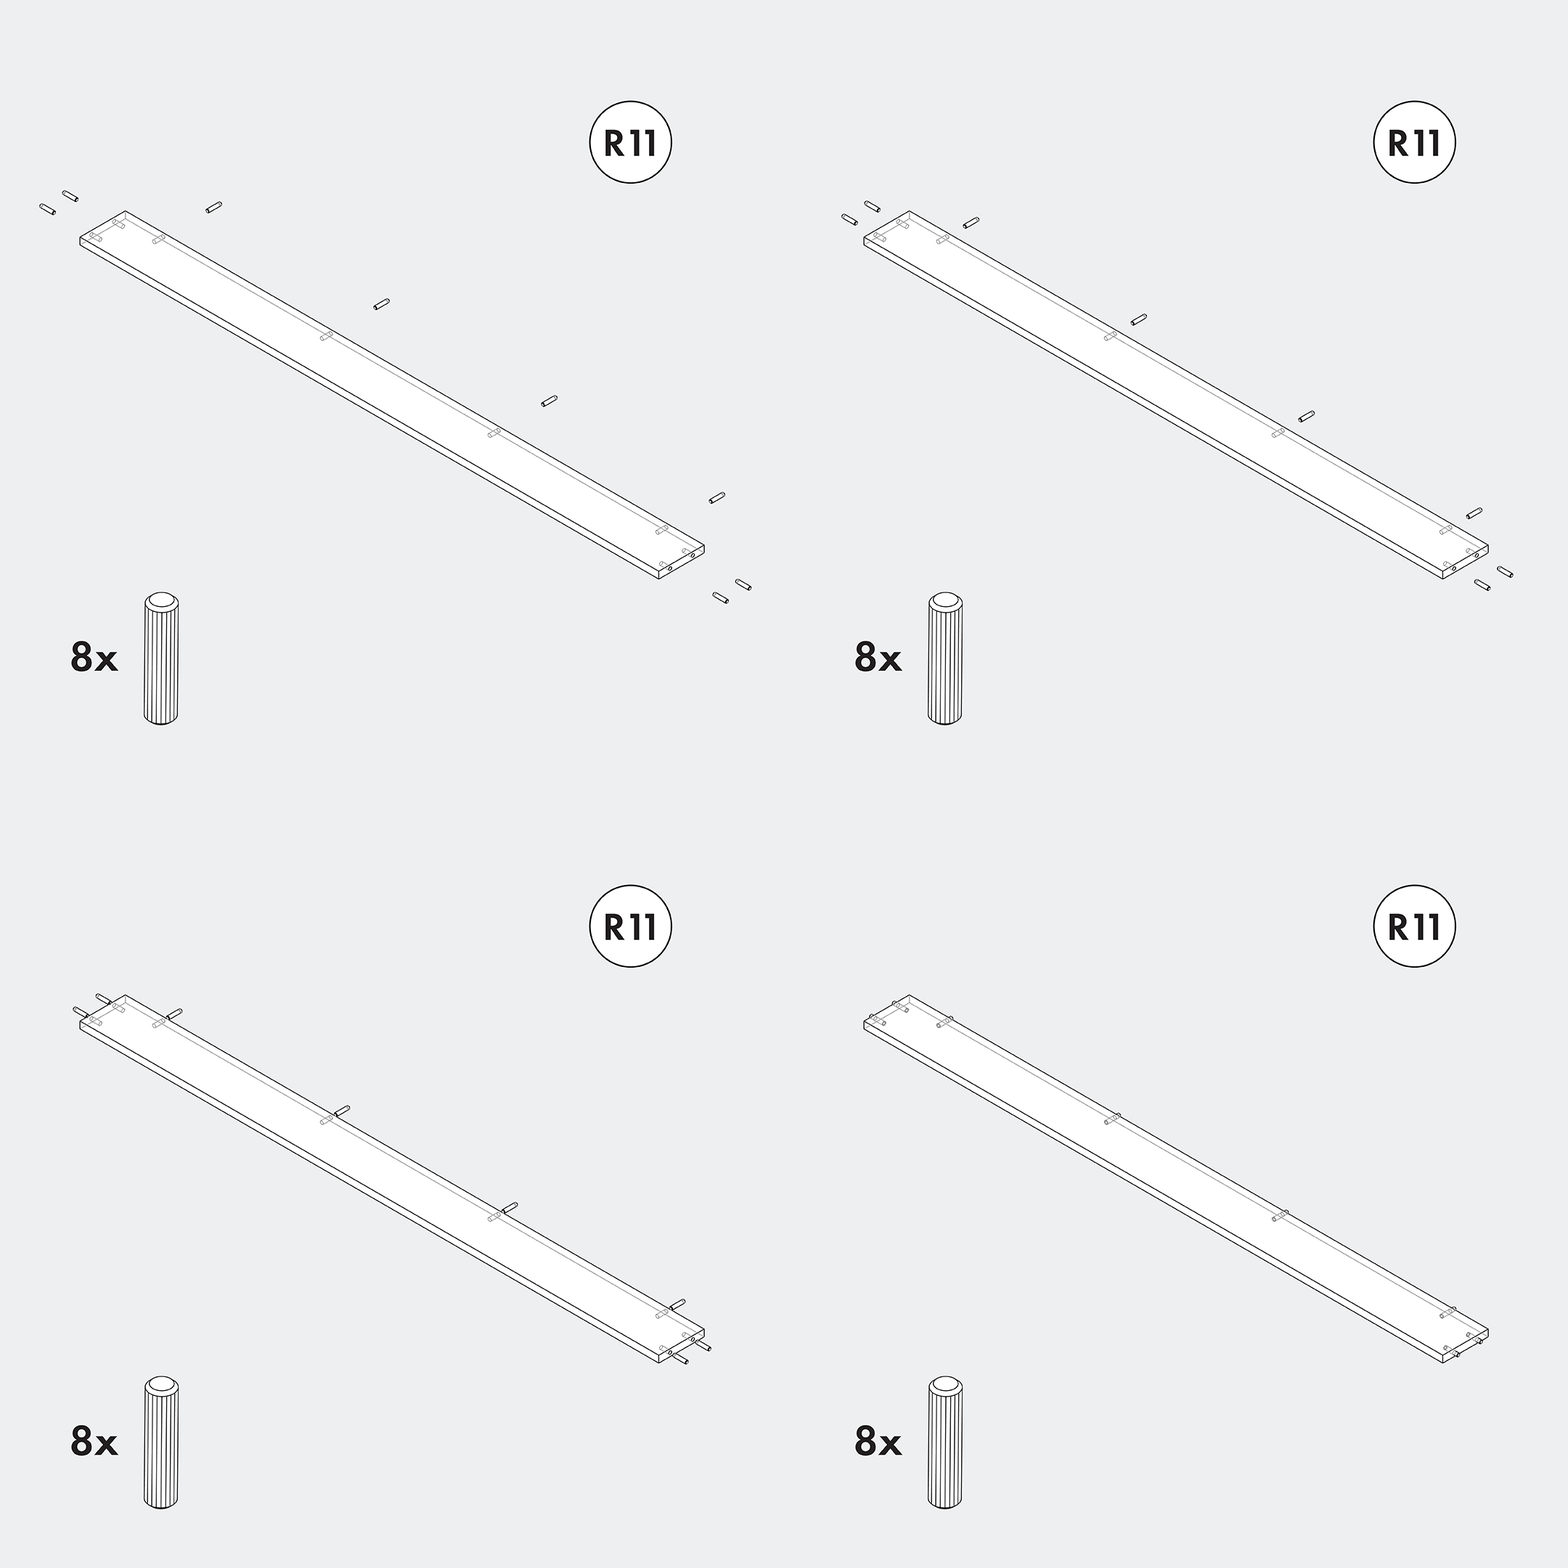
Insert 8 wooden dowels into R11.
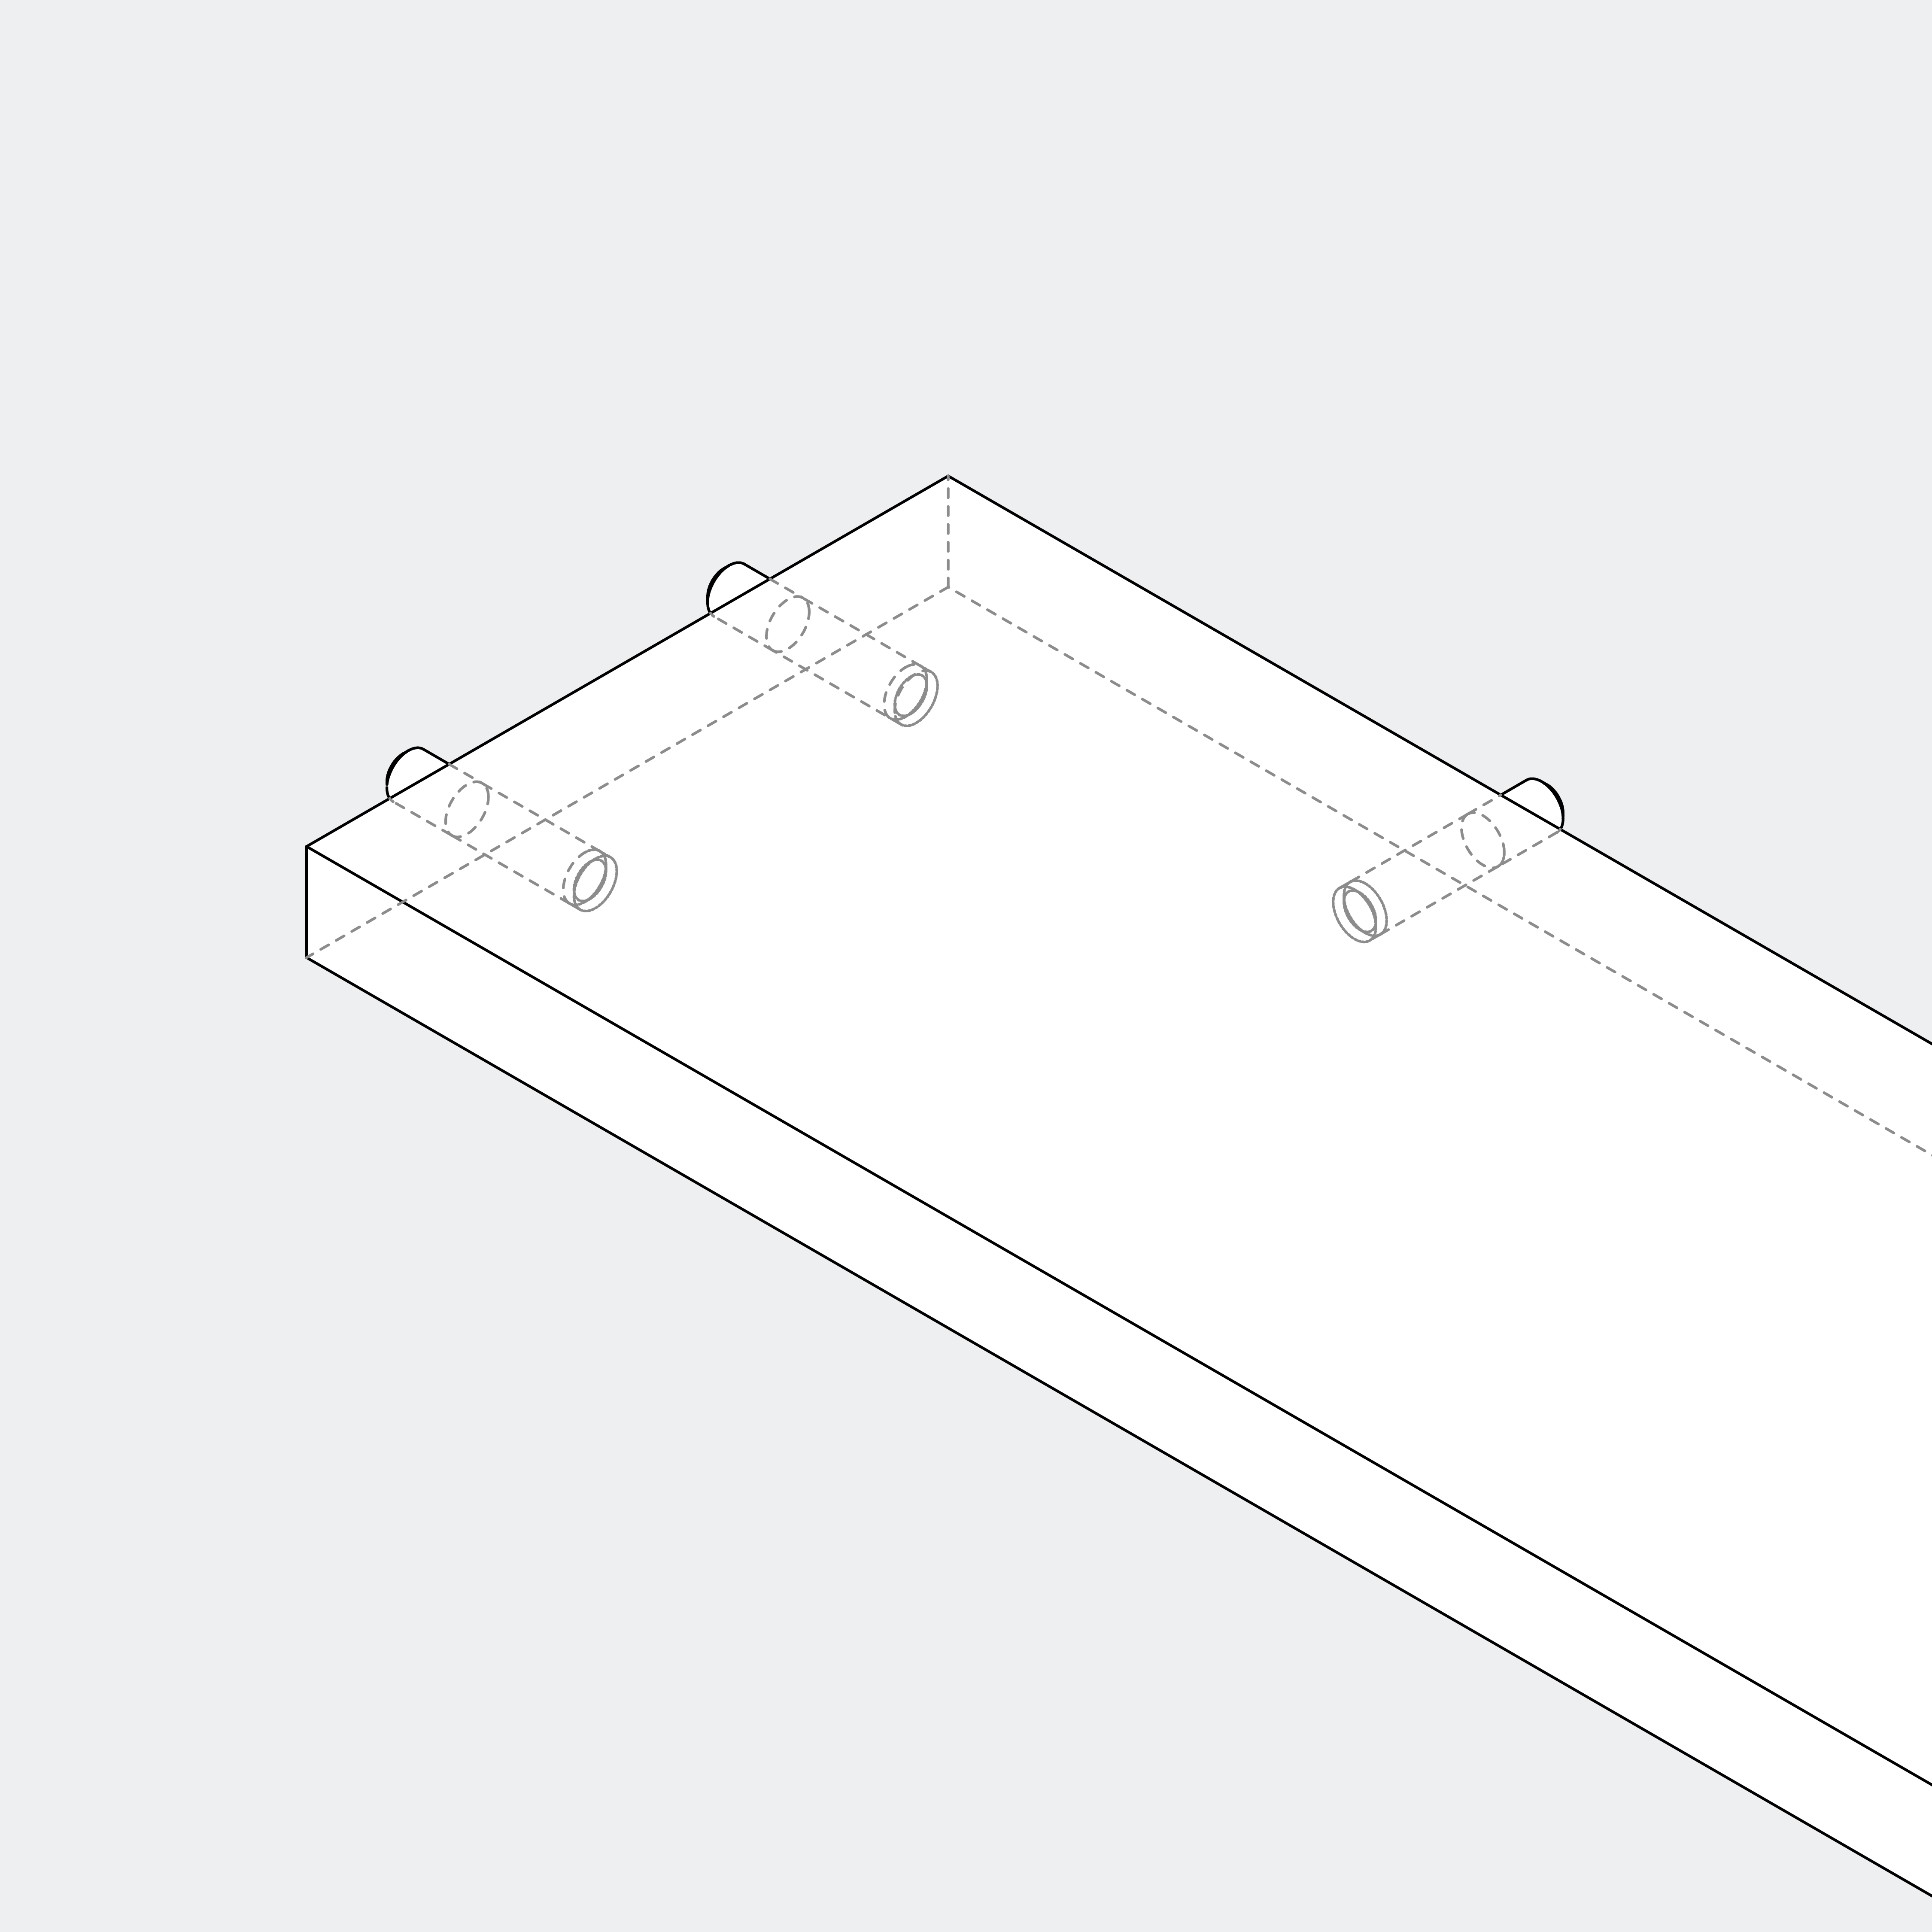
None
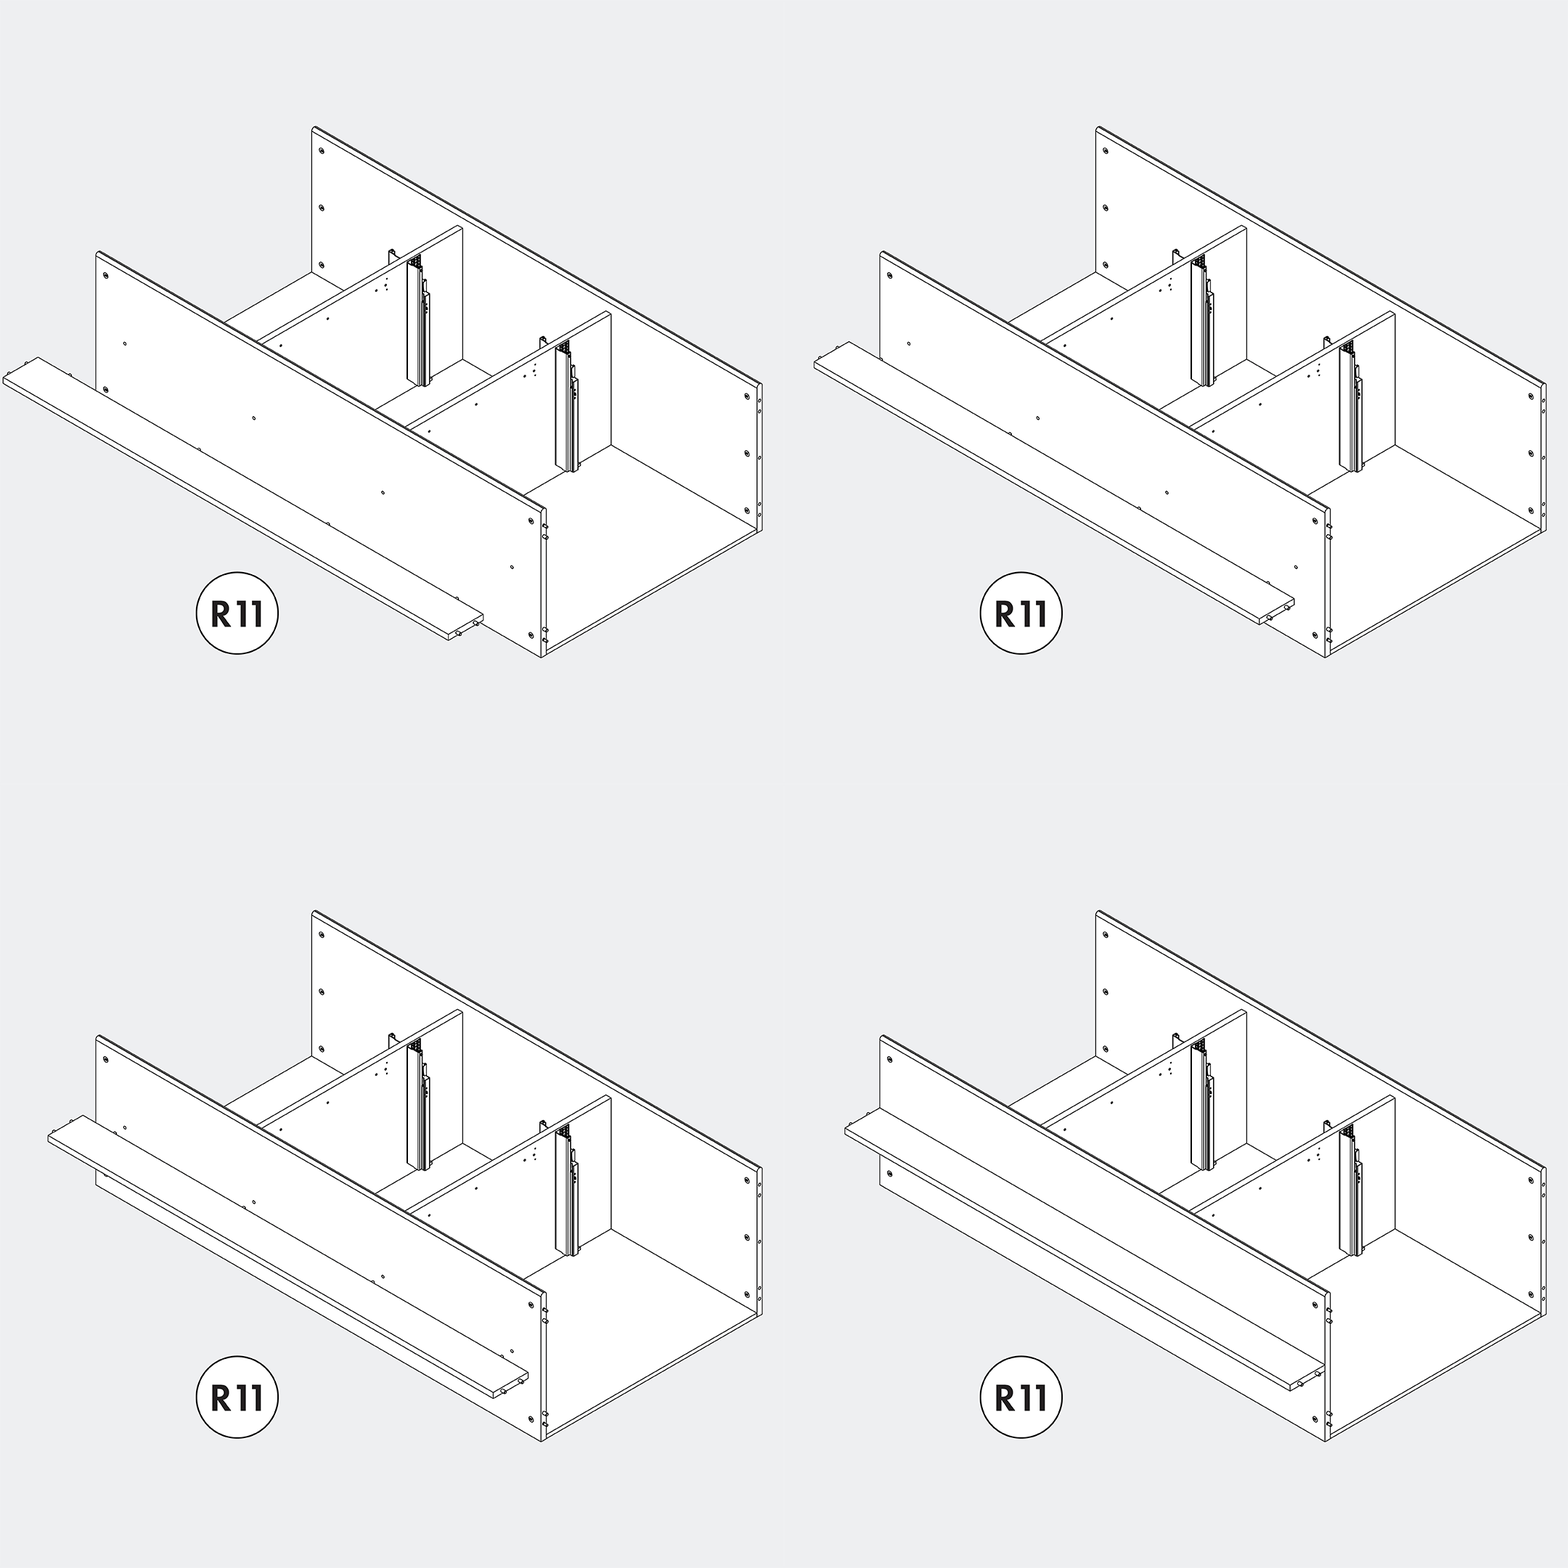
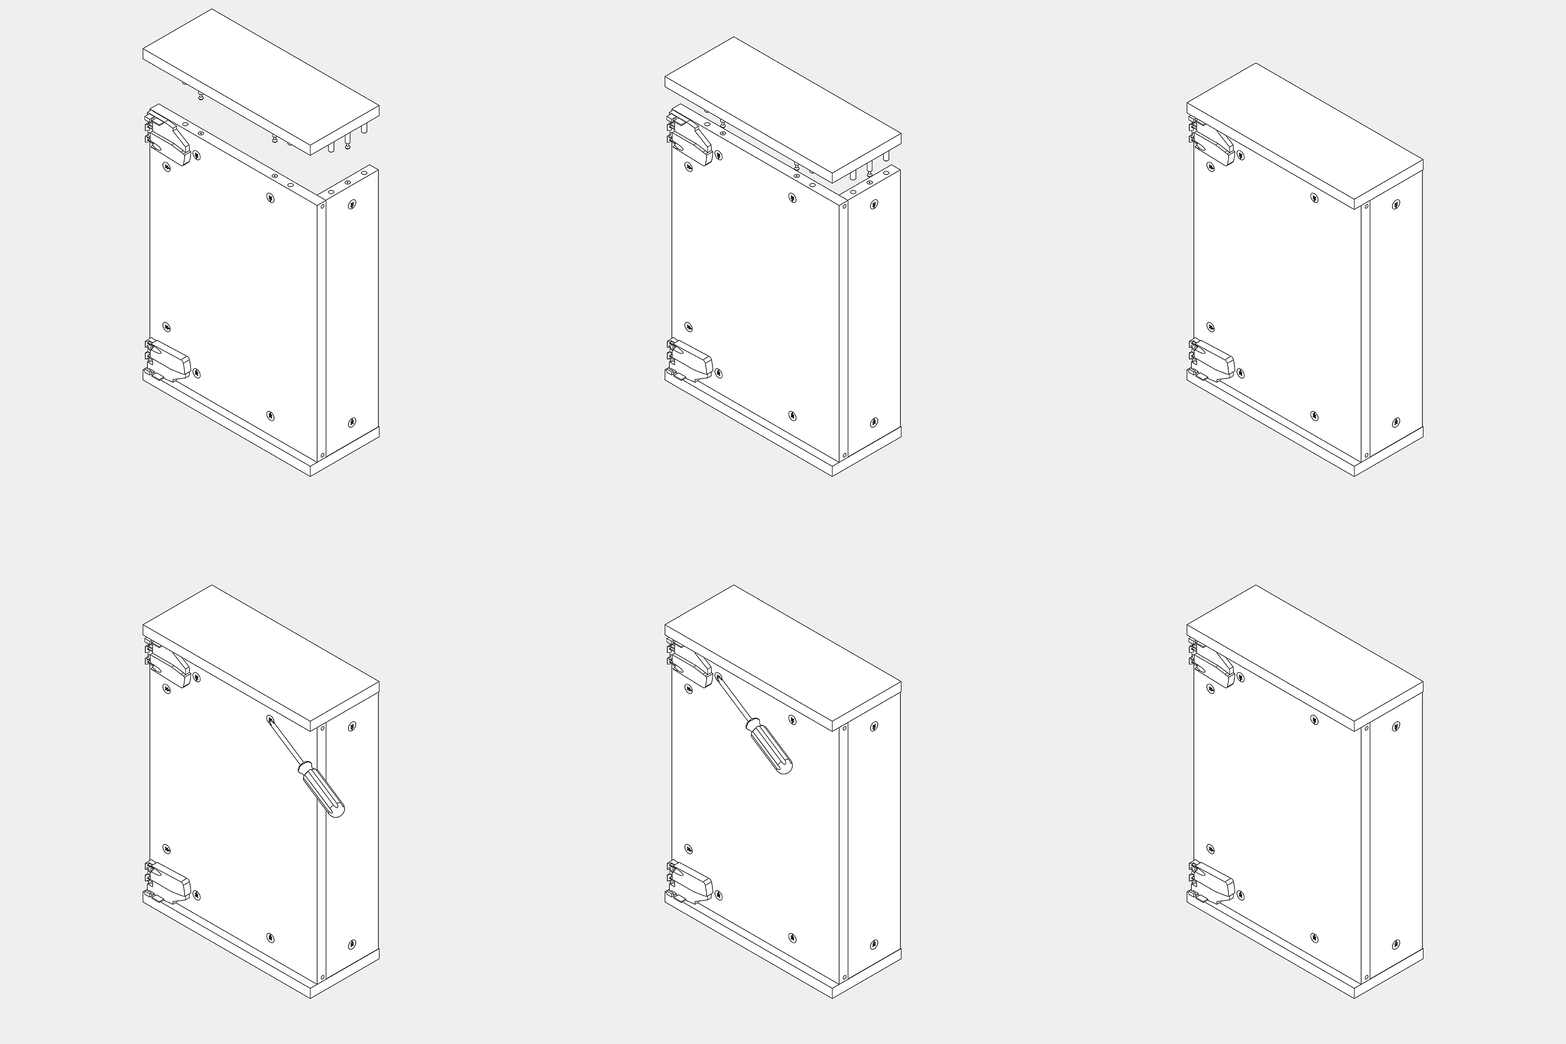
Mount R11 onto R2. Ask the other person to hold R11 in place before mounting the next parts.
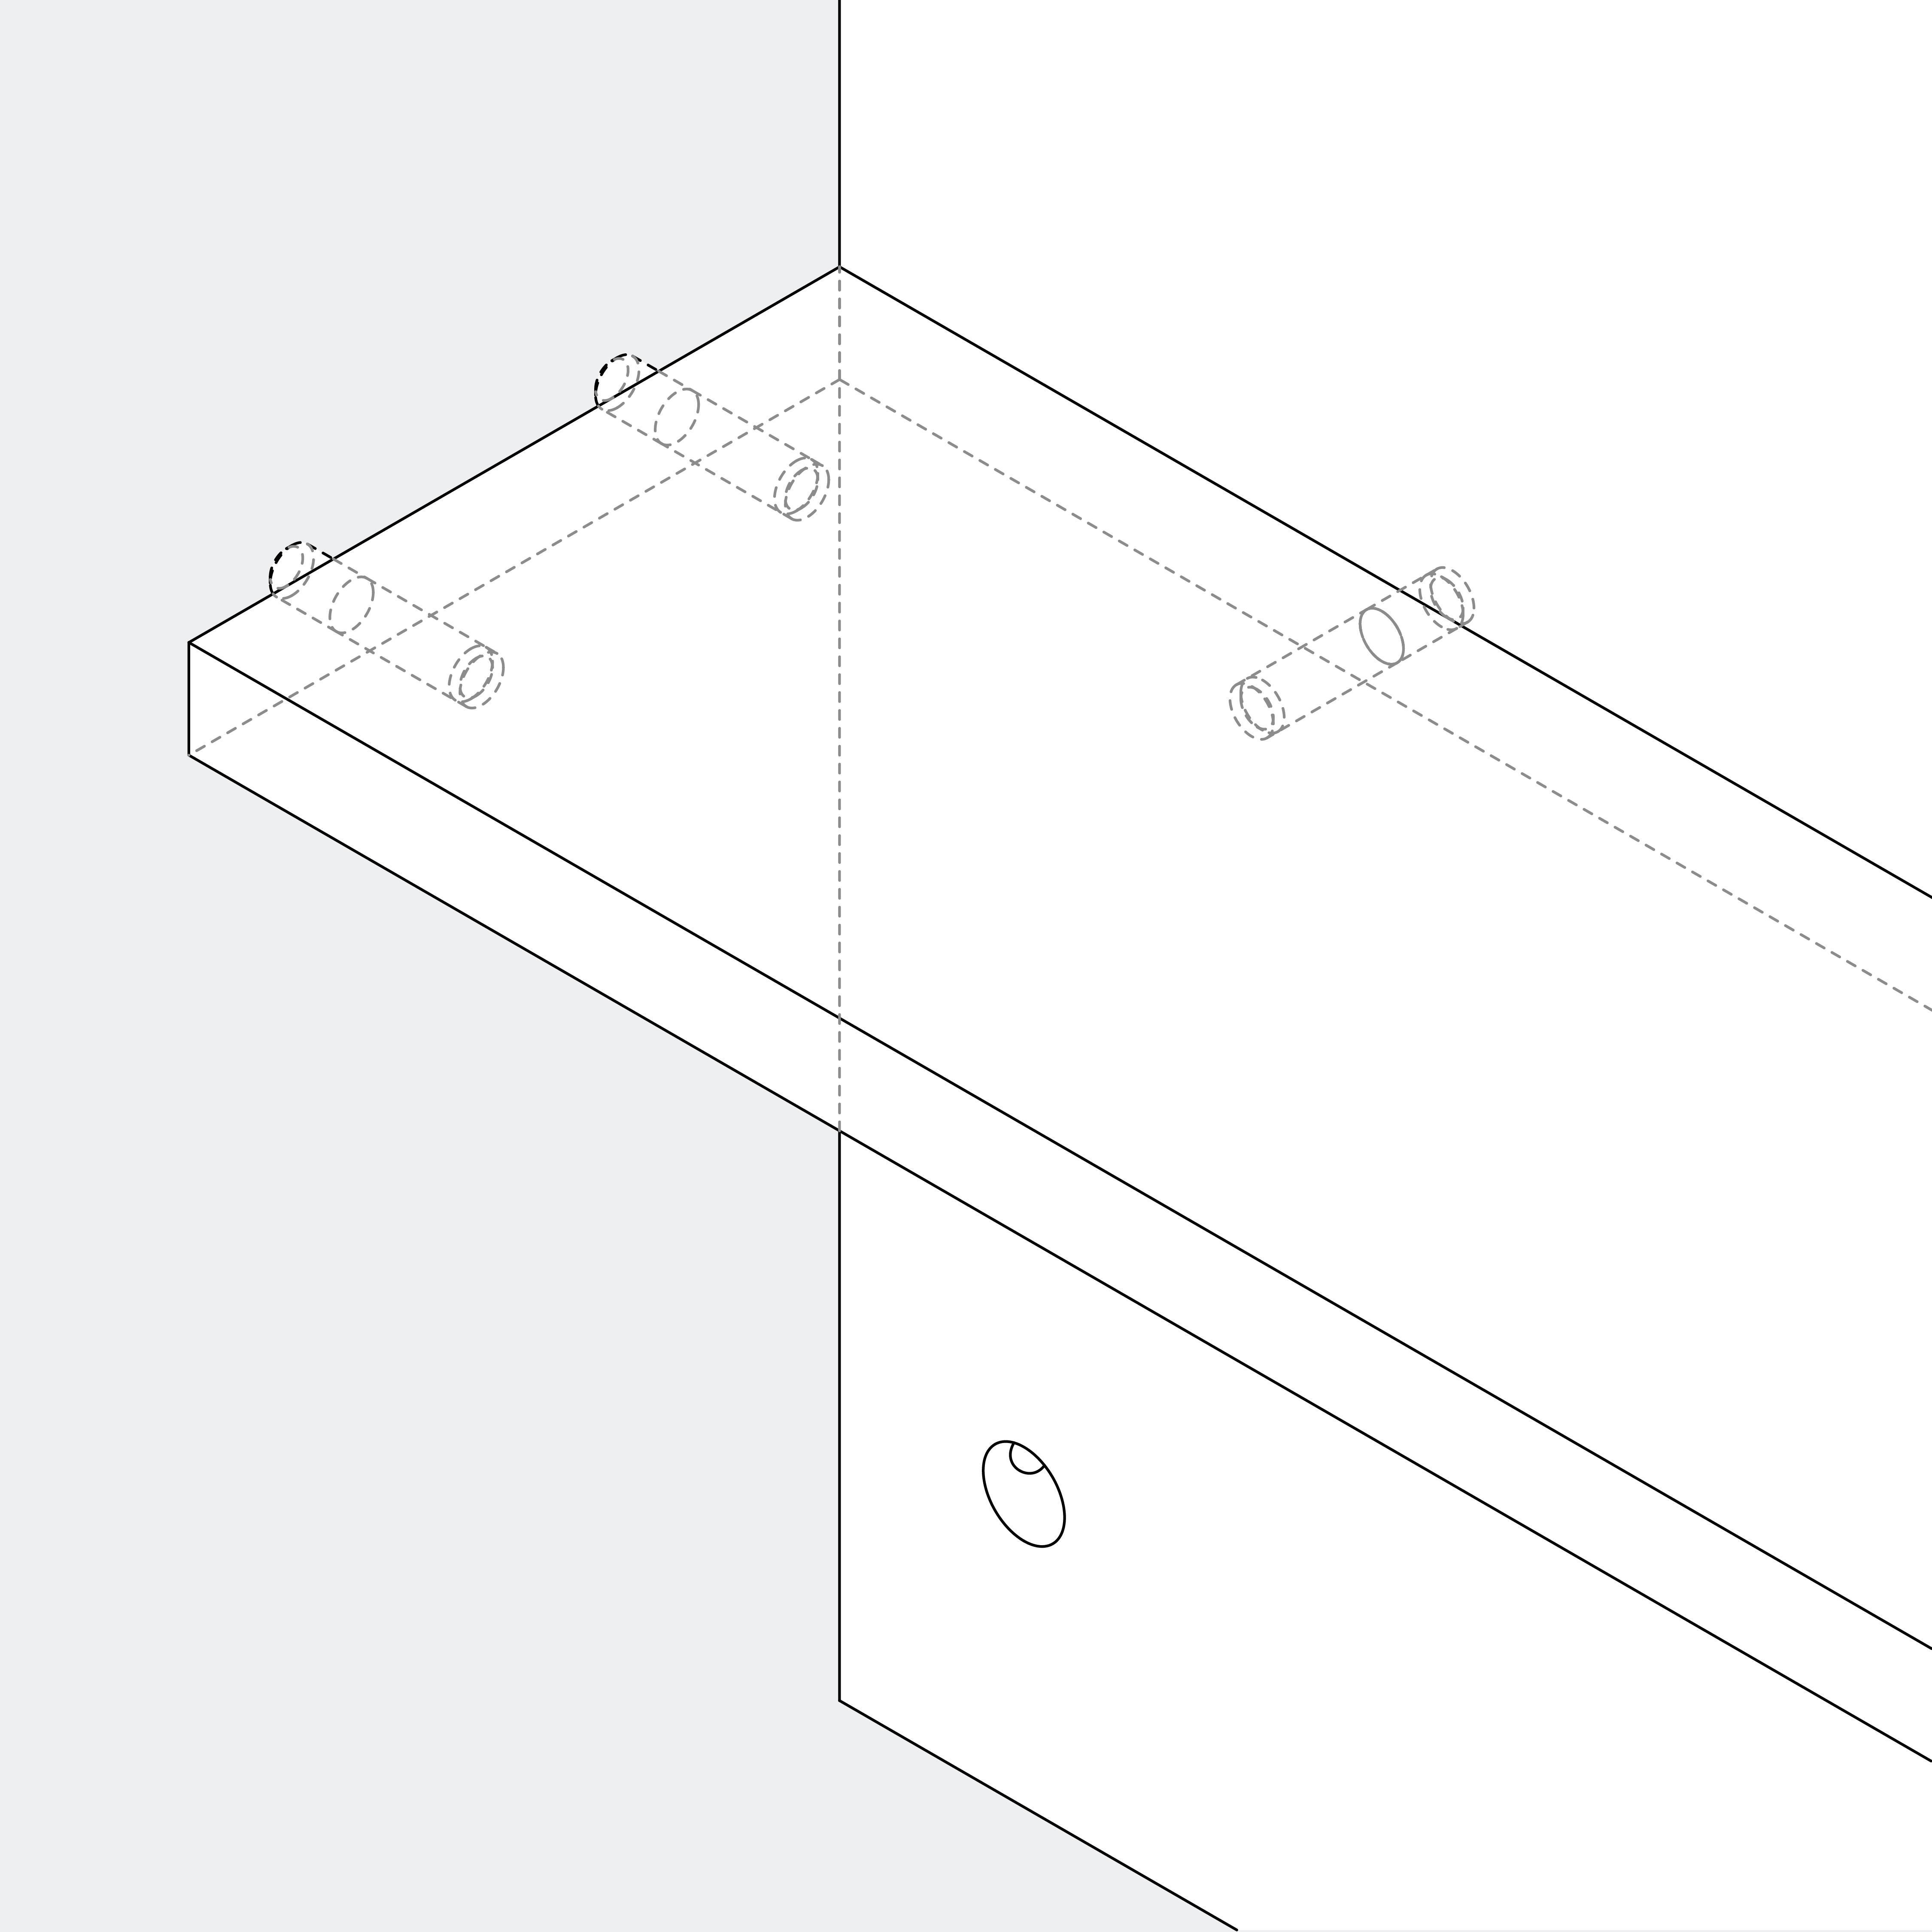
None
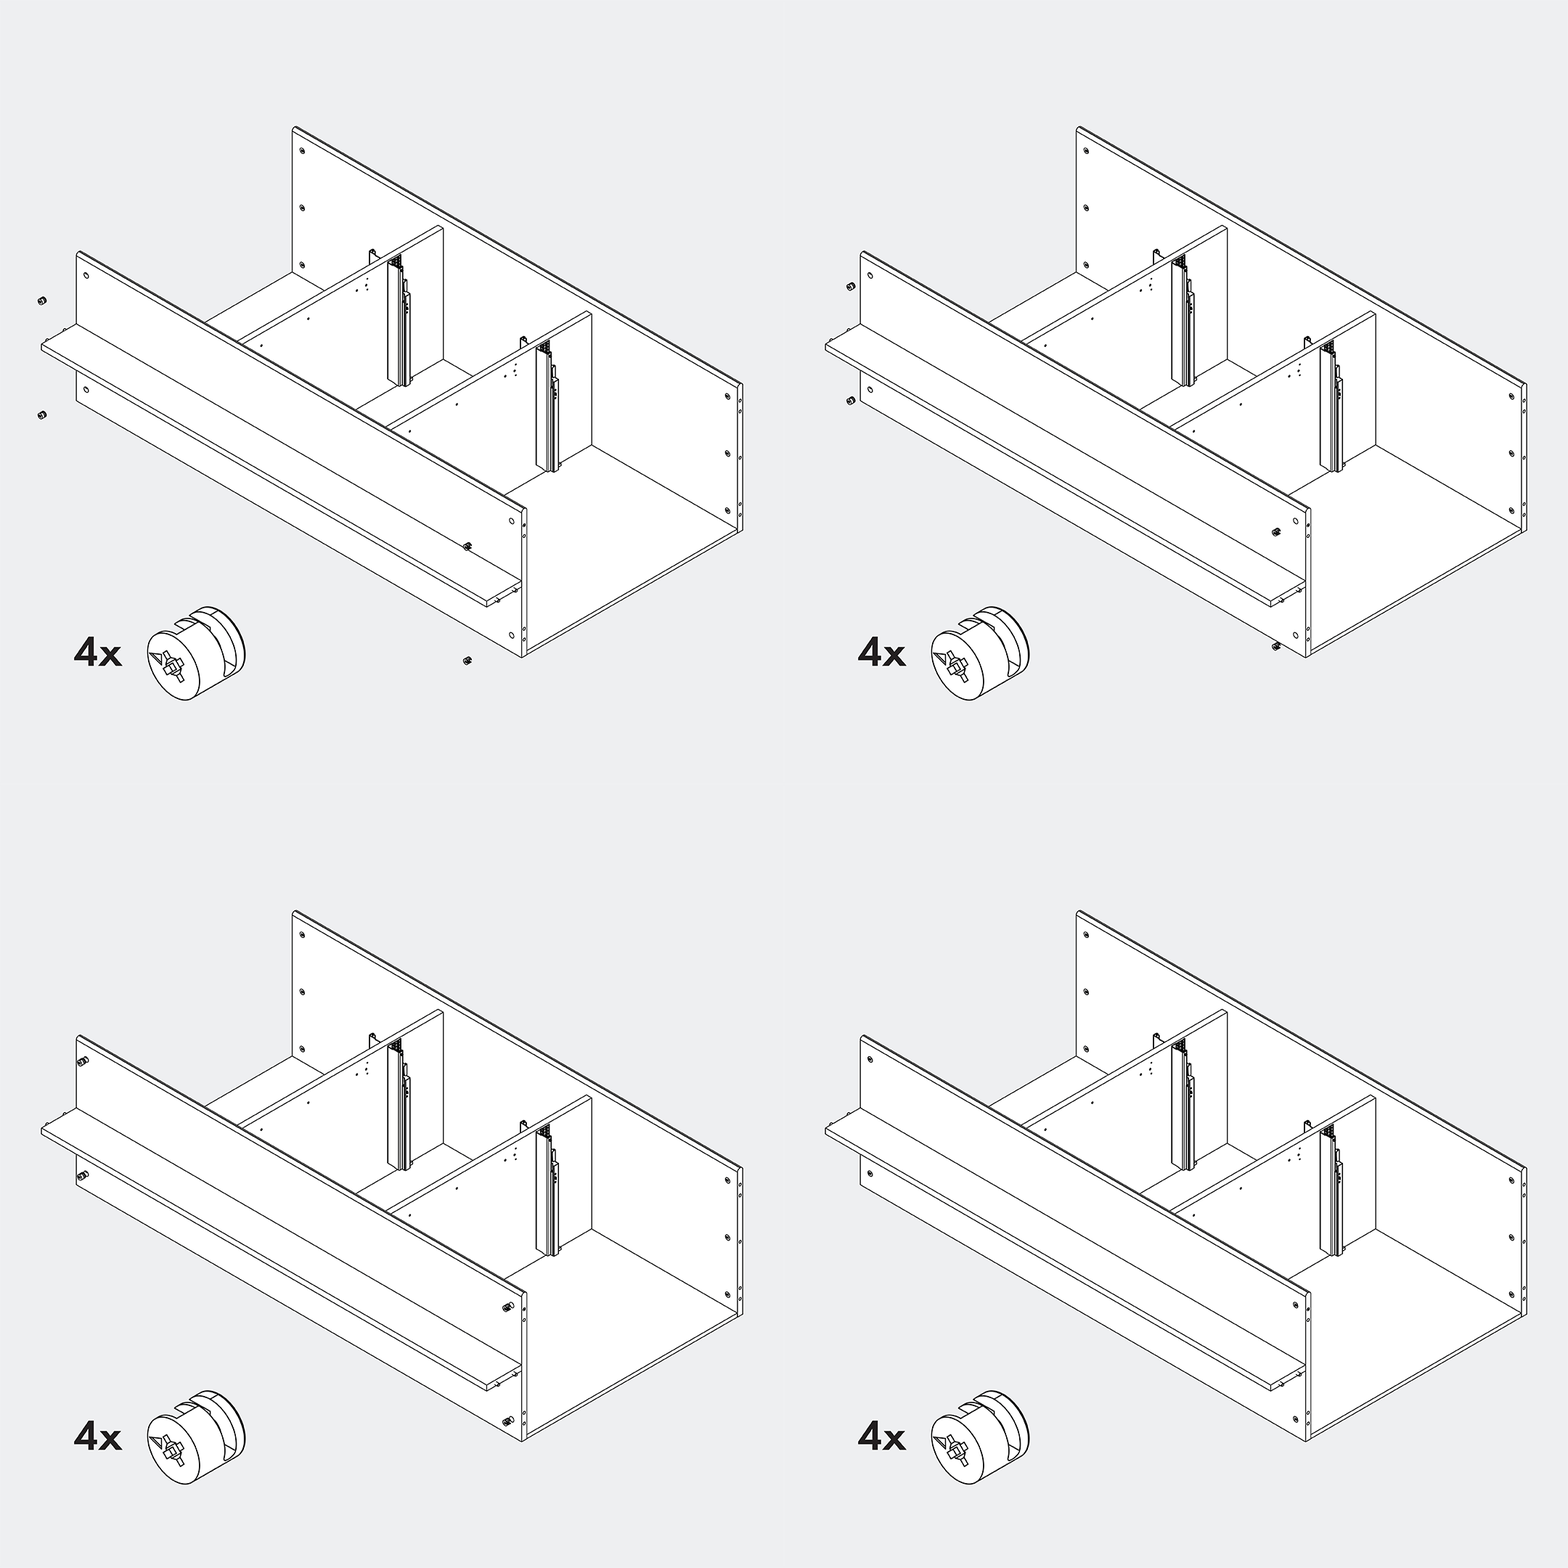
Insert 4 metal cam locks into R2, making sure the arrow points outwards.
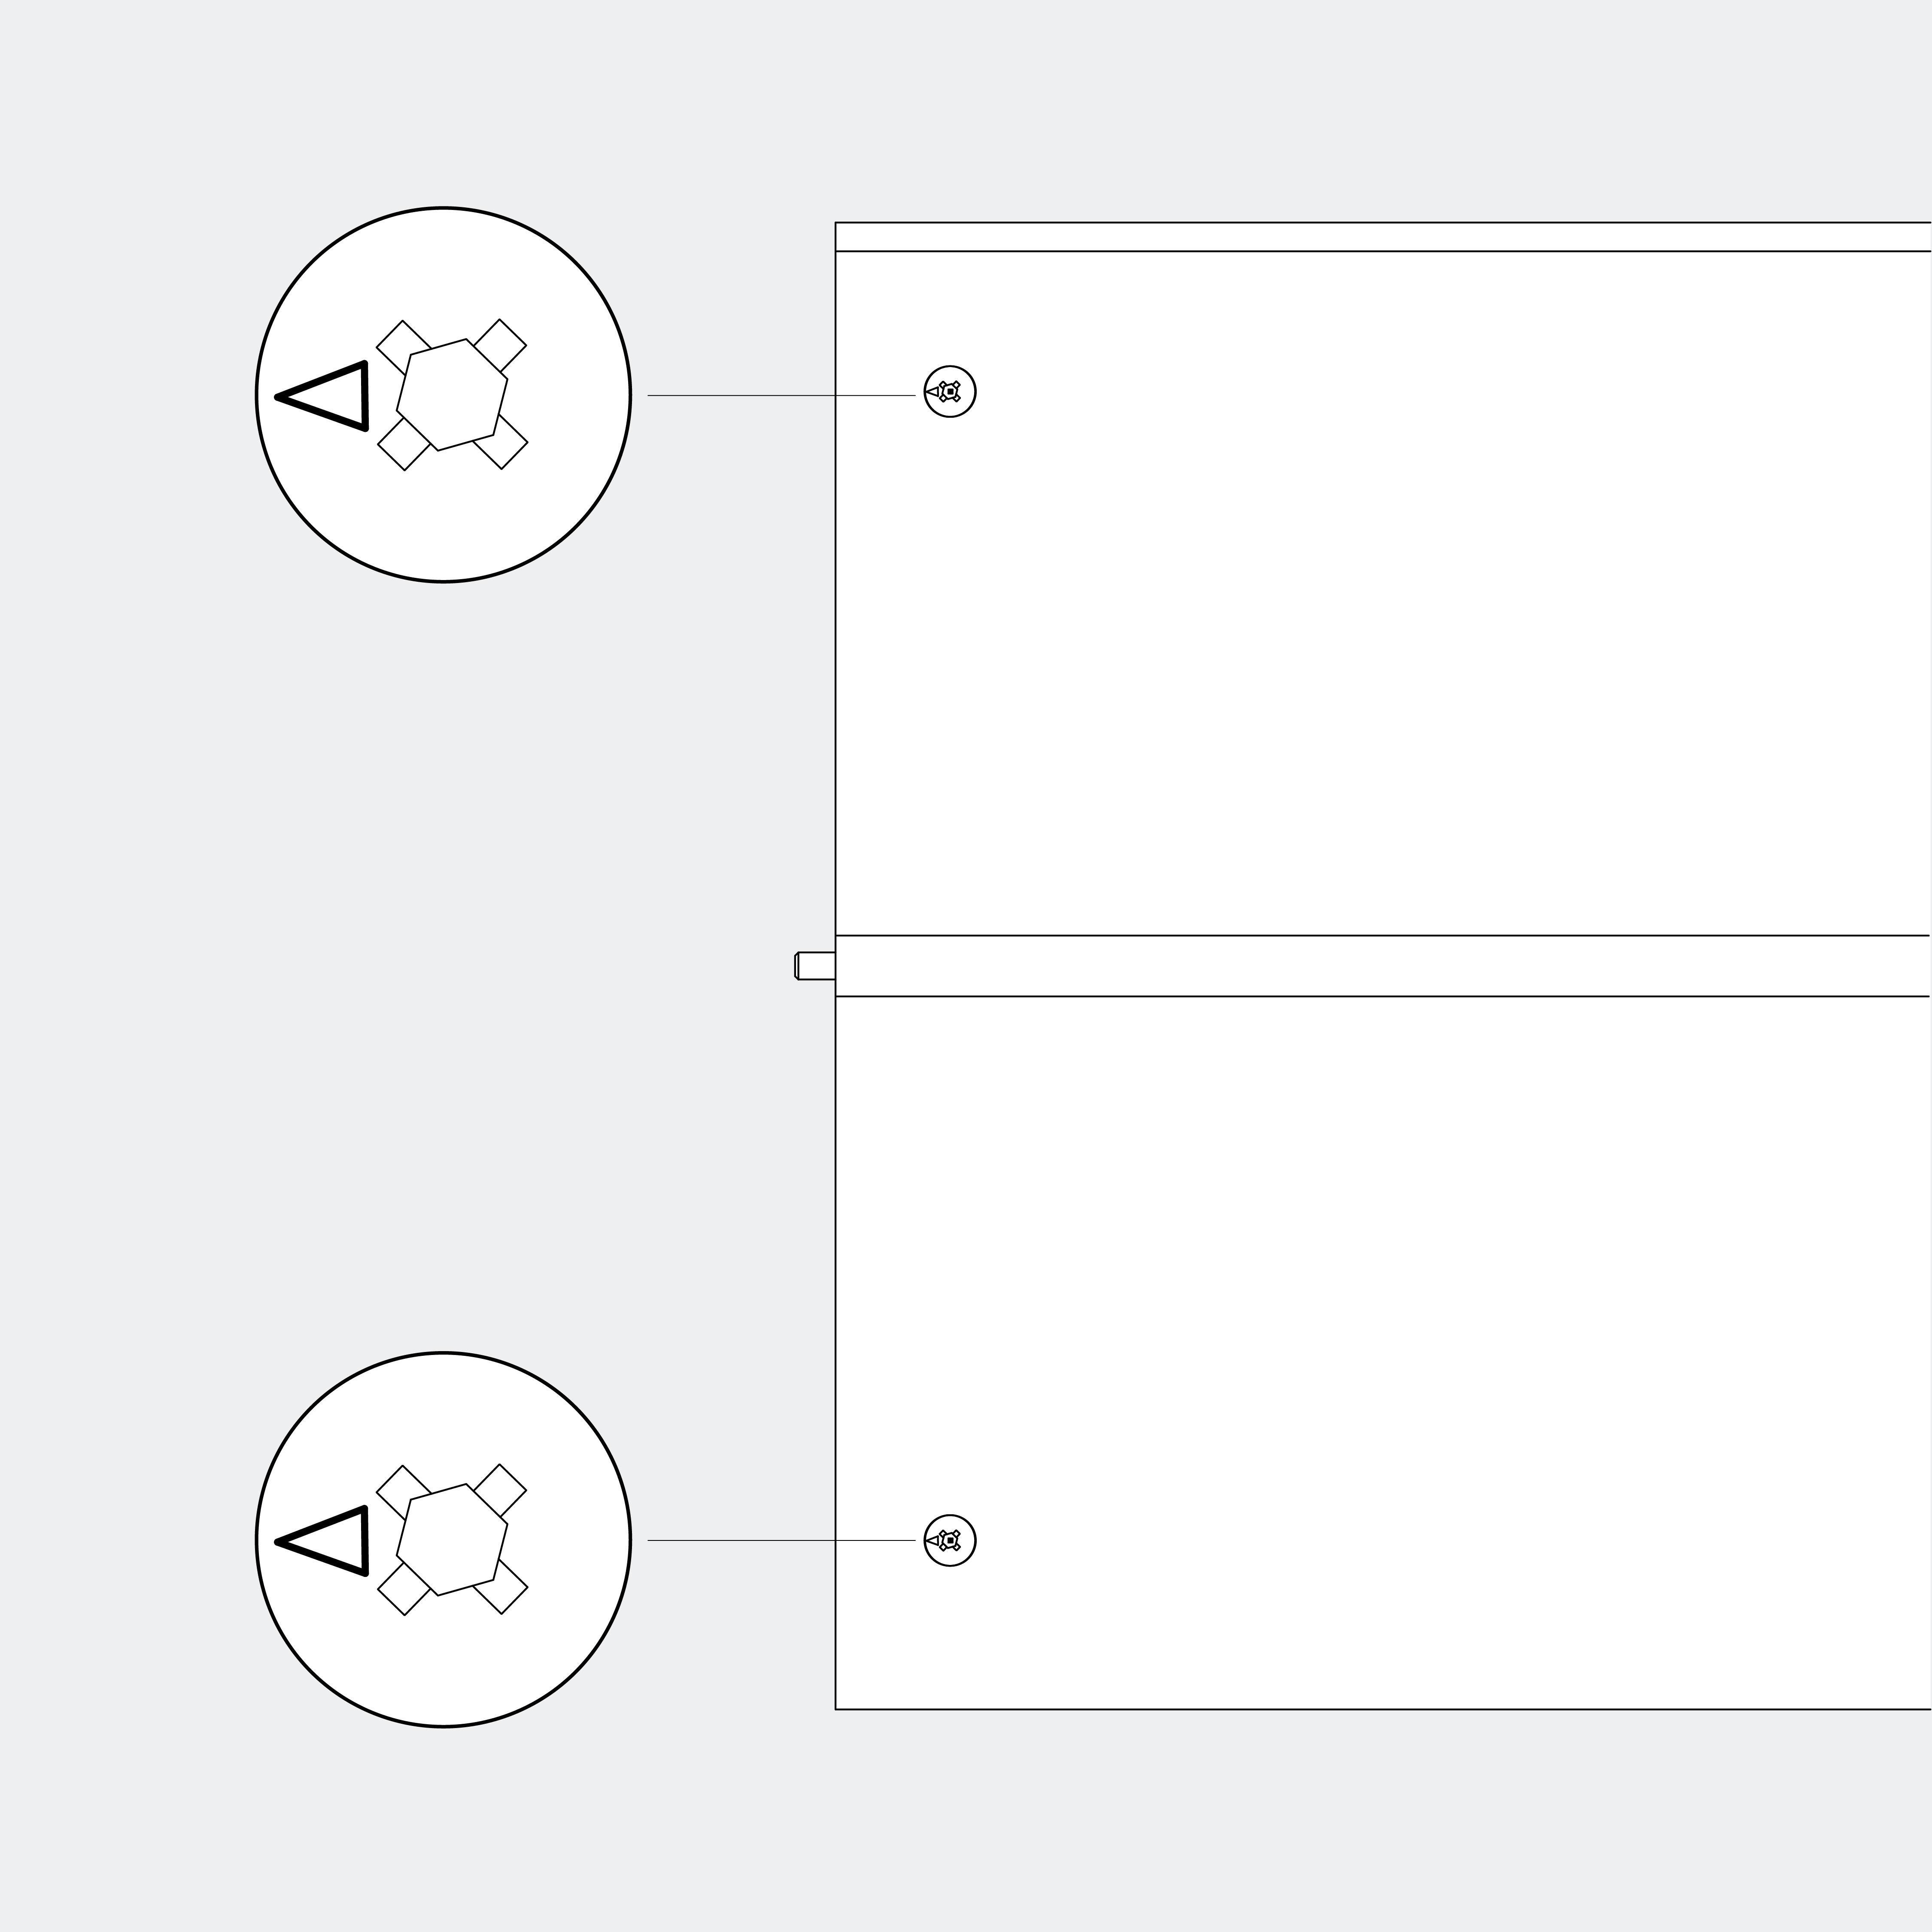
None
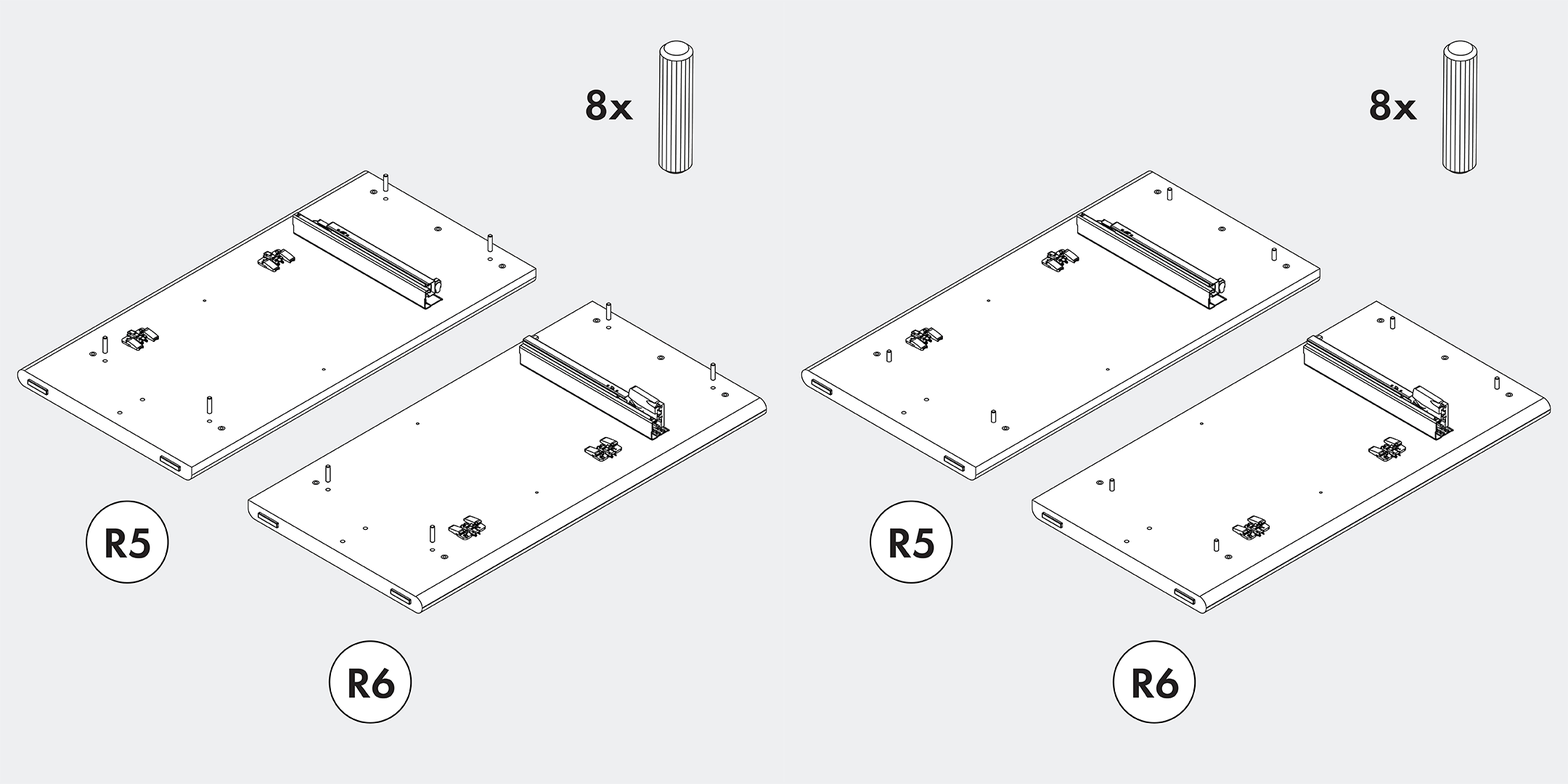
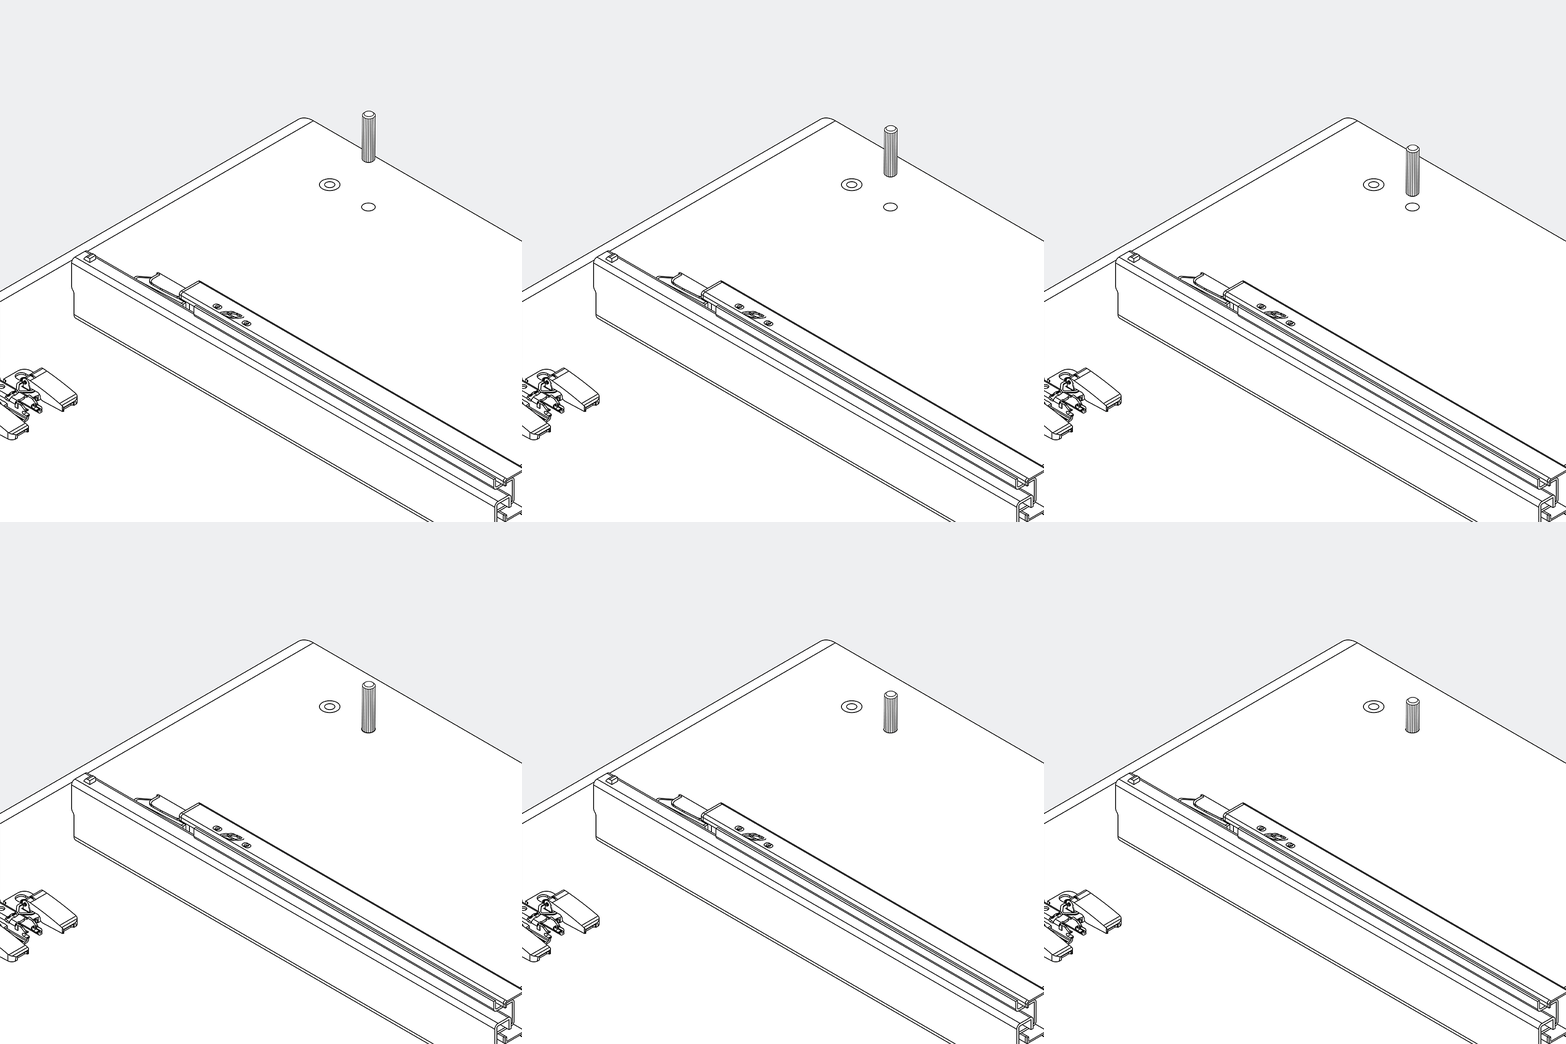
Now prepare R5 and R6: insert 4 wooden dowels into each part.
None
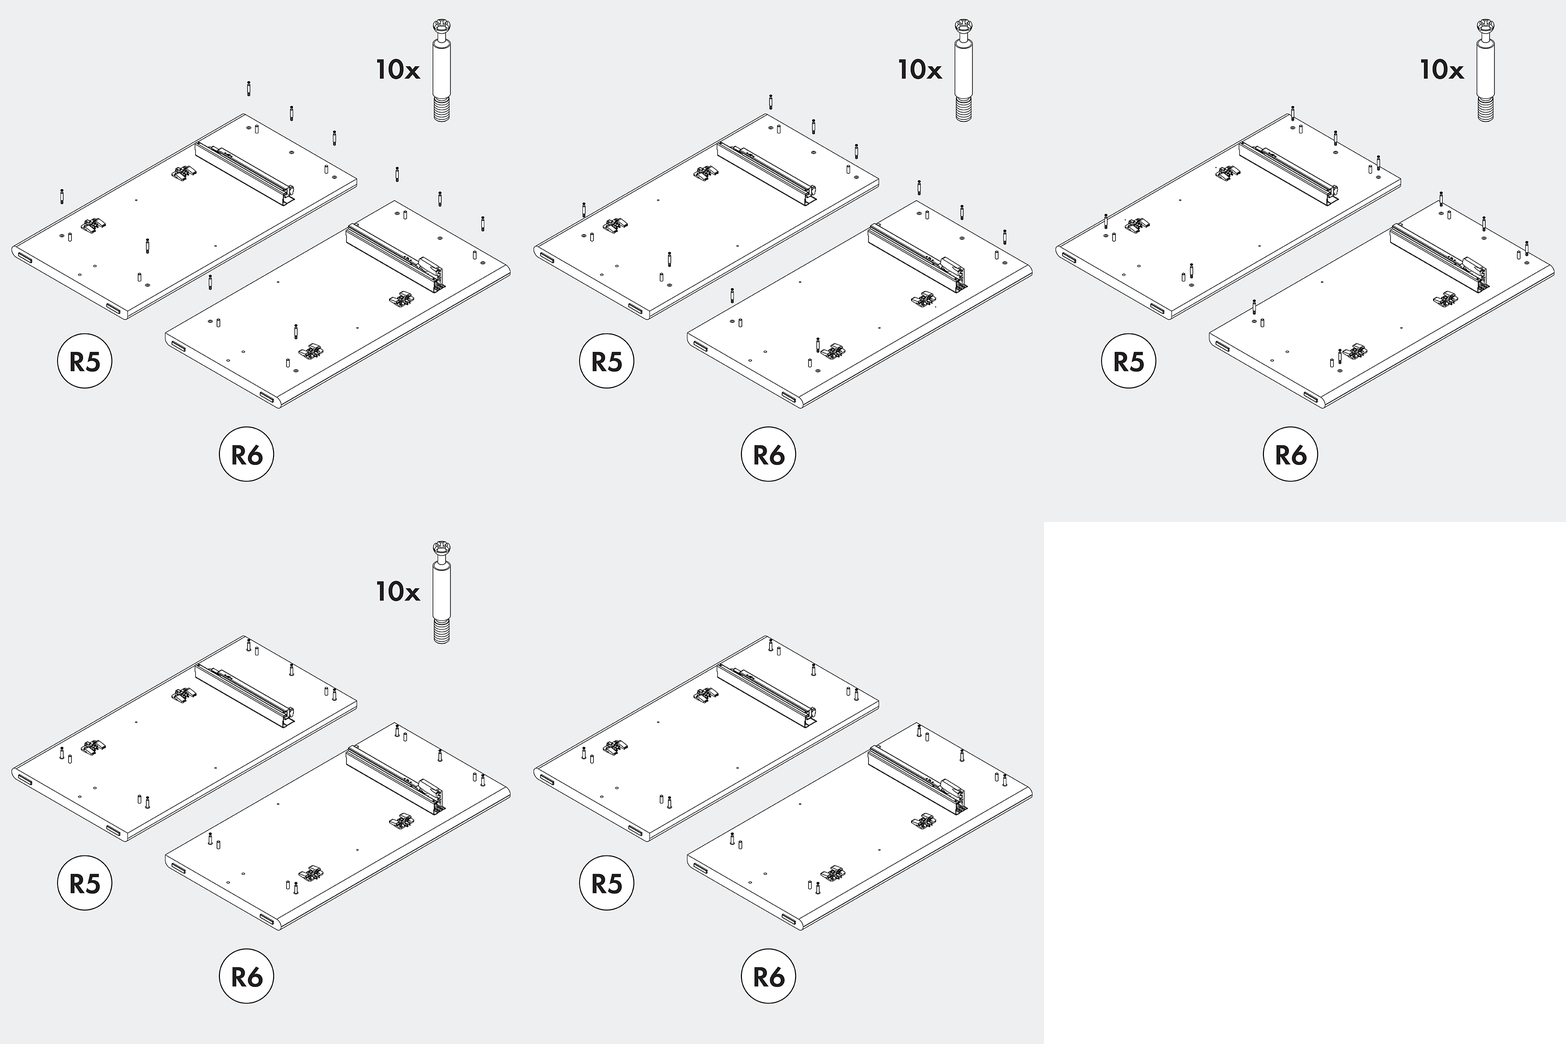
Screw 10 metal cam bolts into both parts.
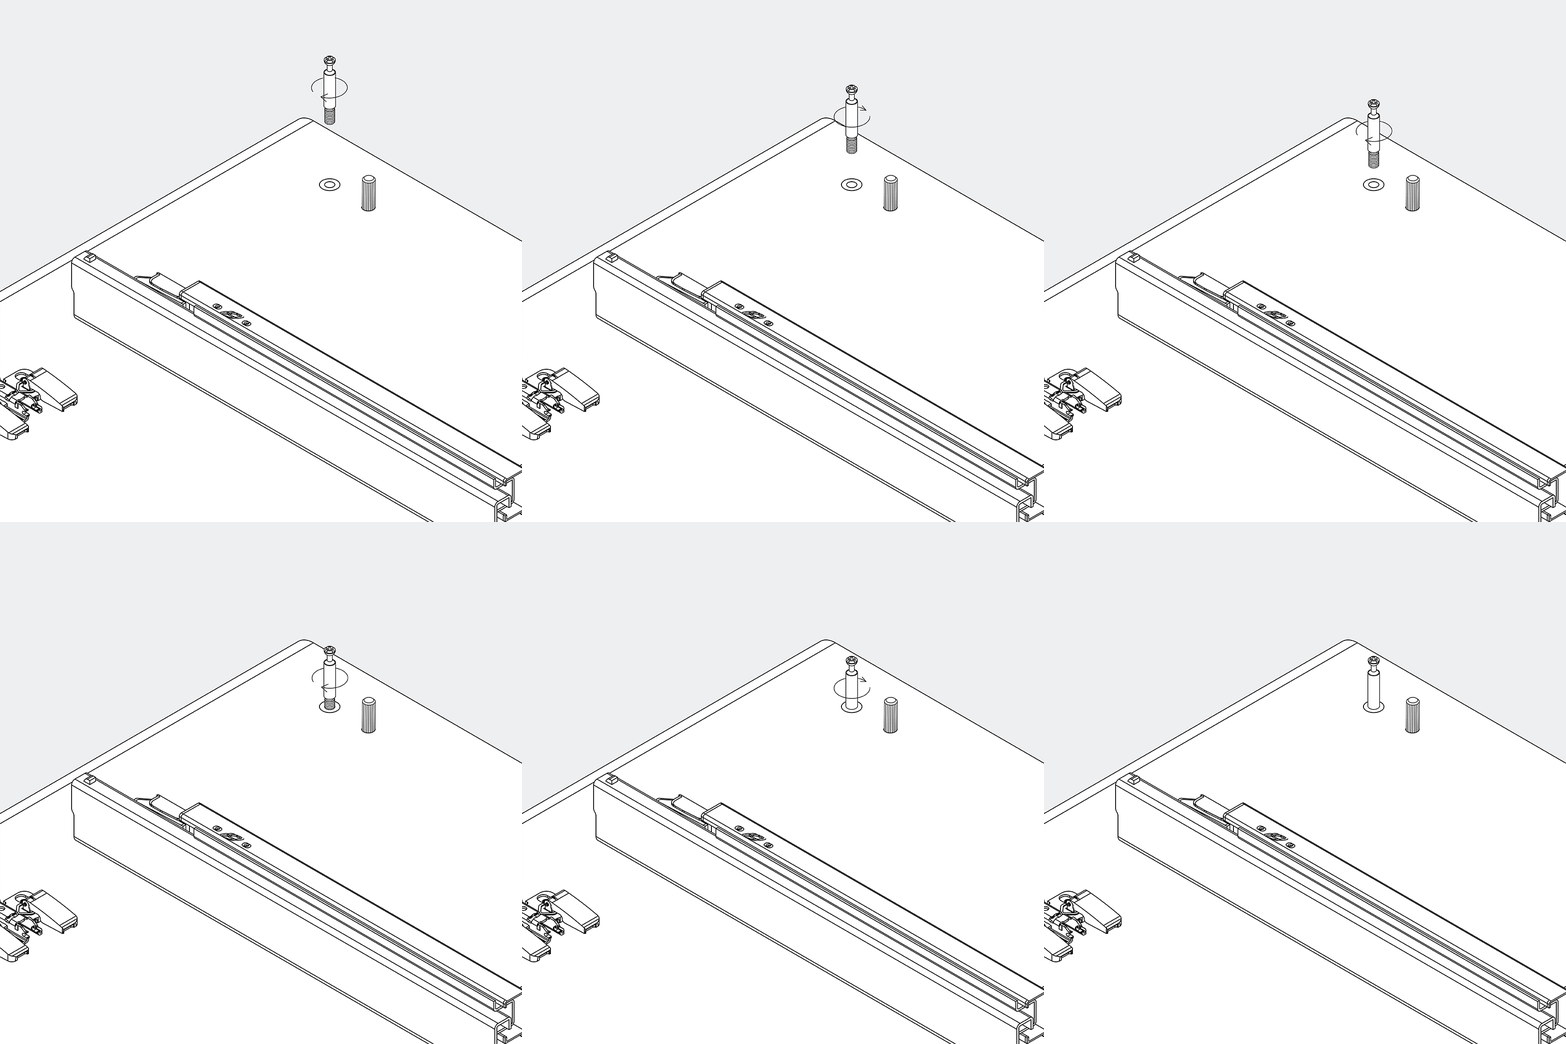
None
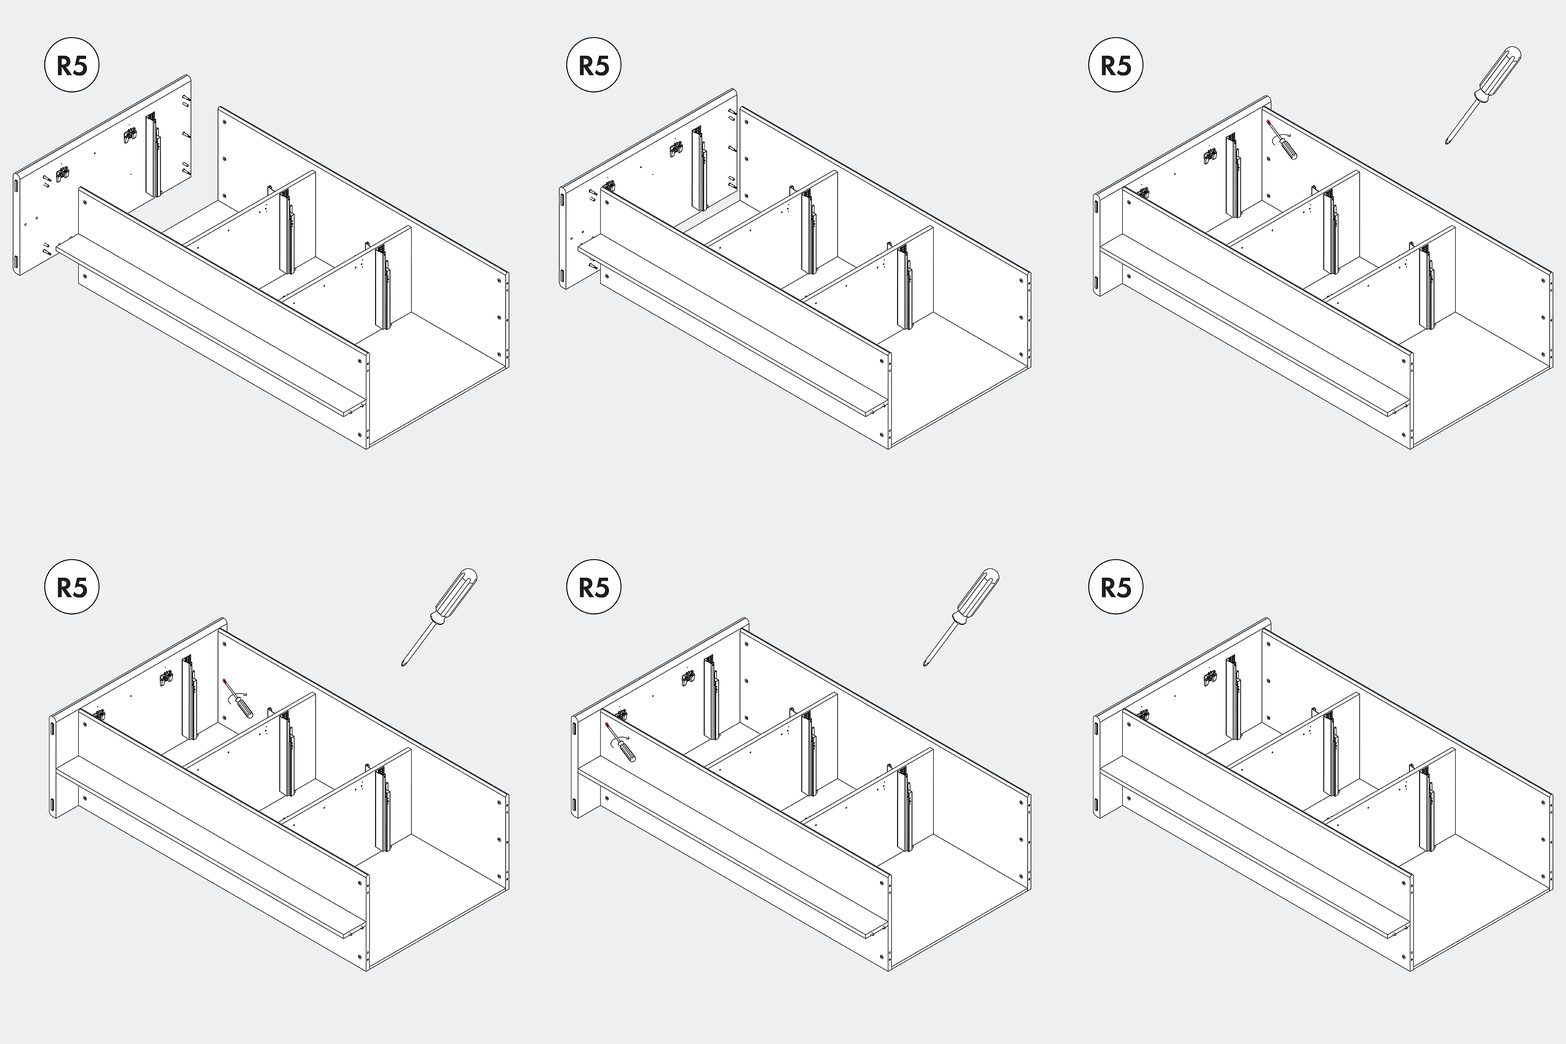
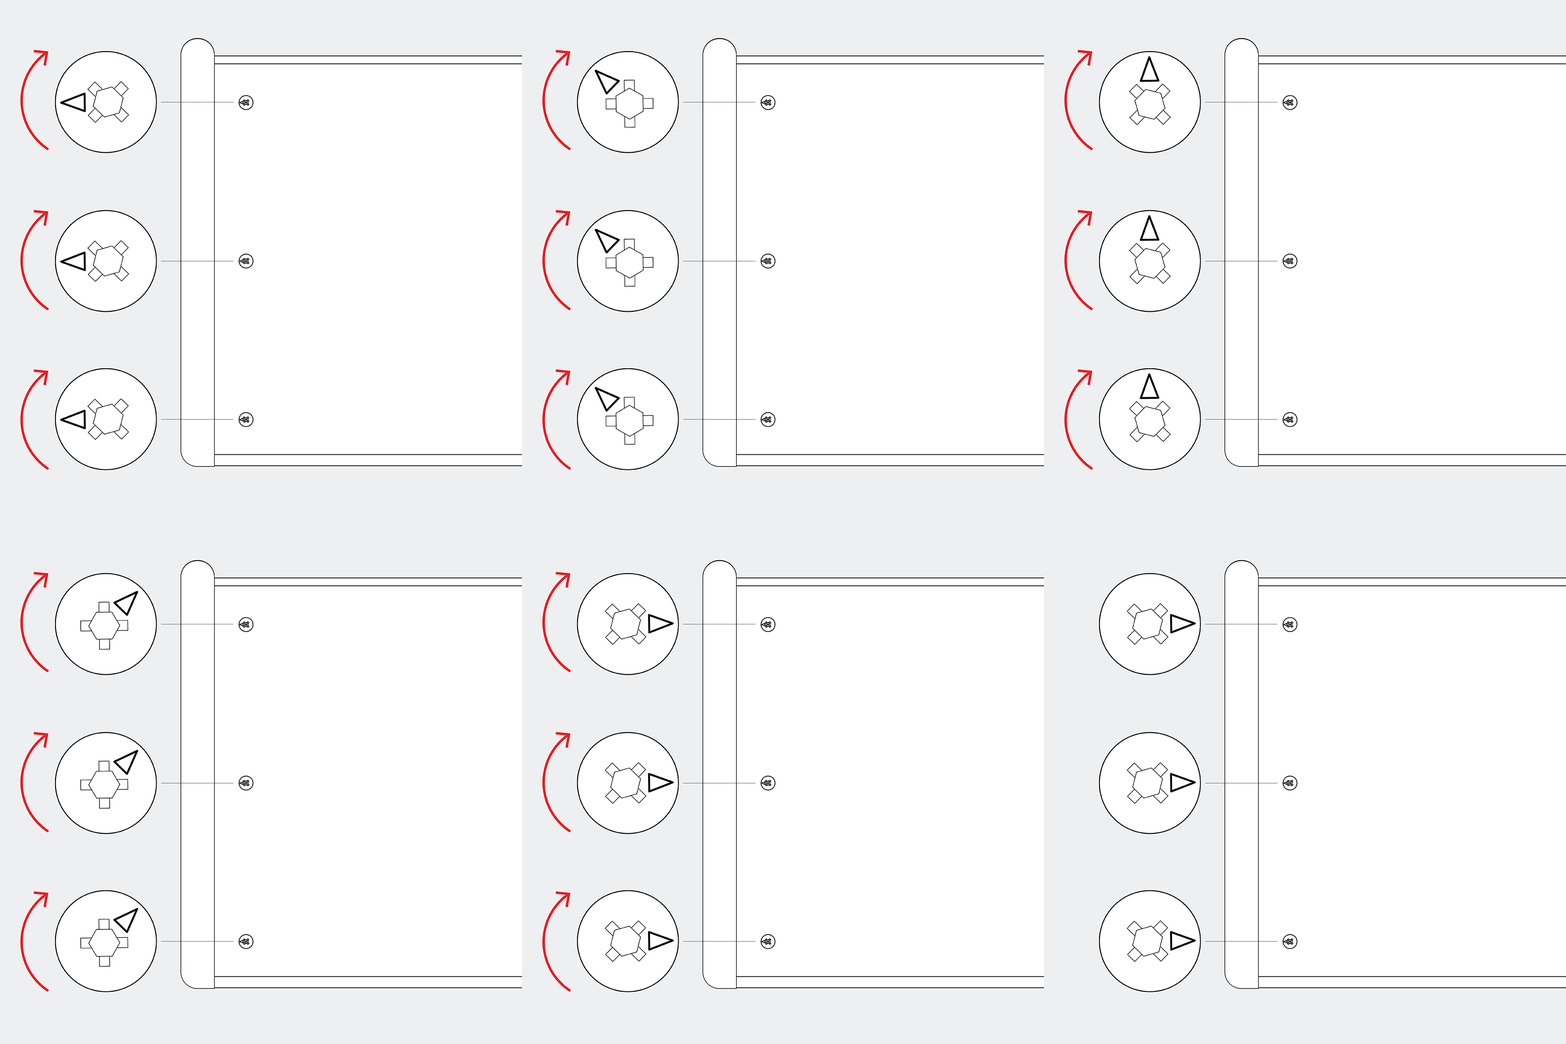
Place R5 onto the unit and screw the metal cam locks. Turn the metal cam locks by approximately 180°, until you feel resistance.
None
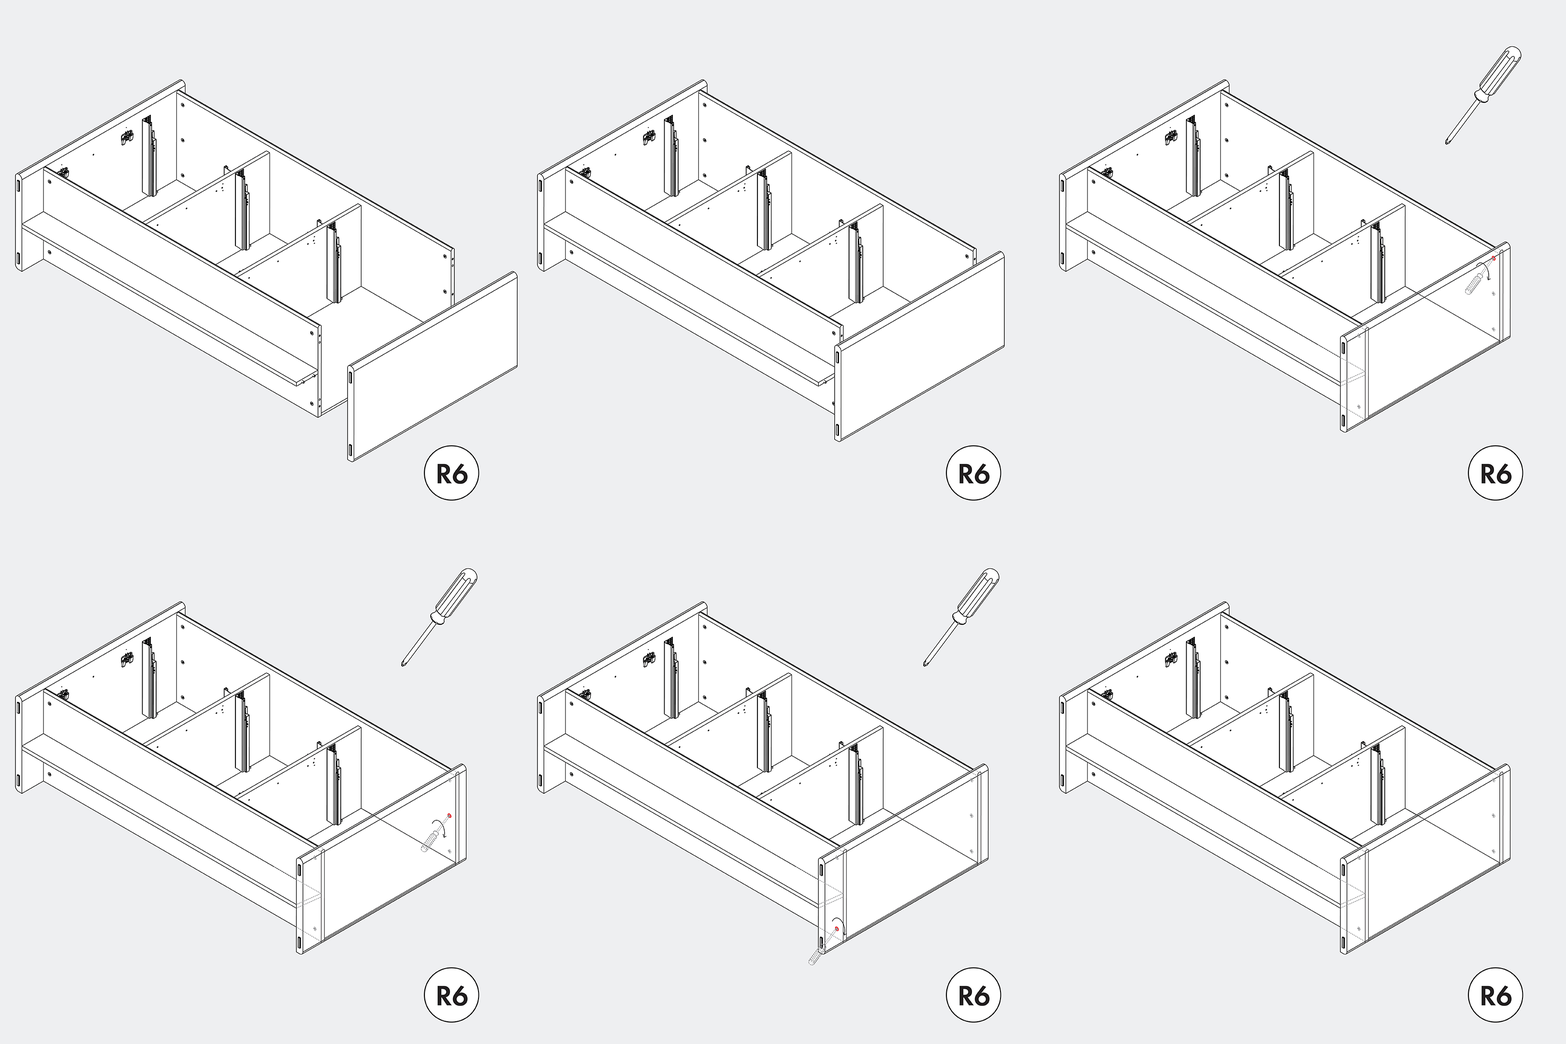
Place R6 onto the unit and screw the metal cam locks. Turn the metal cam locks by approximately 180°, until you feel resistance.
None
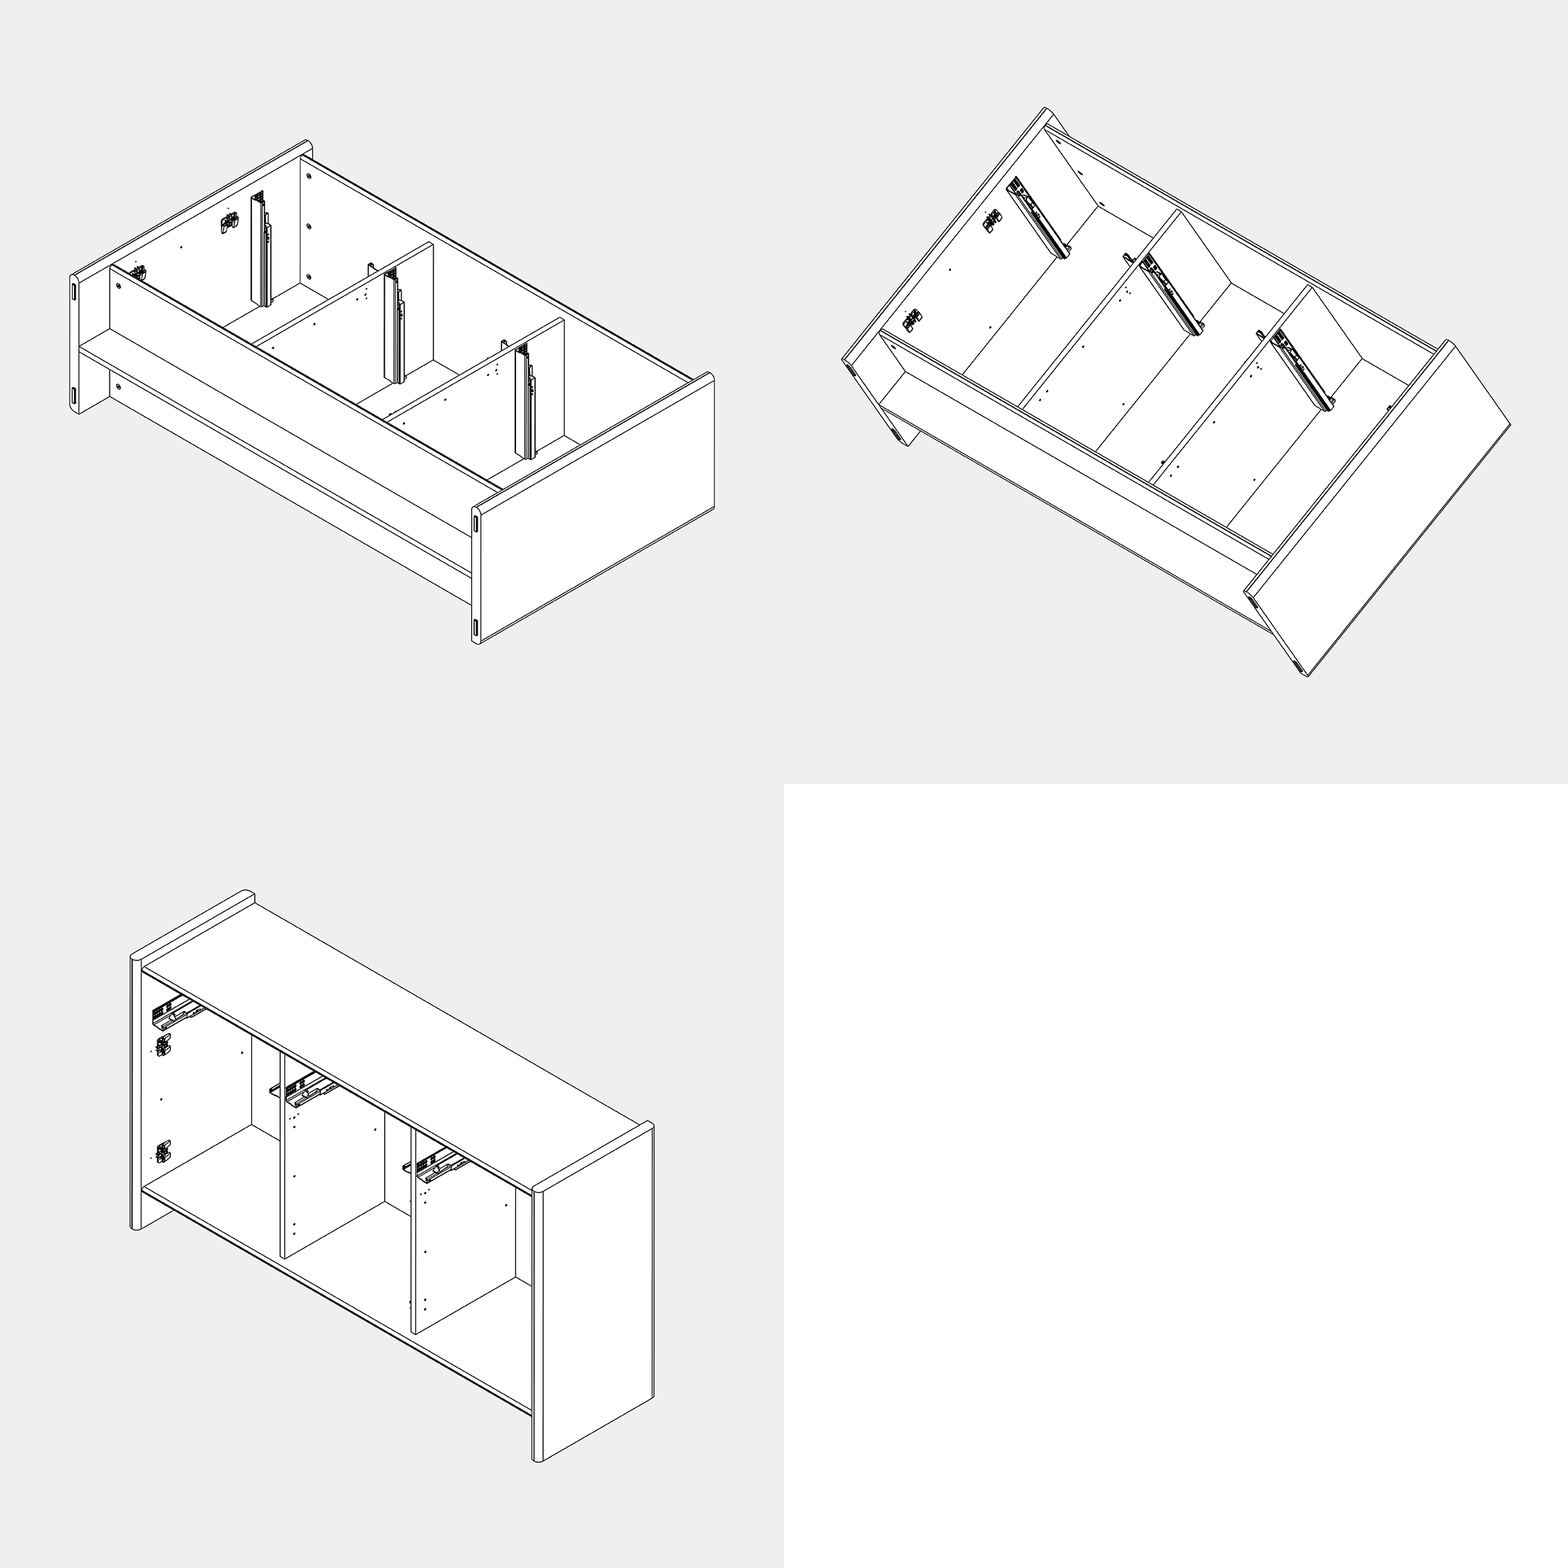
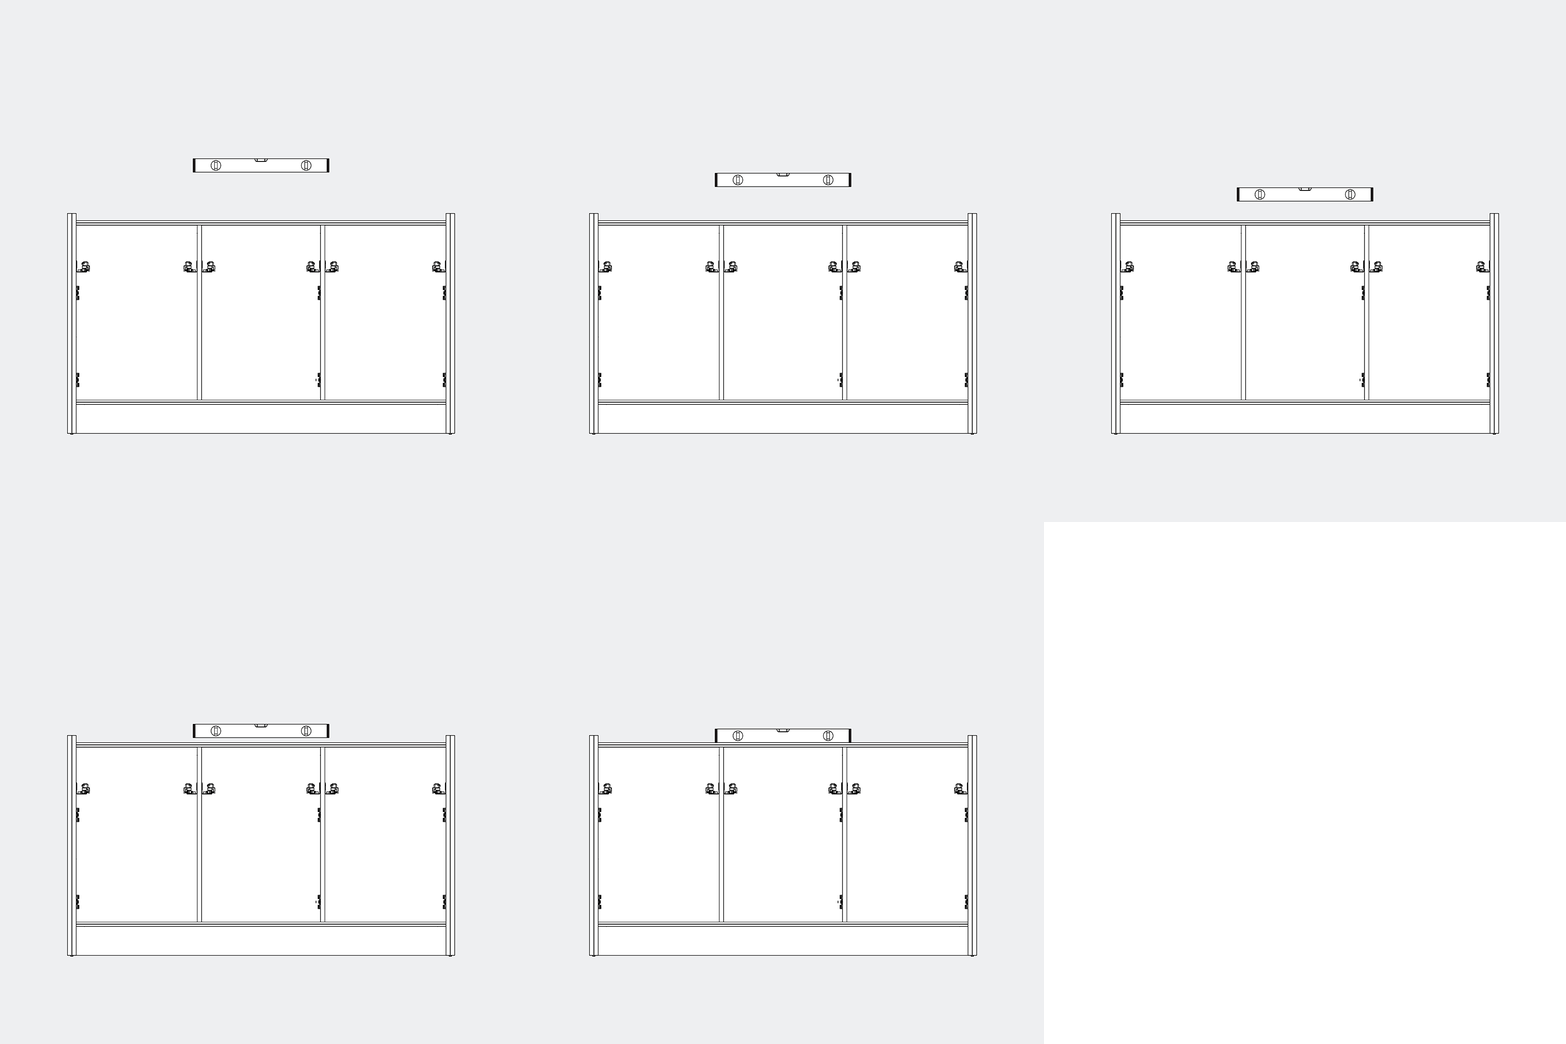
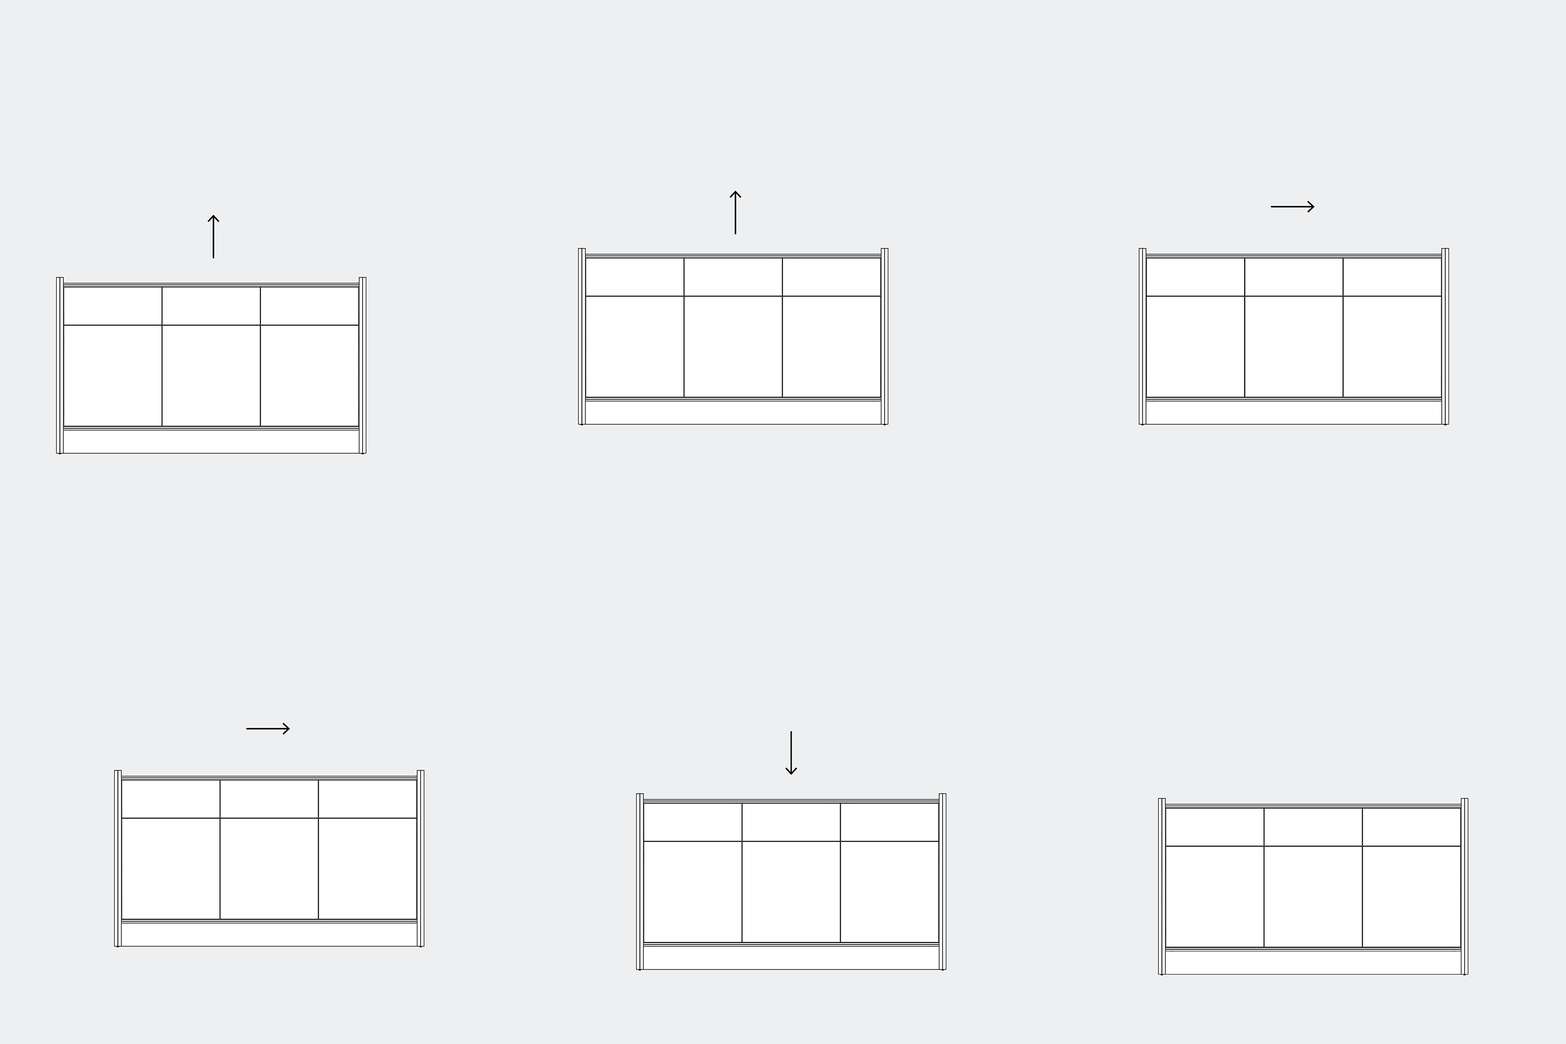
With the help of the other person, carefully lift the sideboard into an upright position. Do not pivot it on its edges, as this may cause damage. Before installing the doors and drawers, make sure the sideboard is already positioned in its final location. Use a spirit level to check that it is perfectly level, as this will affect the final alignment and adjustment of the fronts.
None
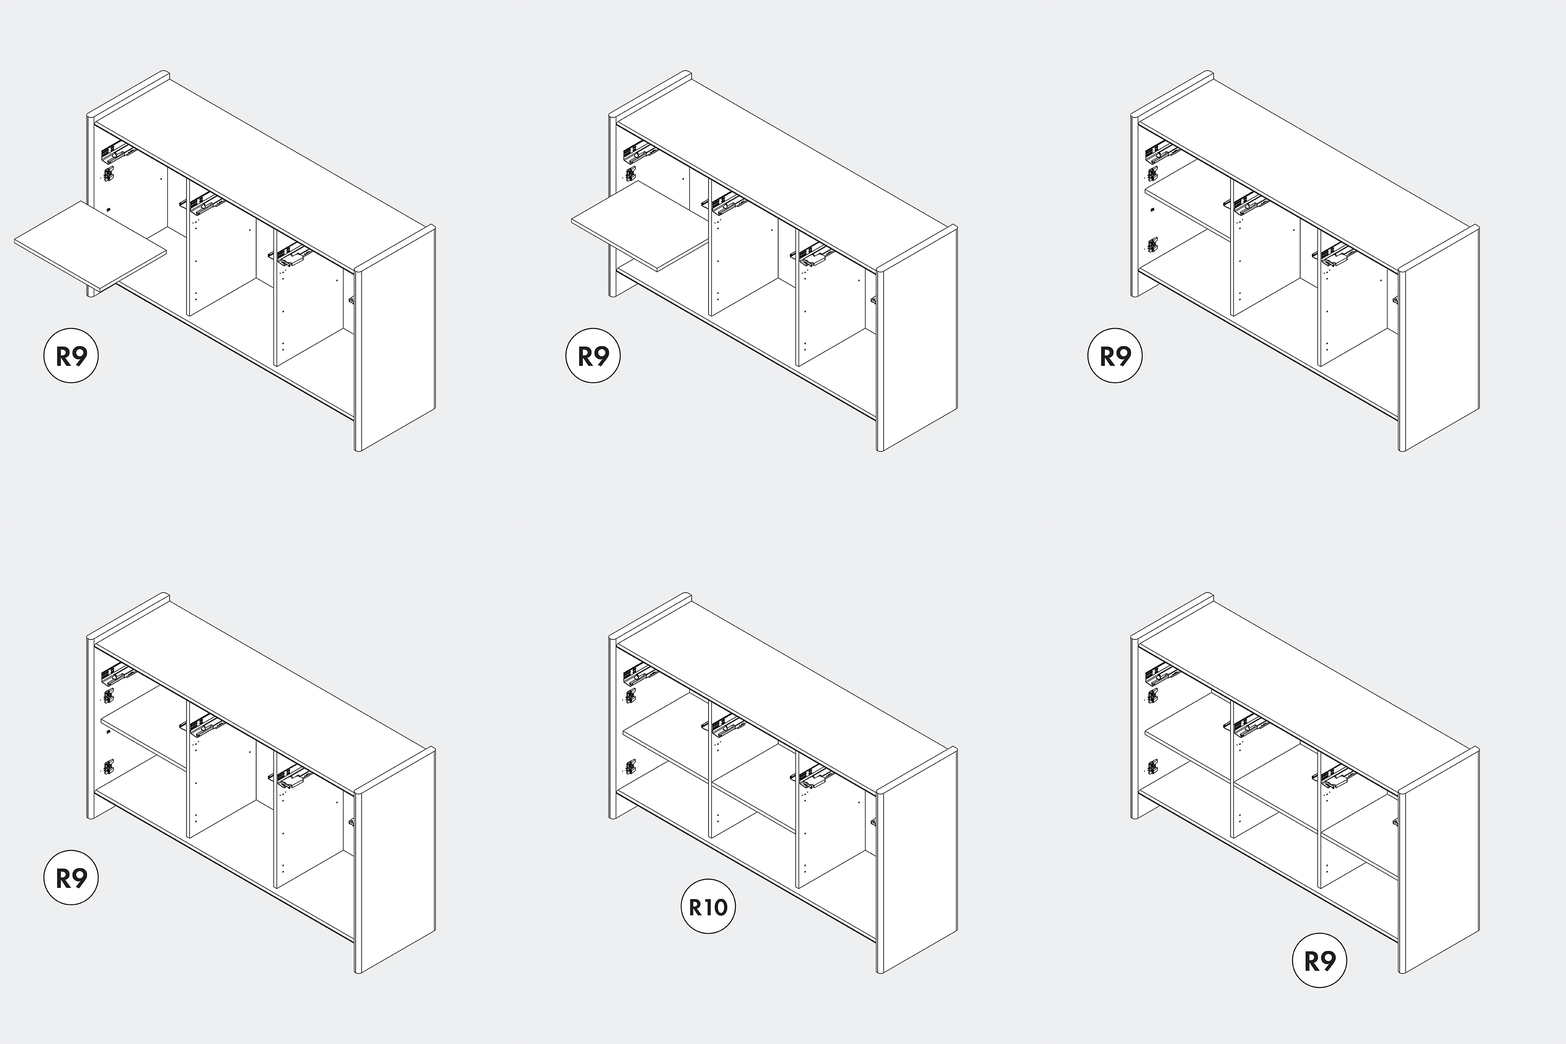
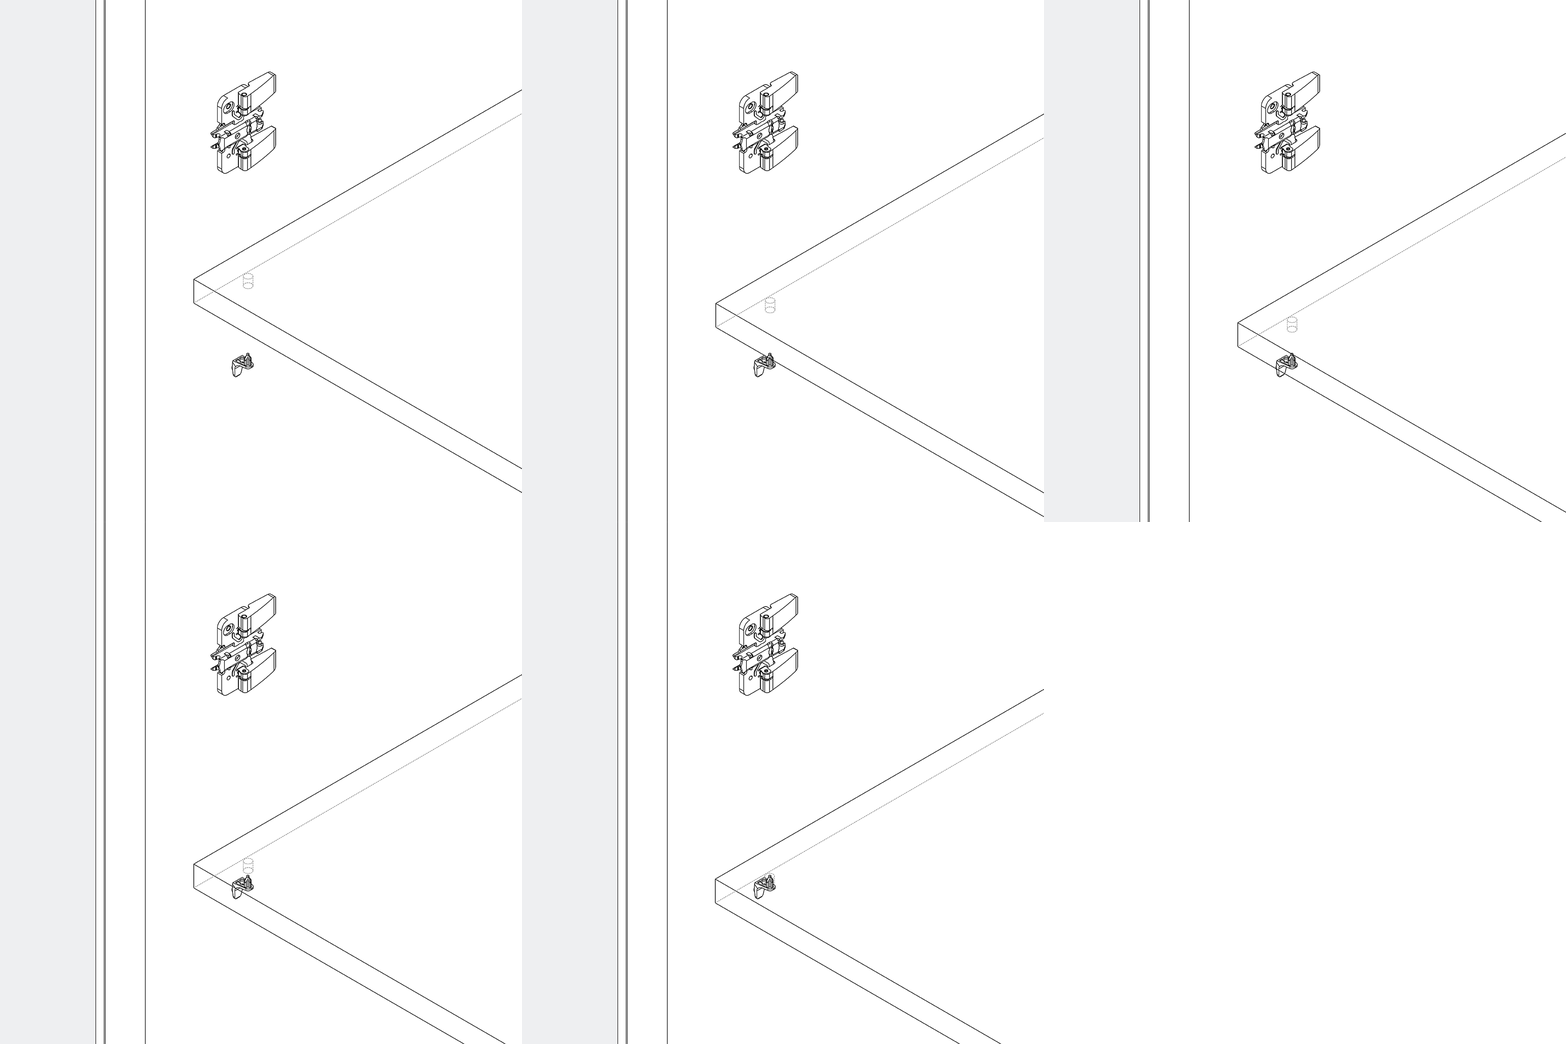
Insert the shelf supports into the side panels, then slide 3 R9 parts into place.
None
Install the hinges on the doors. Please note that the middle door and the side doors require different type of hinges.

None
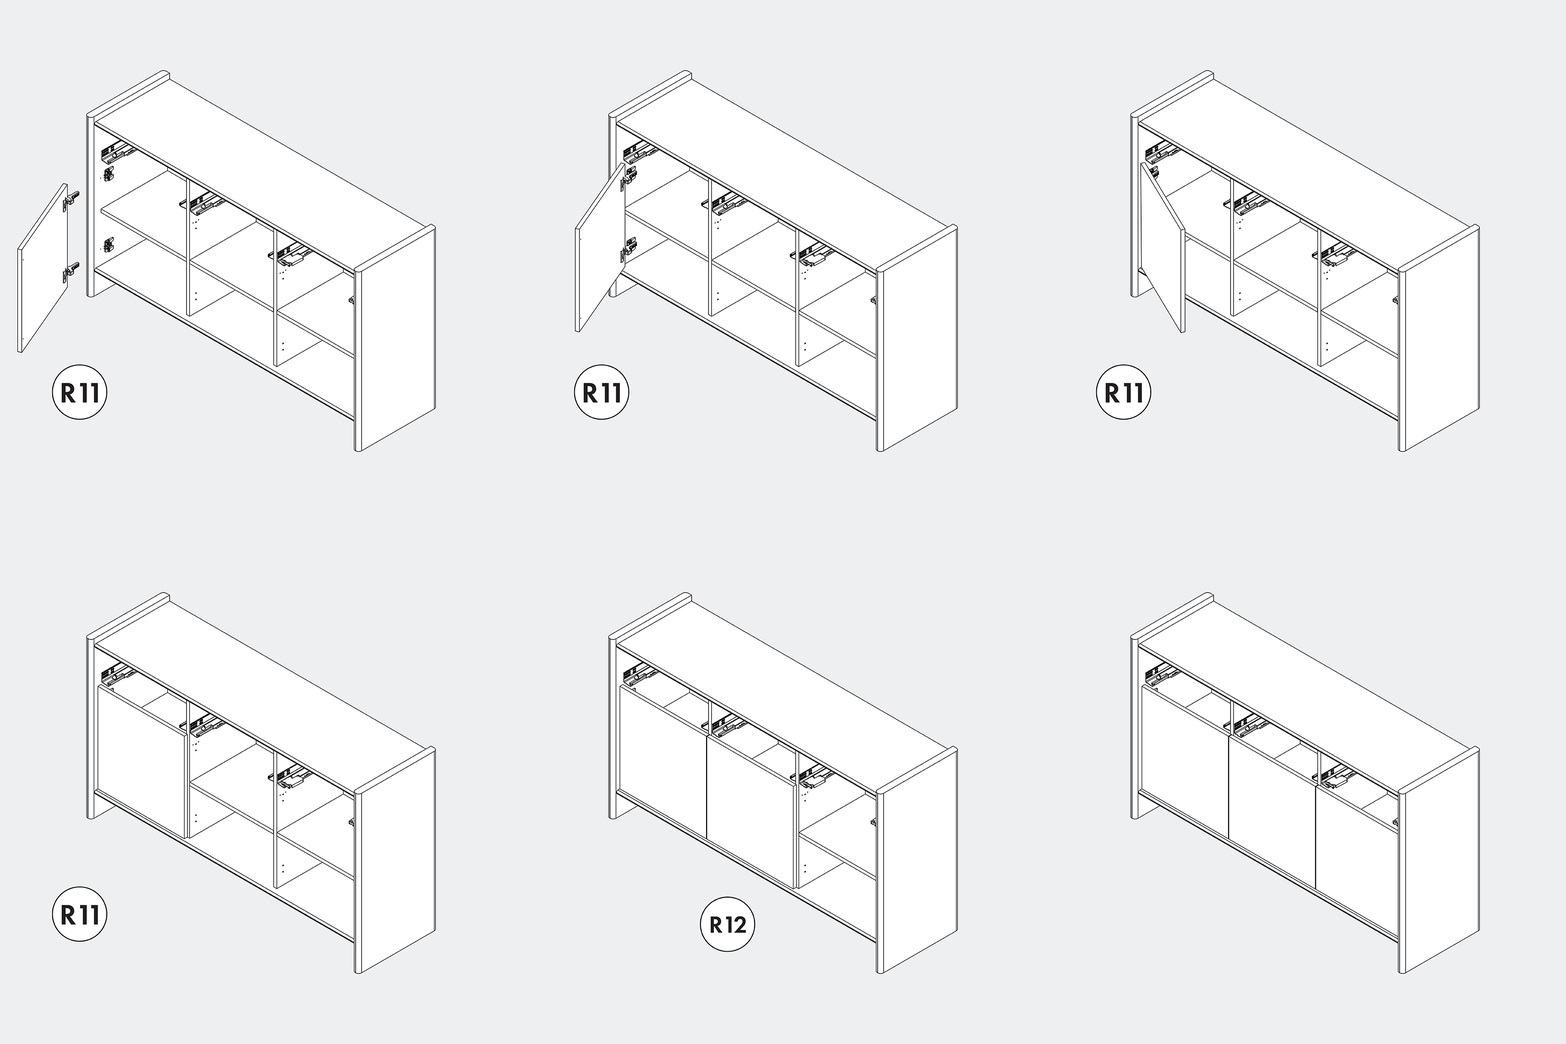
Install R11, R12, and R13 as shown in the illustration.

None

Adjust the position and alignment of the doors using a screwdriver.
None
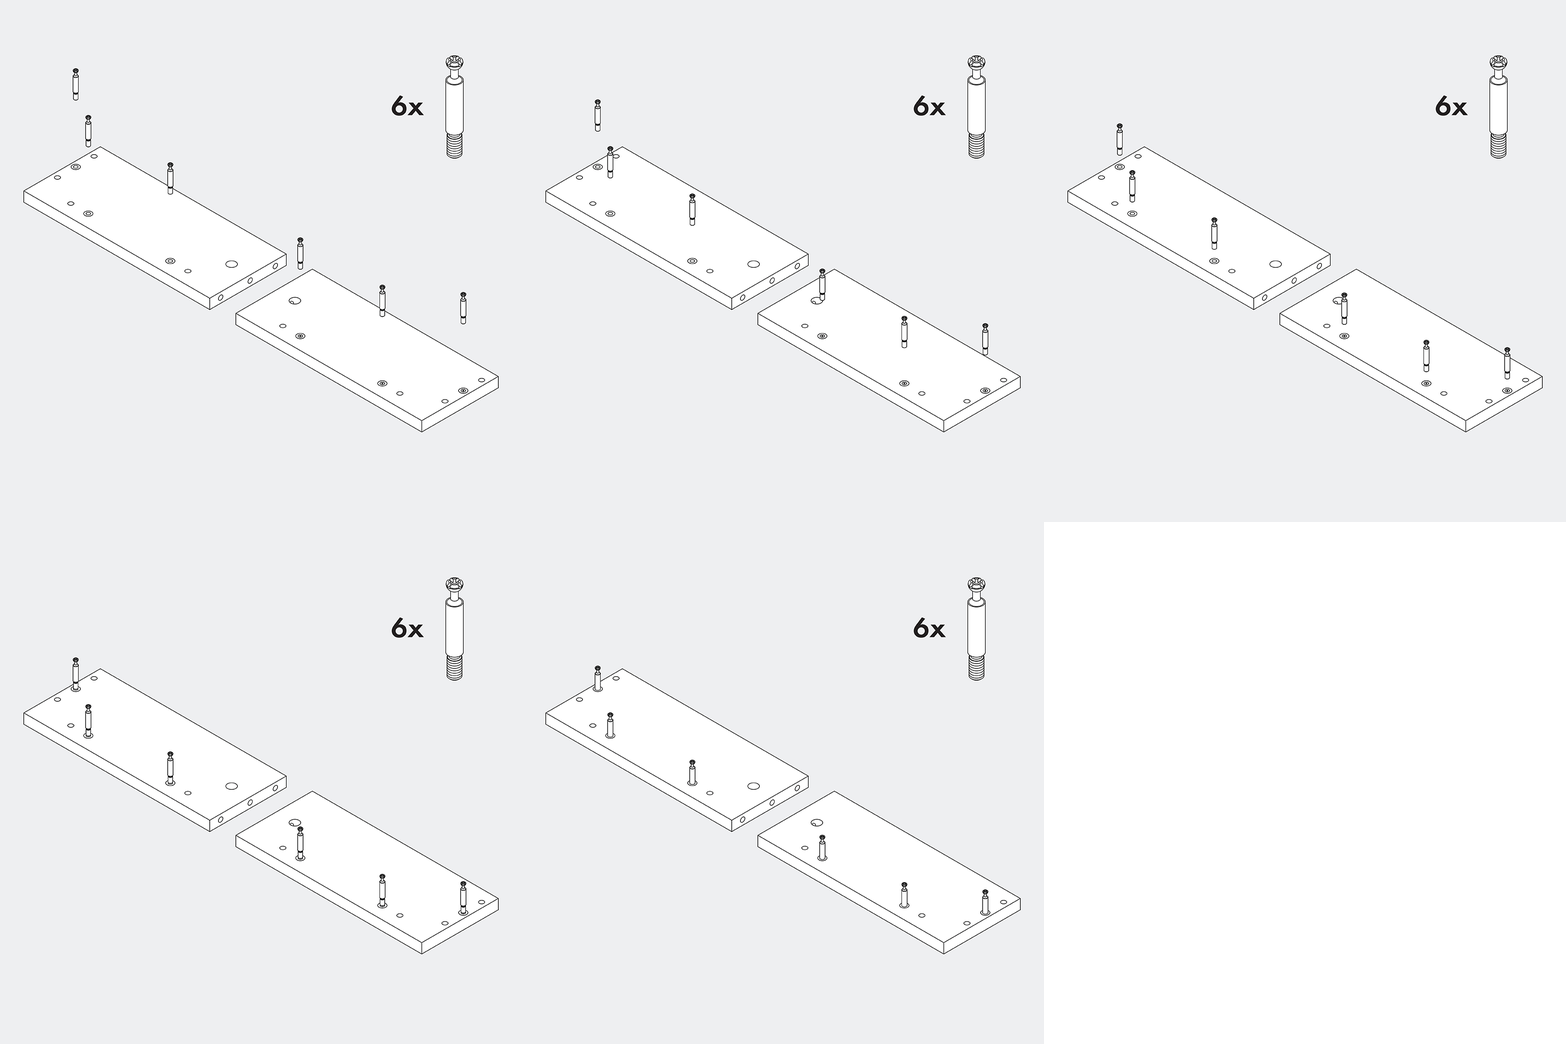
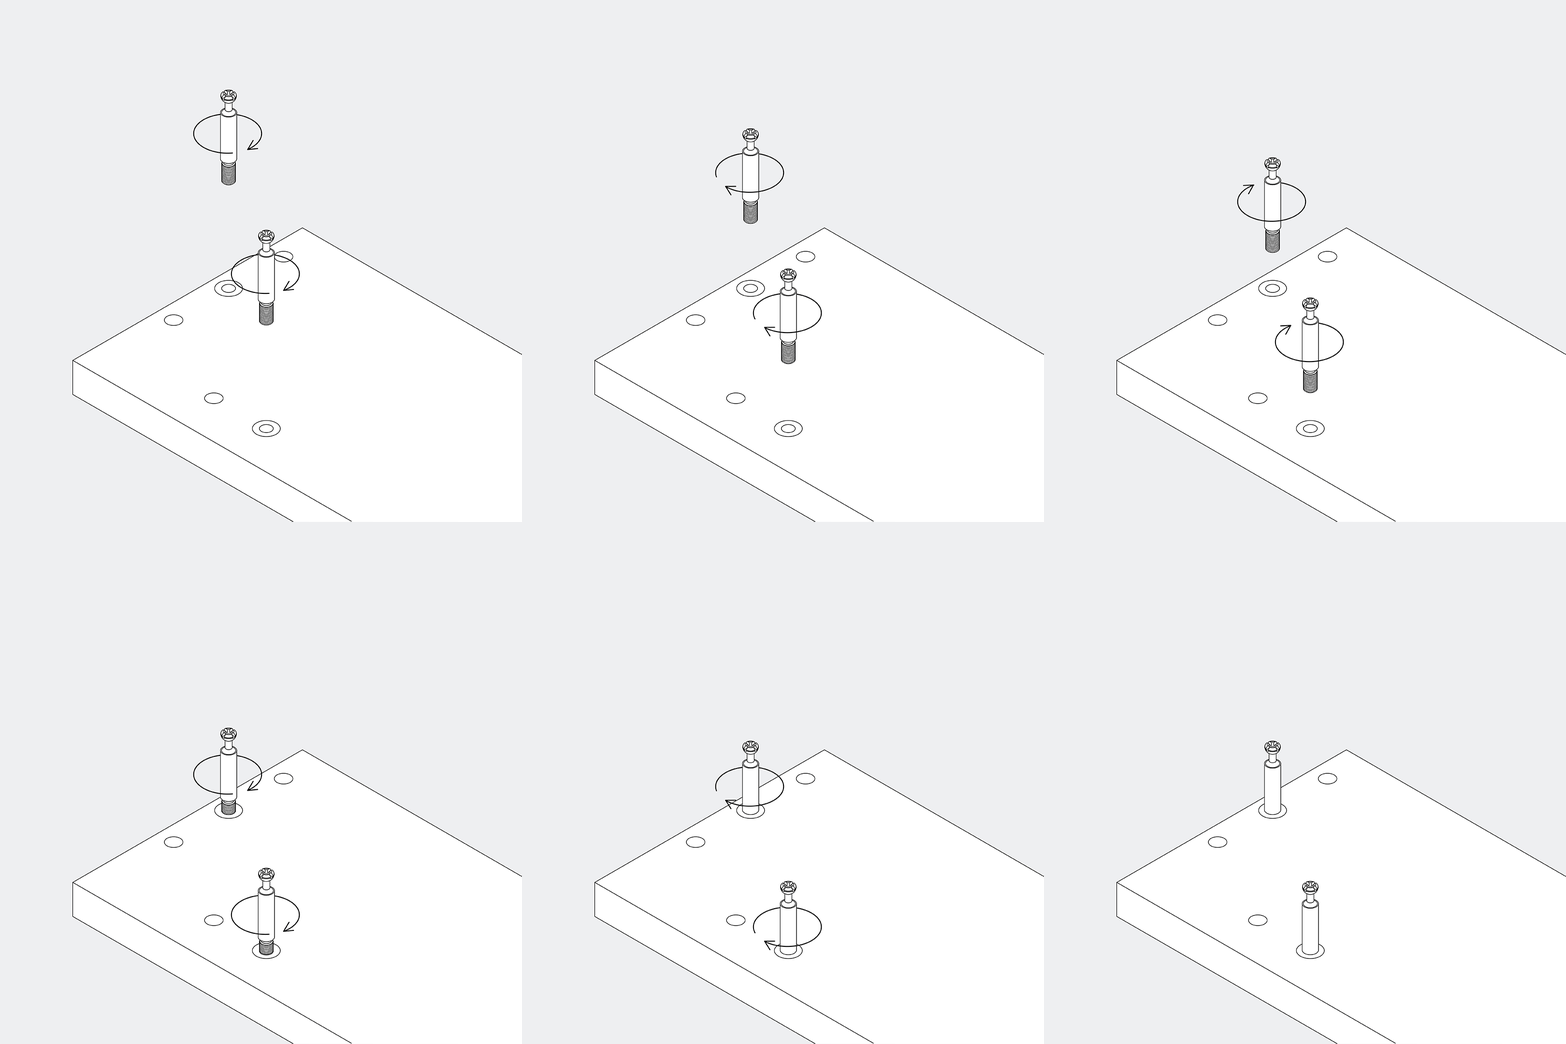
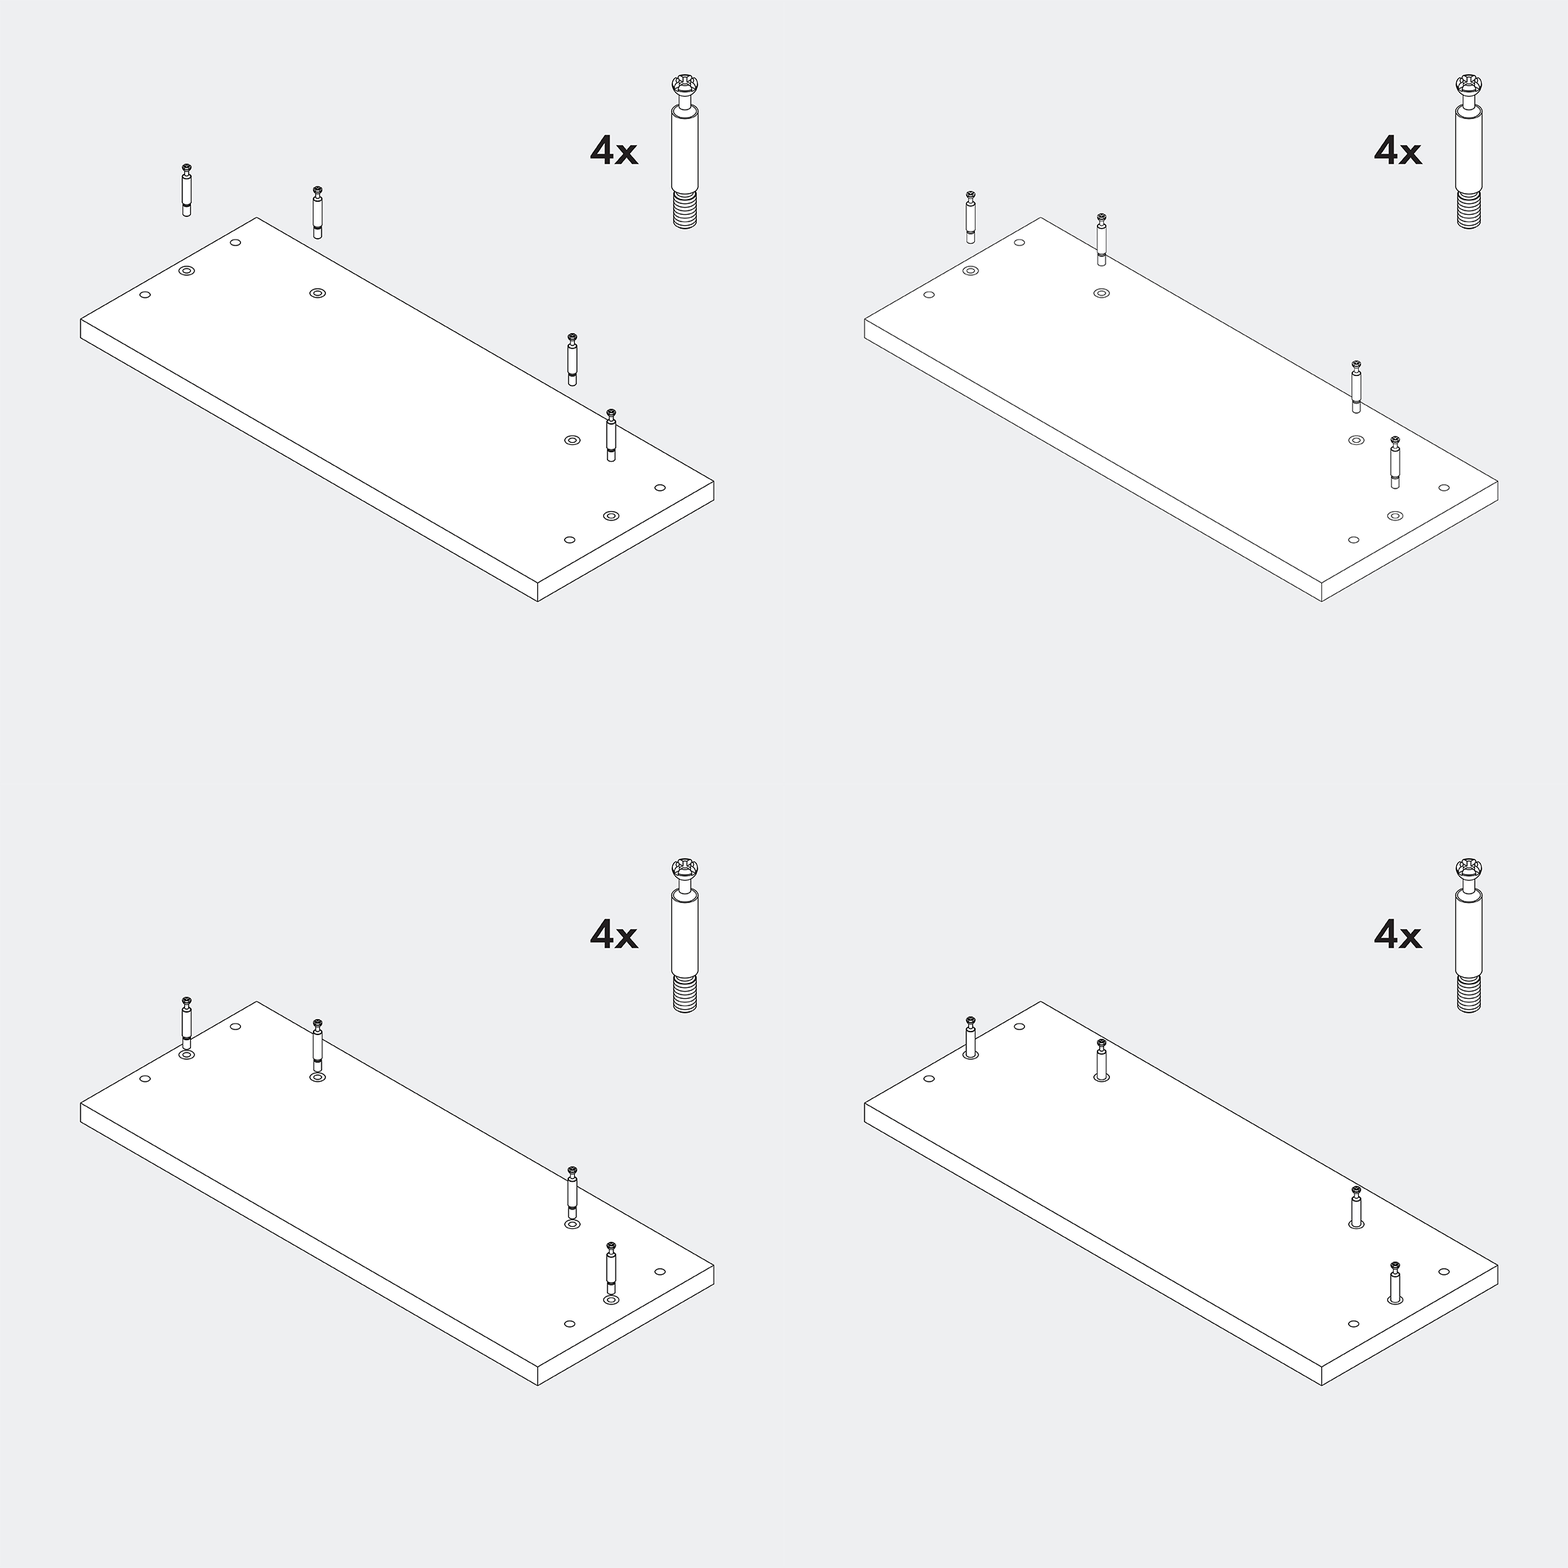
Now assemble the drawers. Screw 6 metal cam bolts into the drawer side panels.
None
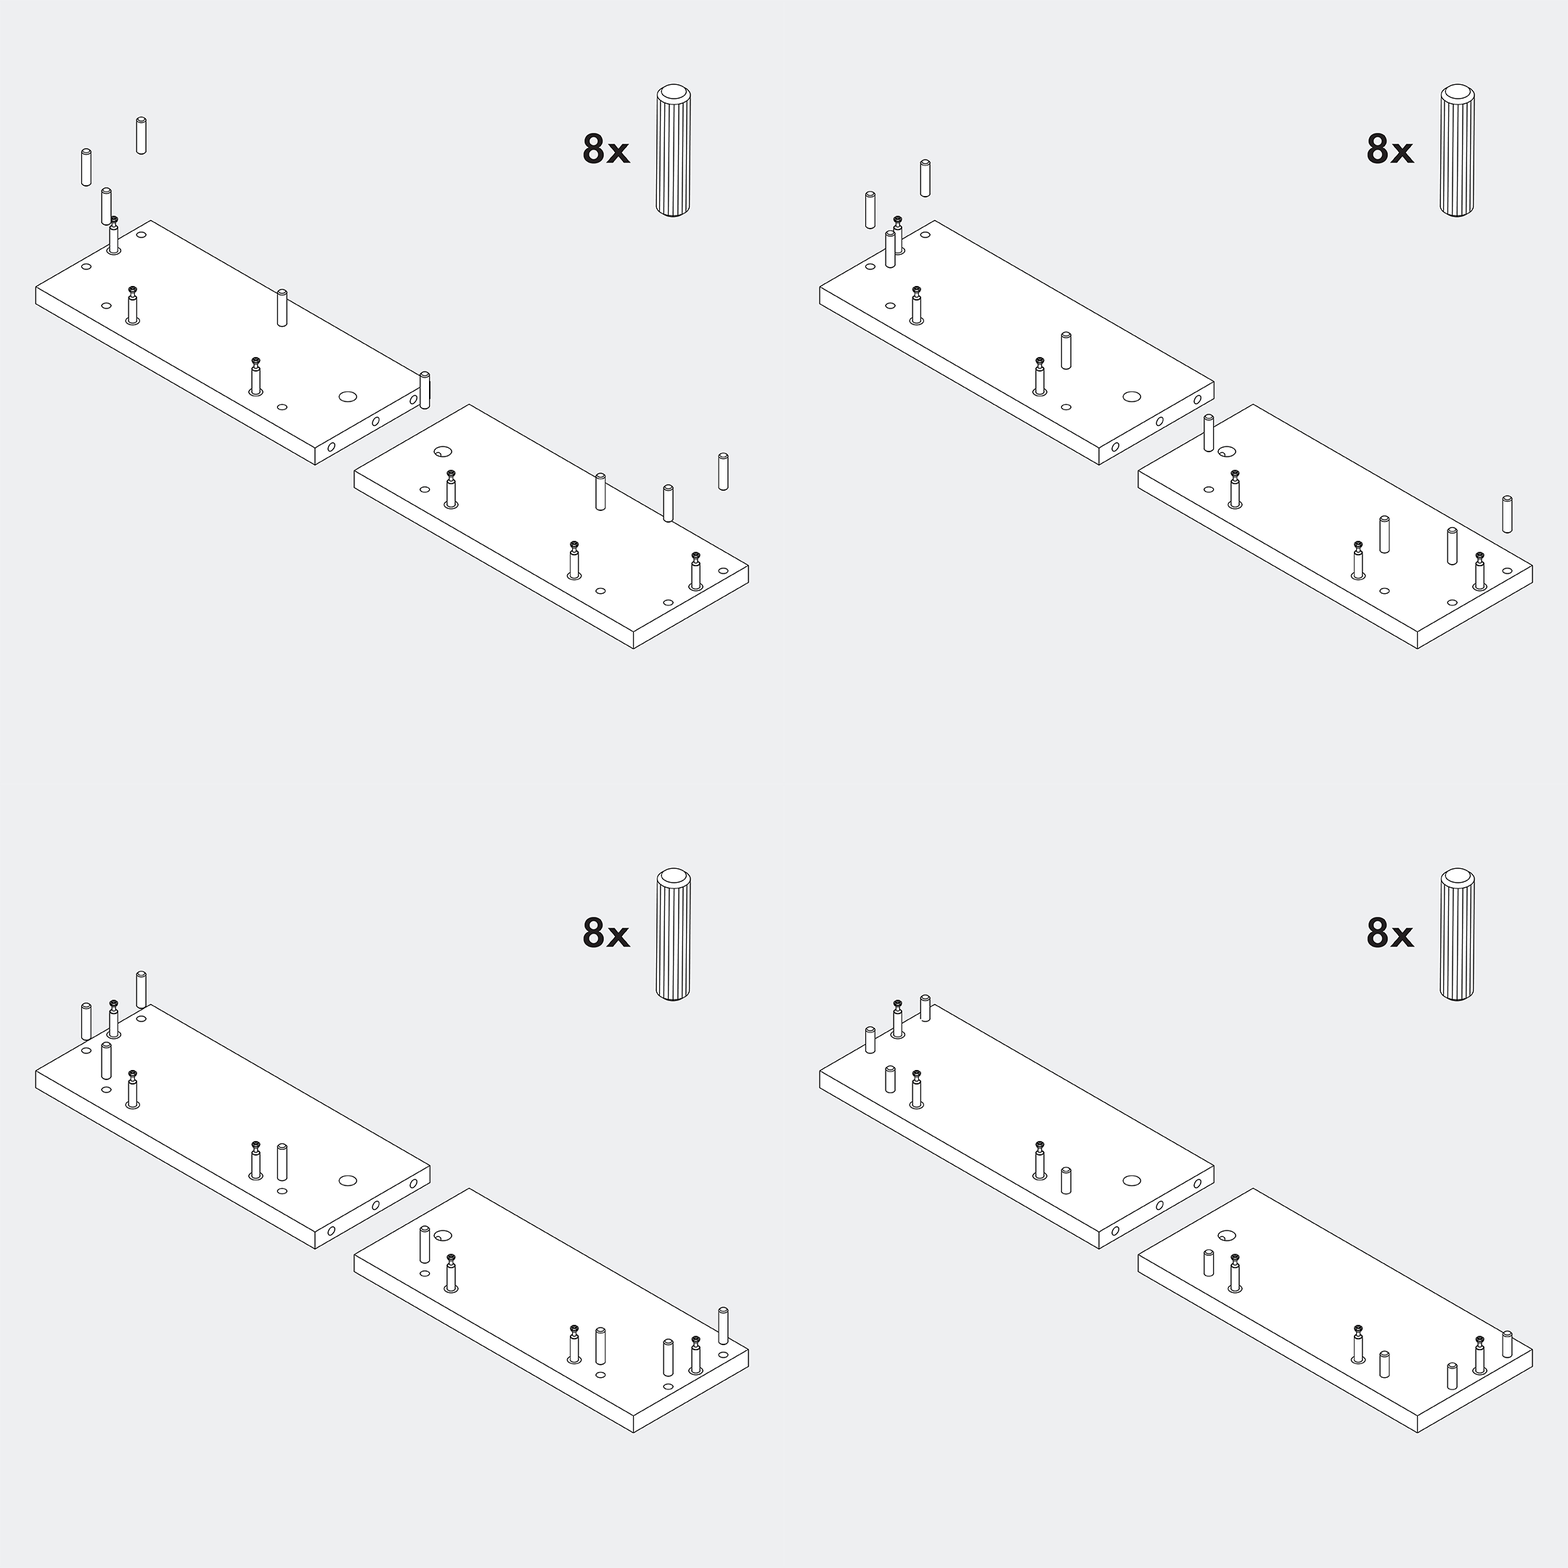
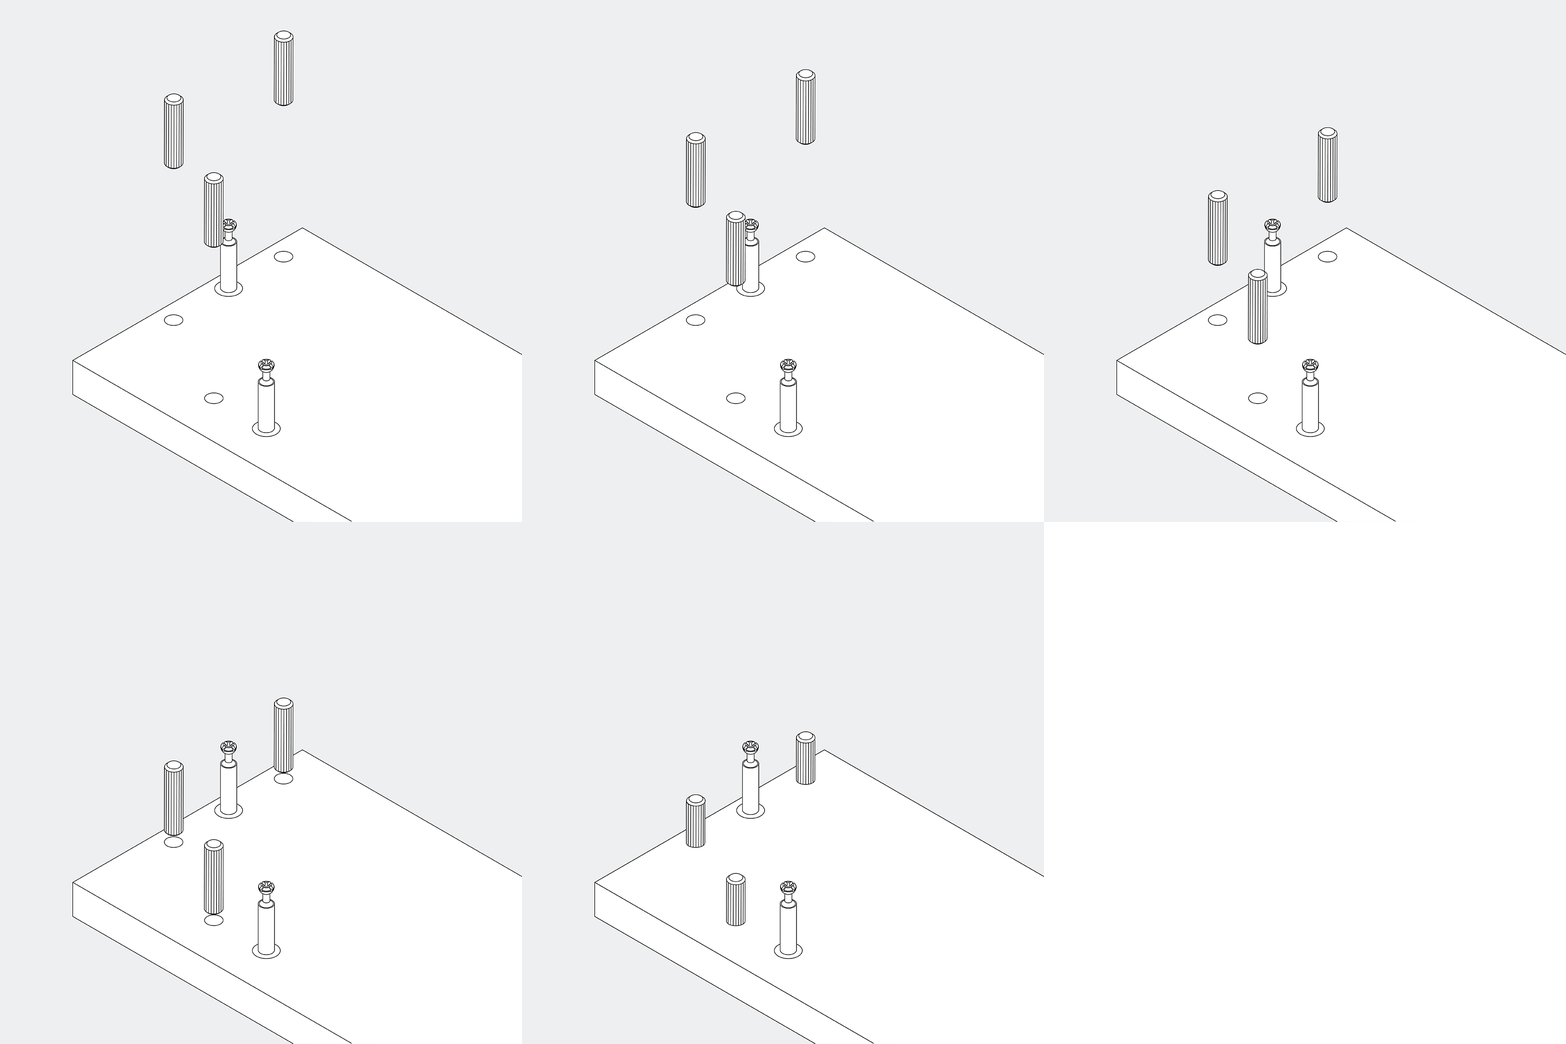
Insert 8 wooden dowels into the drawer side panels.
None
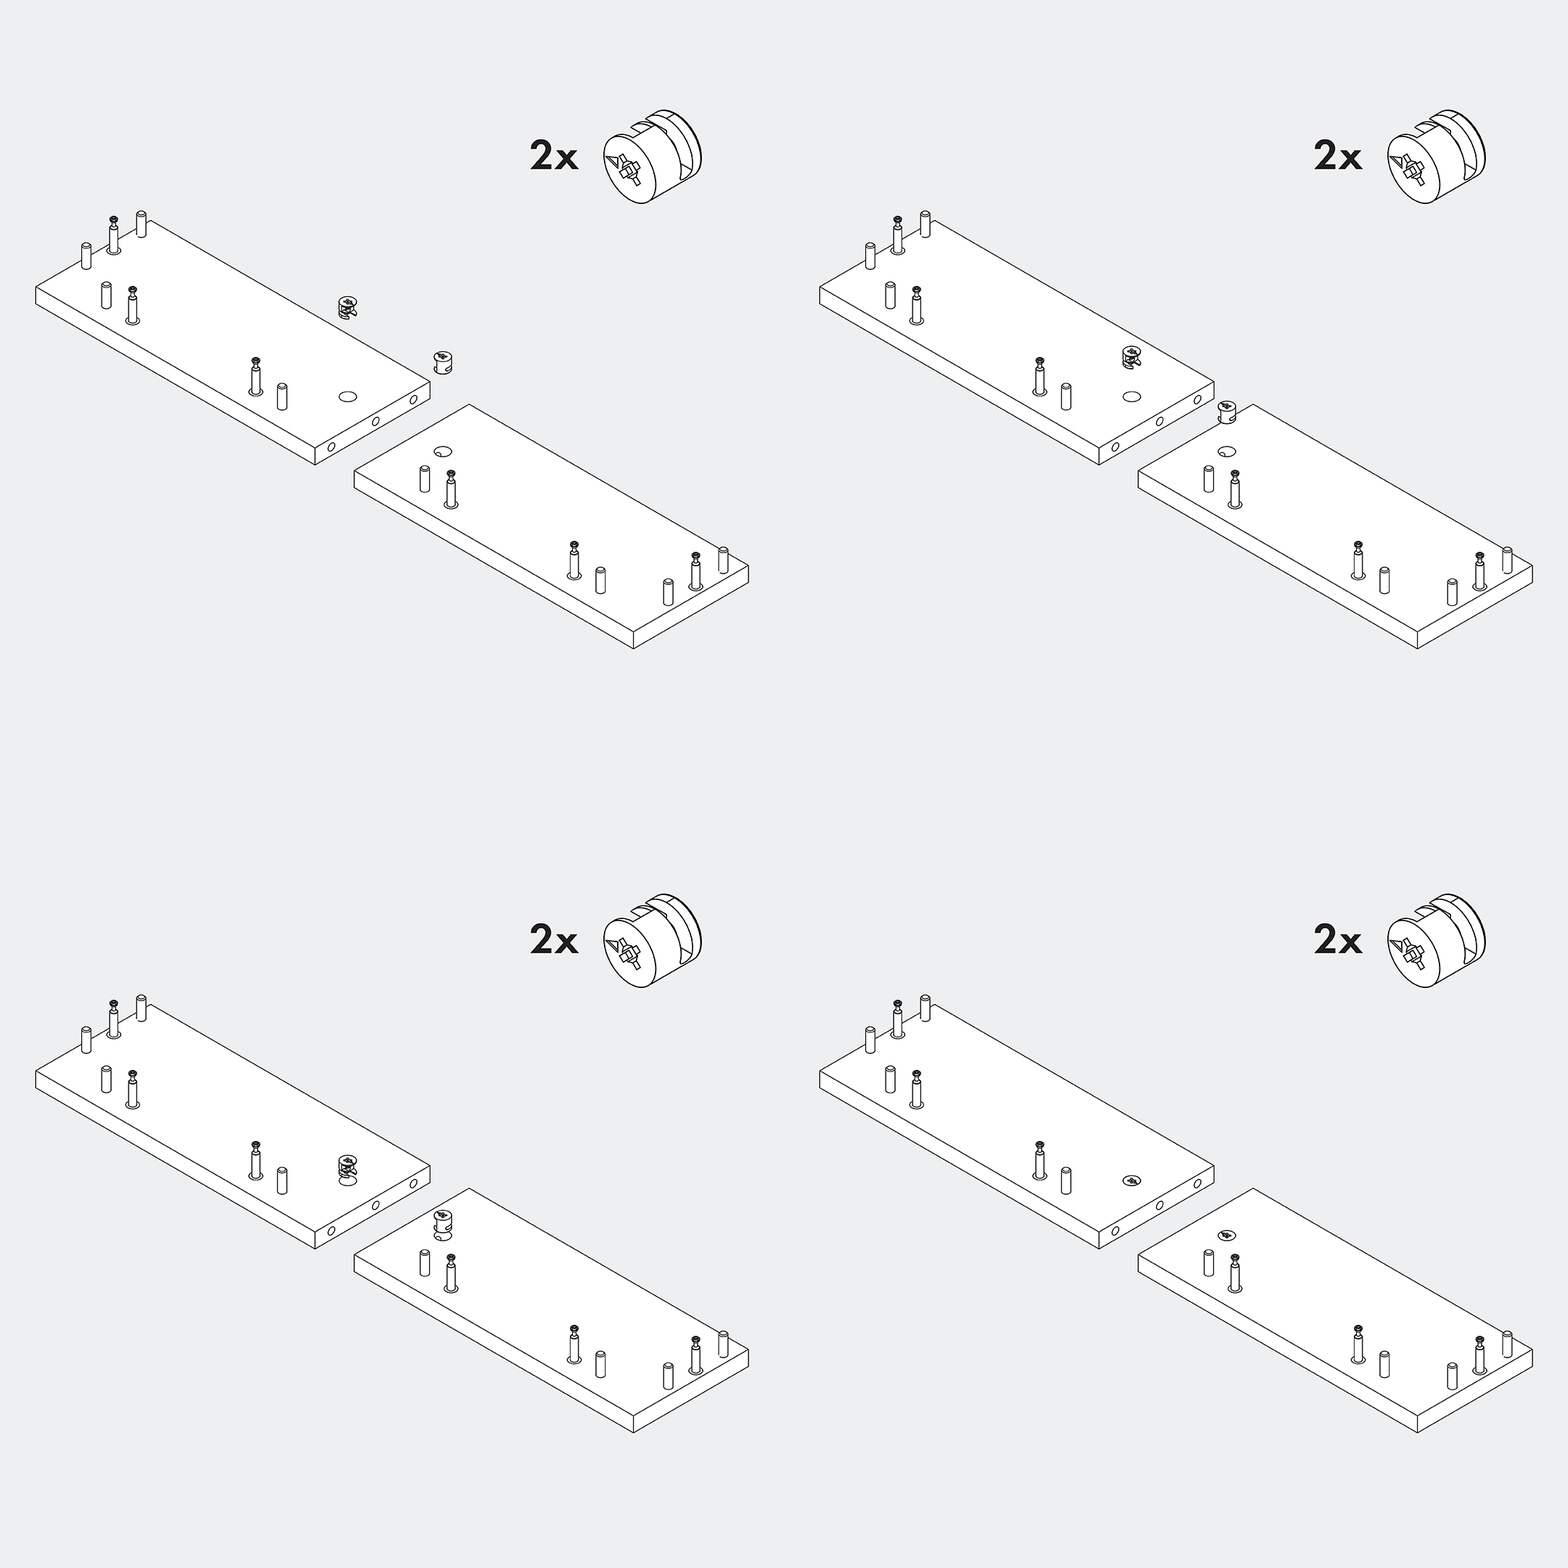
Insert 2 metal cam locks into the drawer side panels, making sure the arrow points outwards.

None
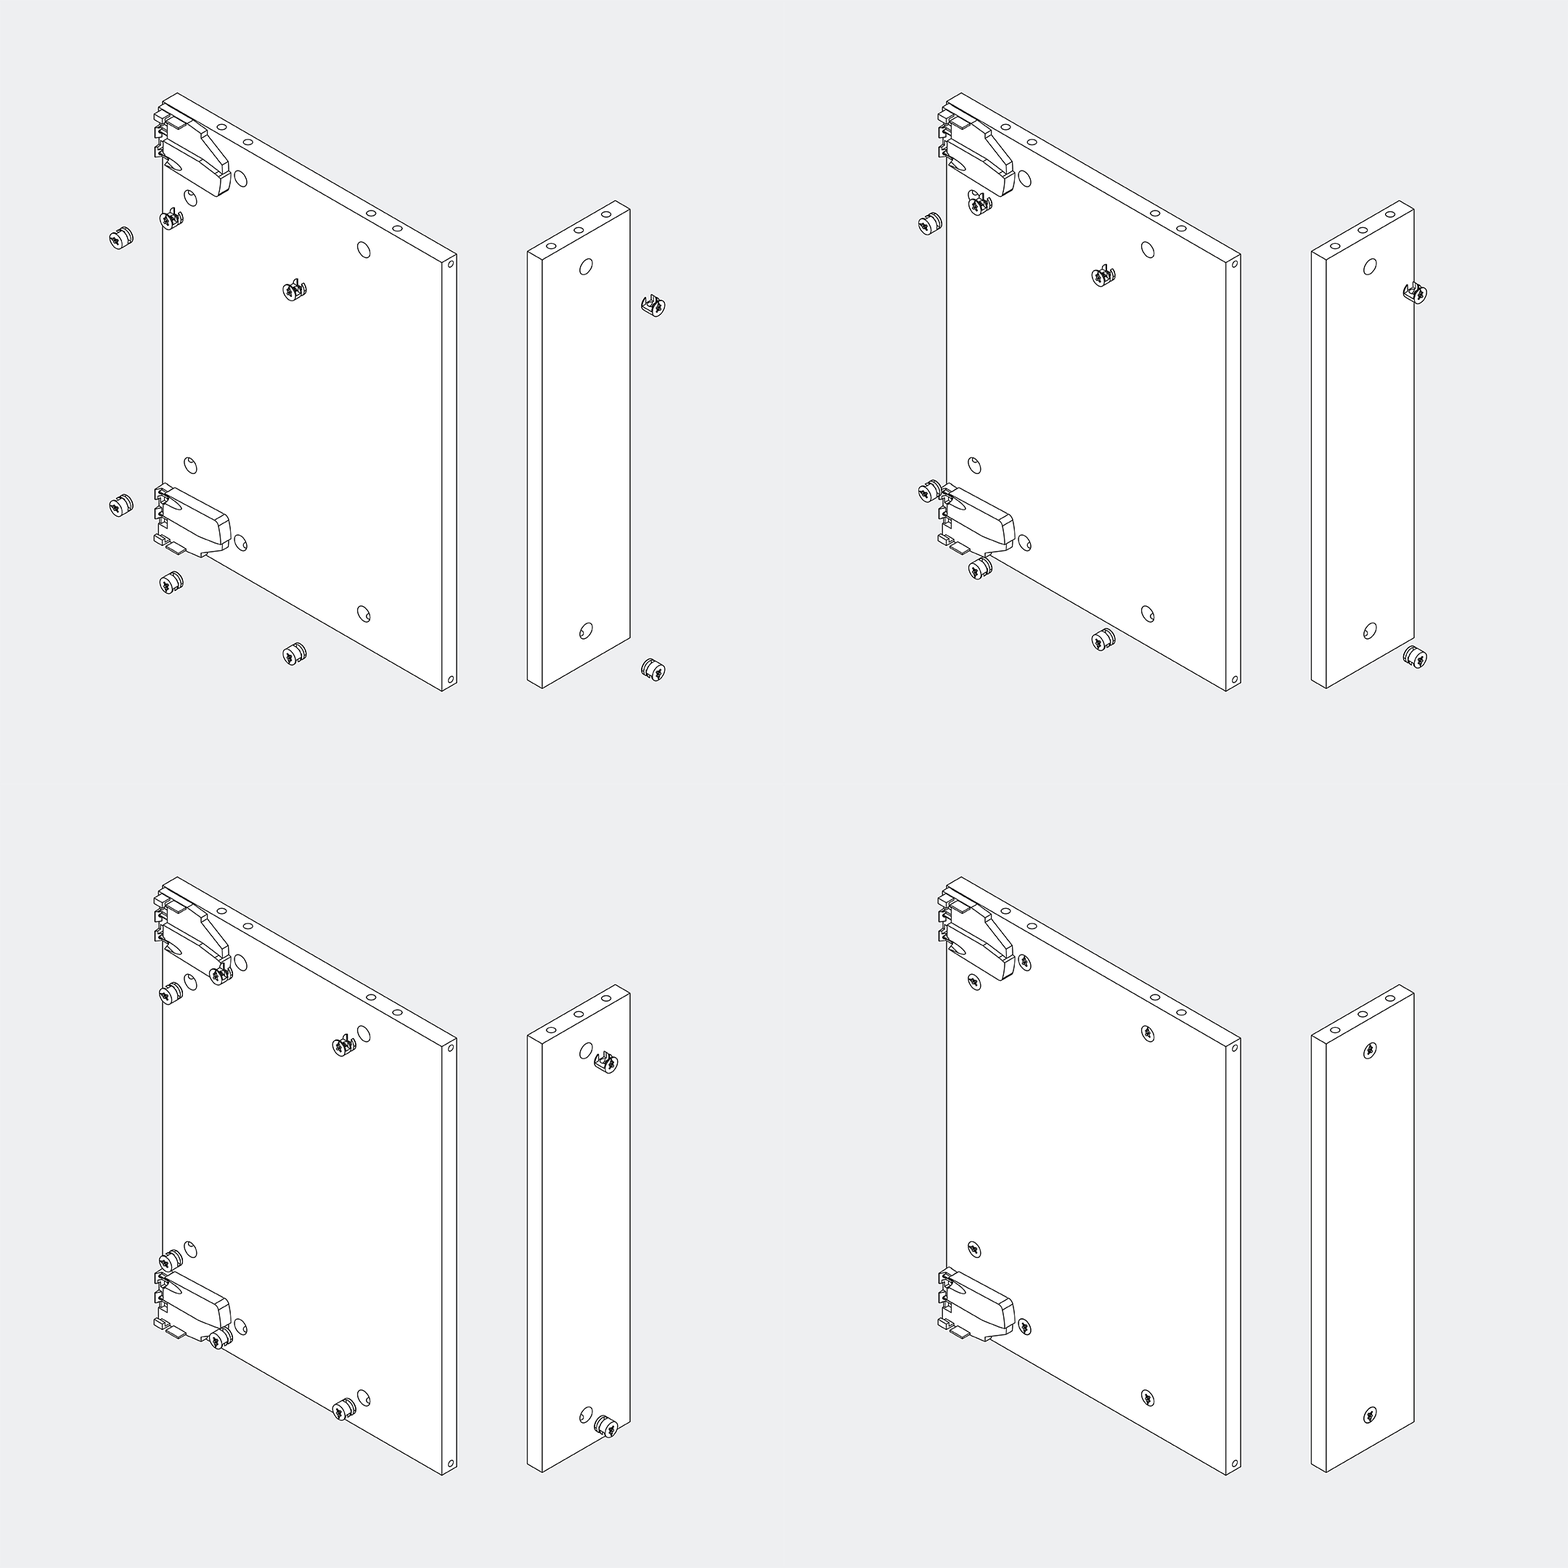
Insert 8 metal cam locks into the drawer bottom and back panel, making sure the arrow points outwards.
None
Slide the drawer back and bottom onto the left drawer side, then secure them at the 3 connection points.
None
Slide the right drawer side into position and secure it at the 3 connection points.
None
Screw 4 metal connectors into the drawer front.
None
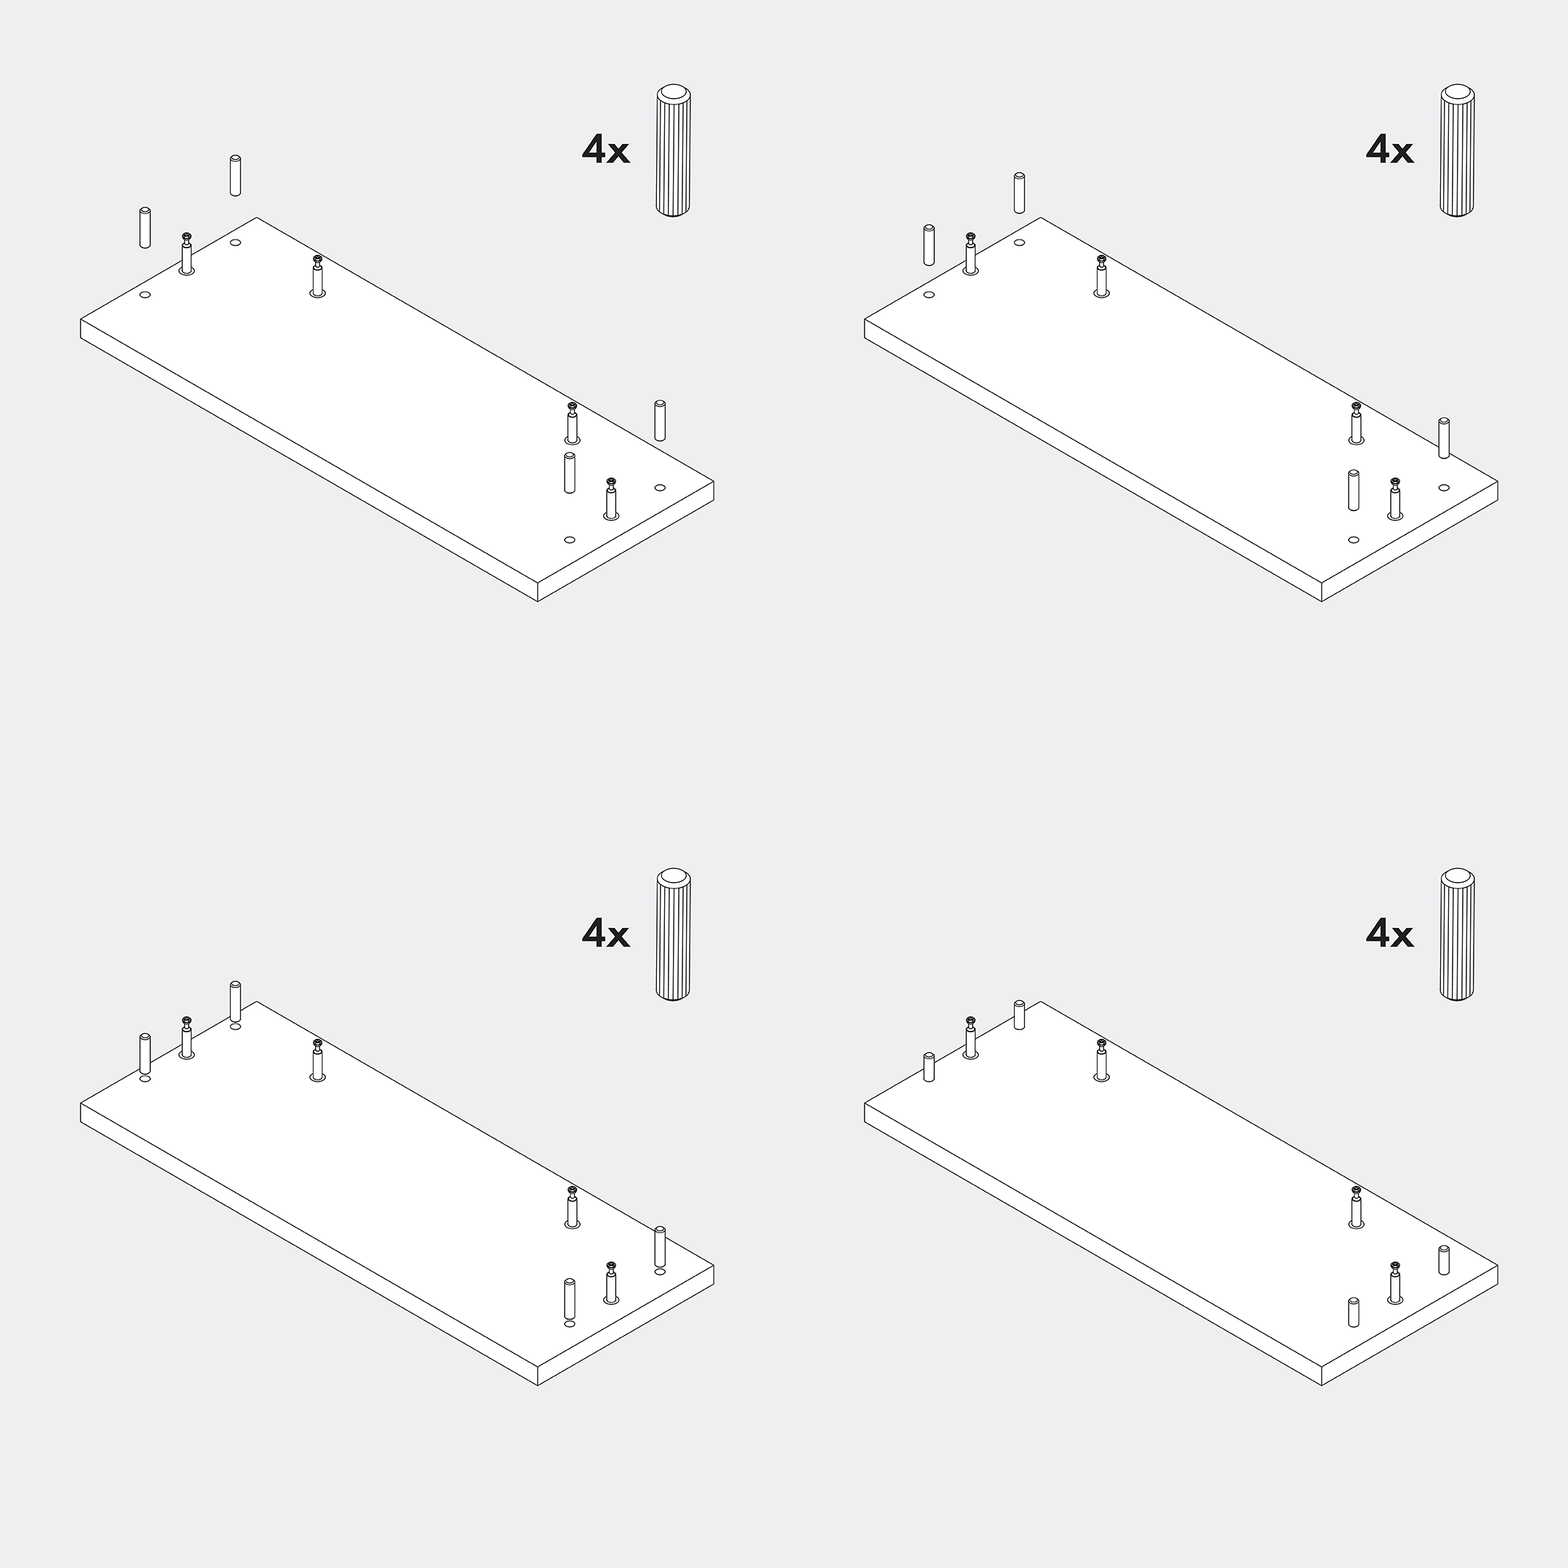
Insert 4 wooden dowels into the drawer front.
None
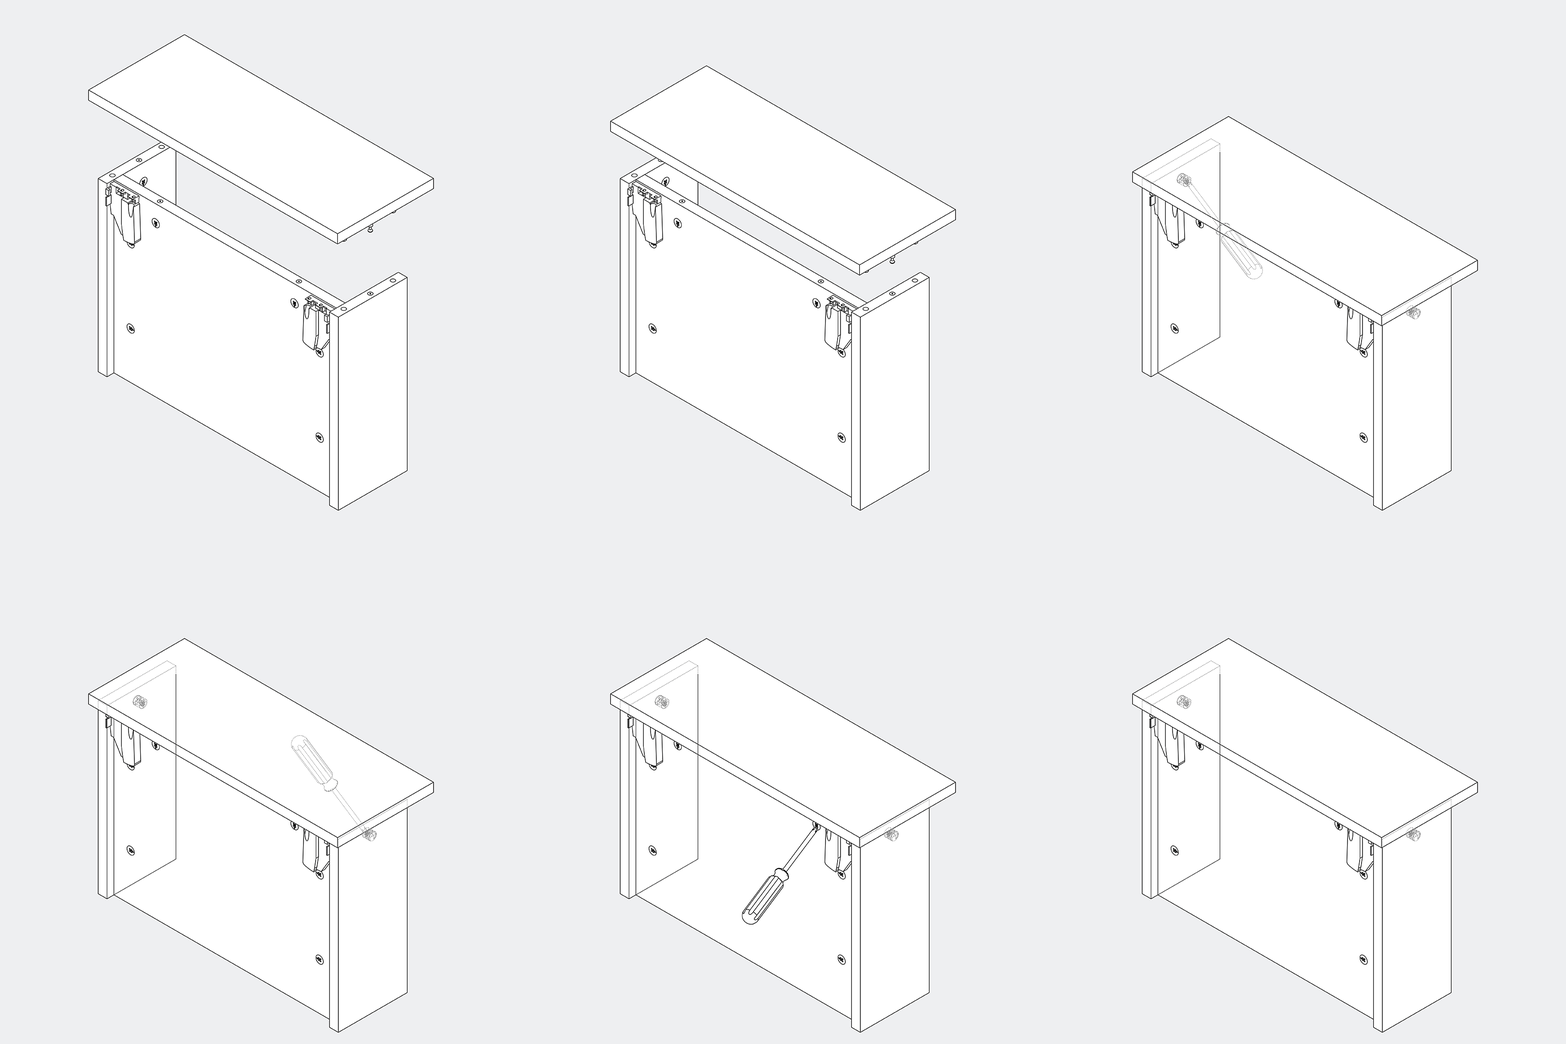
Mount the drawer front onto the drawer body and secure it at the 2 connection points.
Drawer
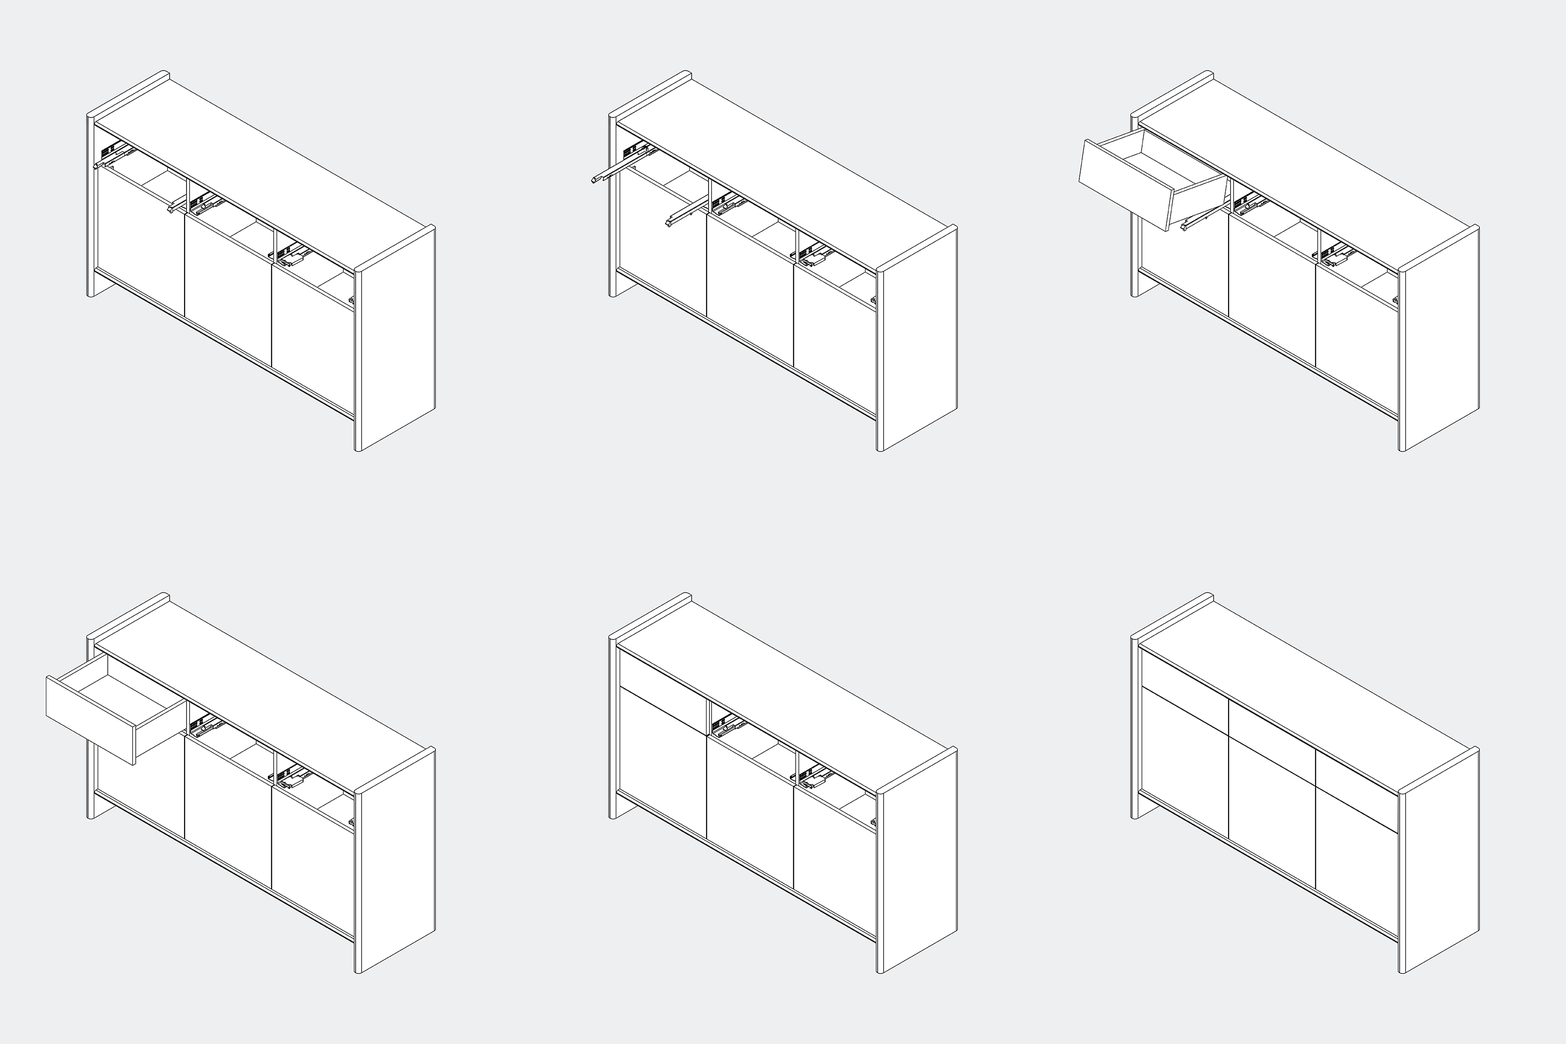
Pull the drawer runners out fully, place the drawer onto them, and push it in until you hear a click.
None
We’re super exited about every new piece of furniture in your home and we’d love to see it.
