
Any assembly problems?
Get Help

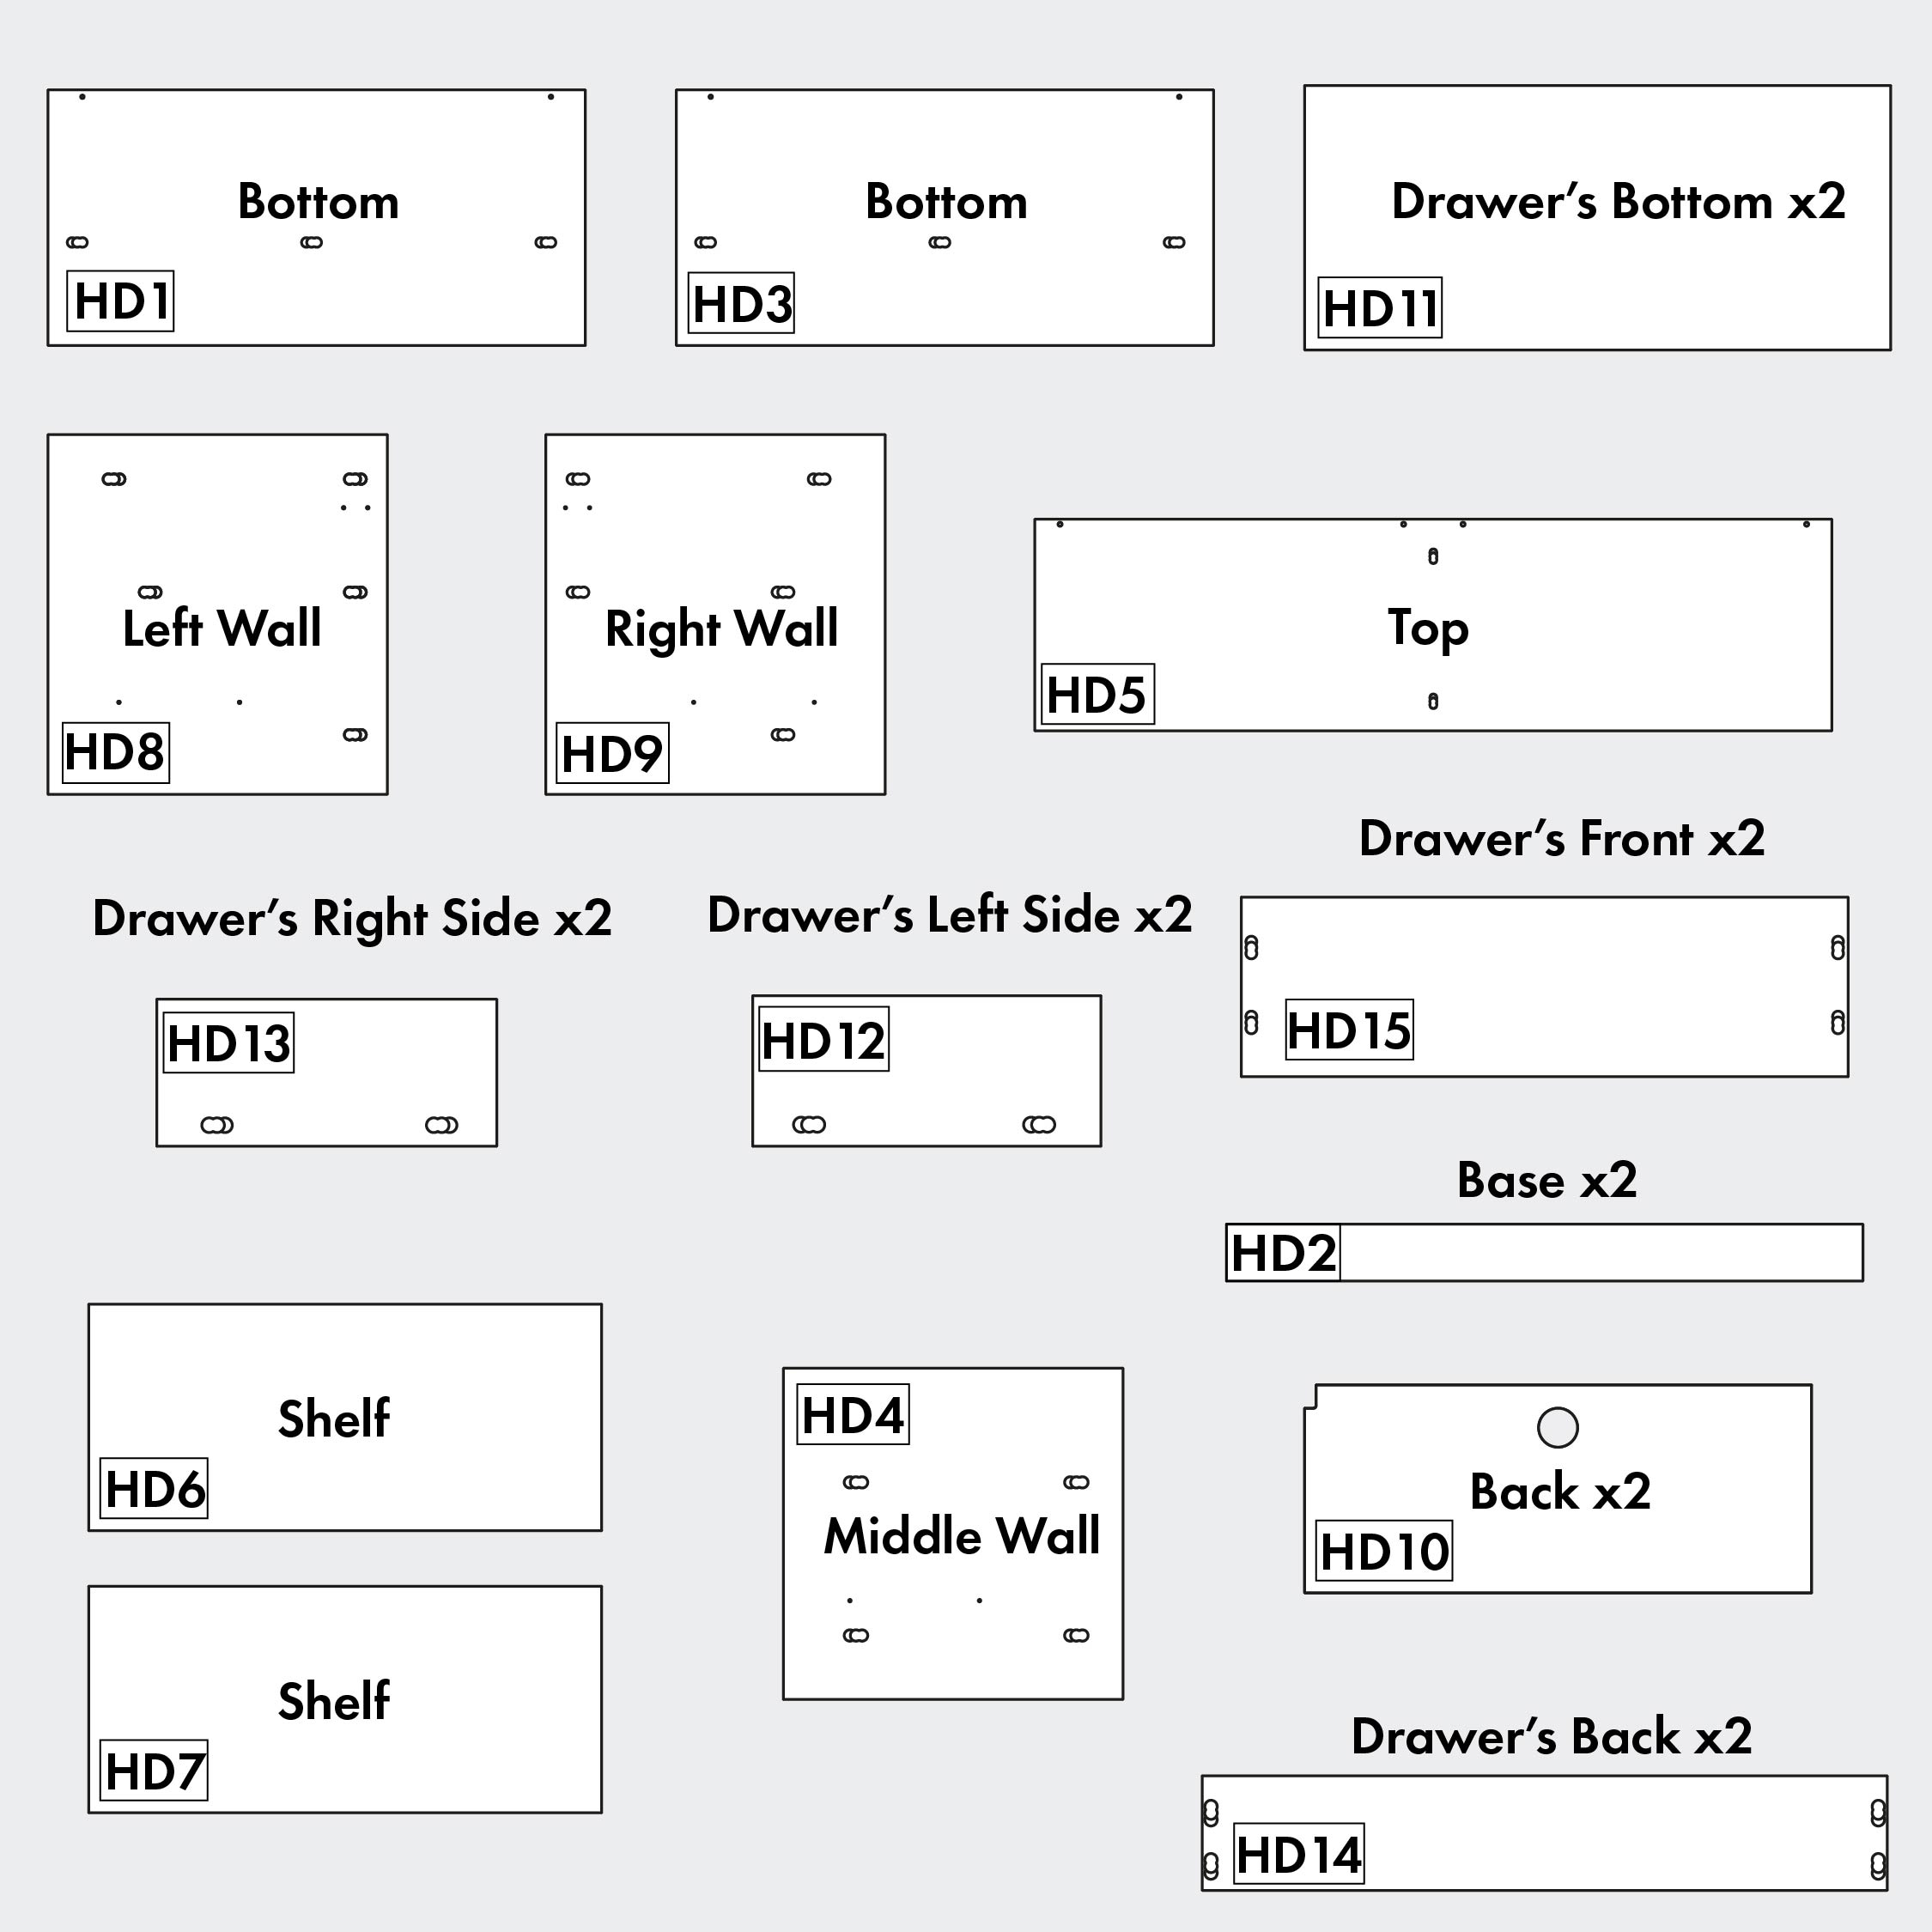

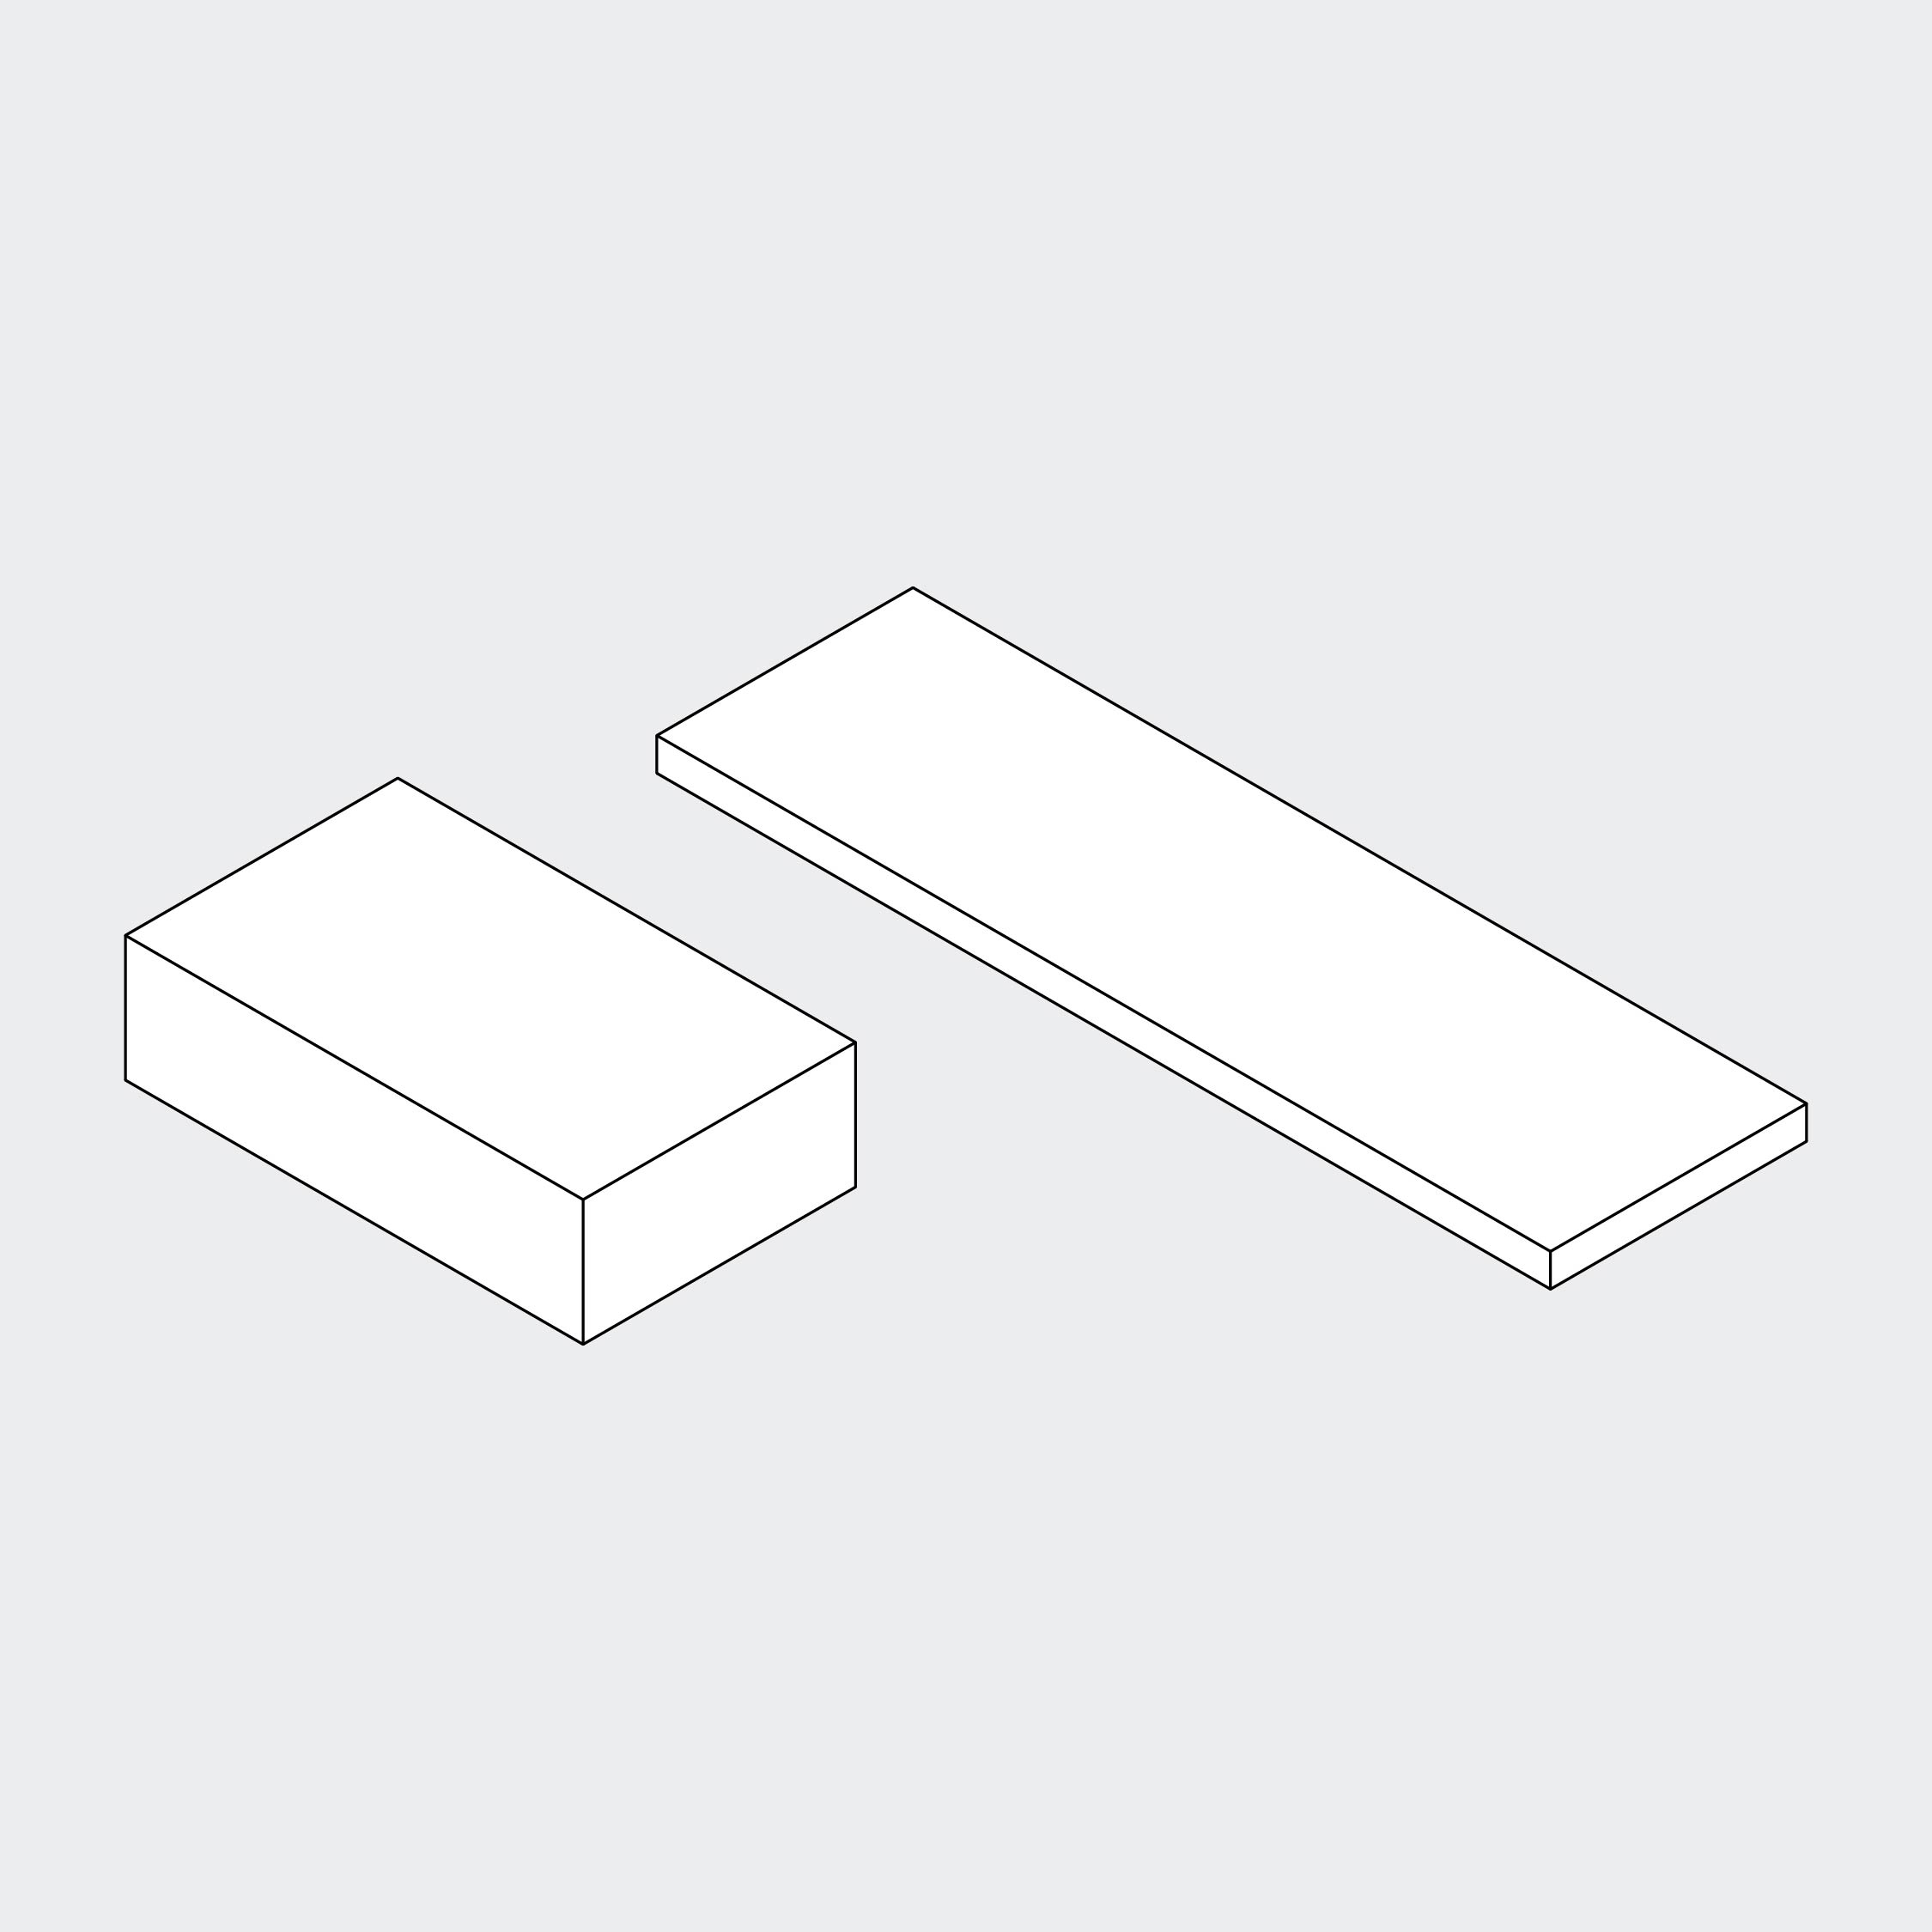
Check if you’ve received all boxes without any damages. If so, you’re good to go! Remember to always assemble furniture on a blanket, carpet or on the cardboard you got from us.

None
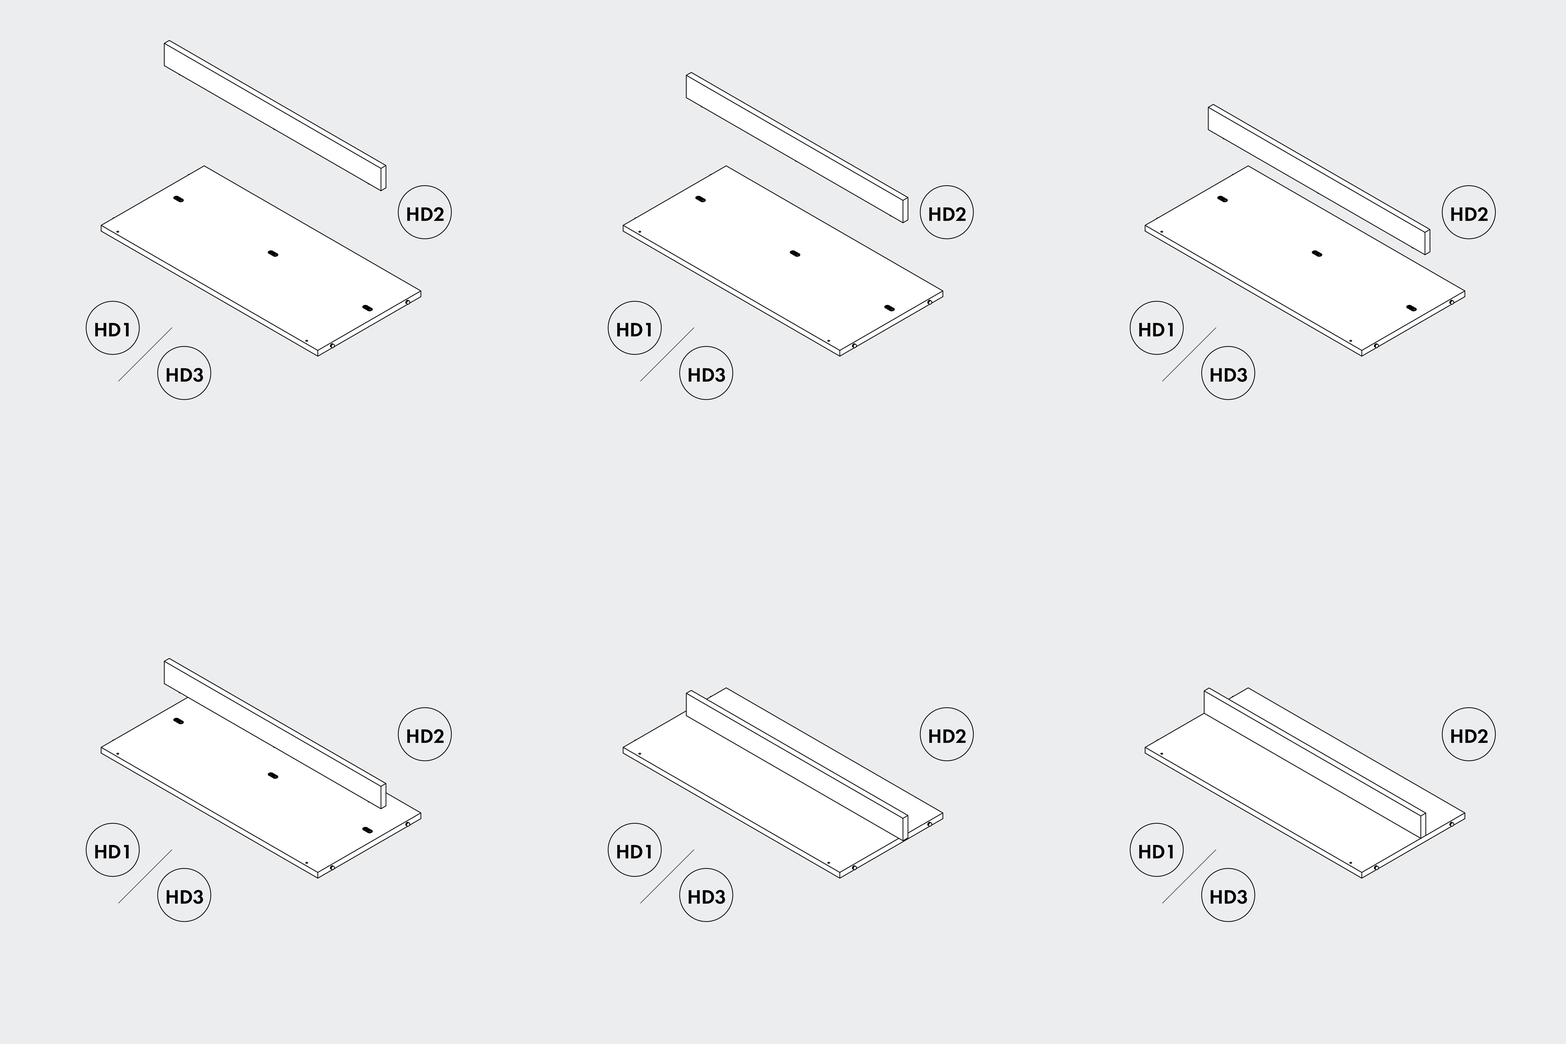
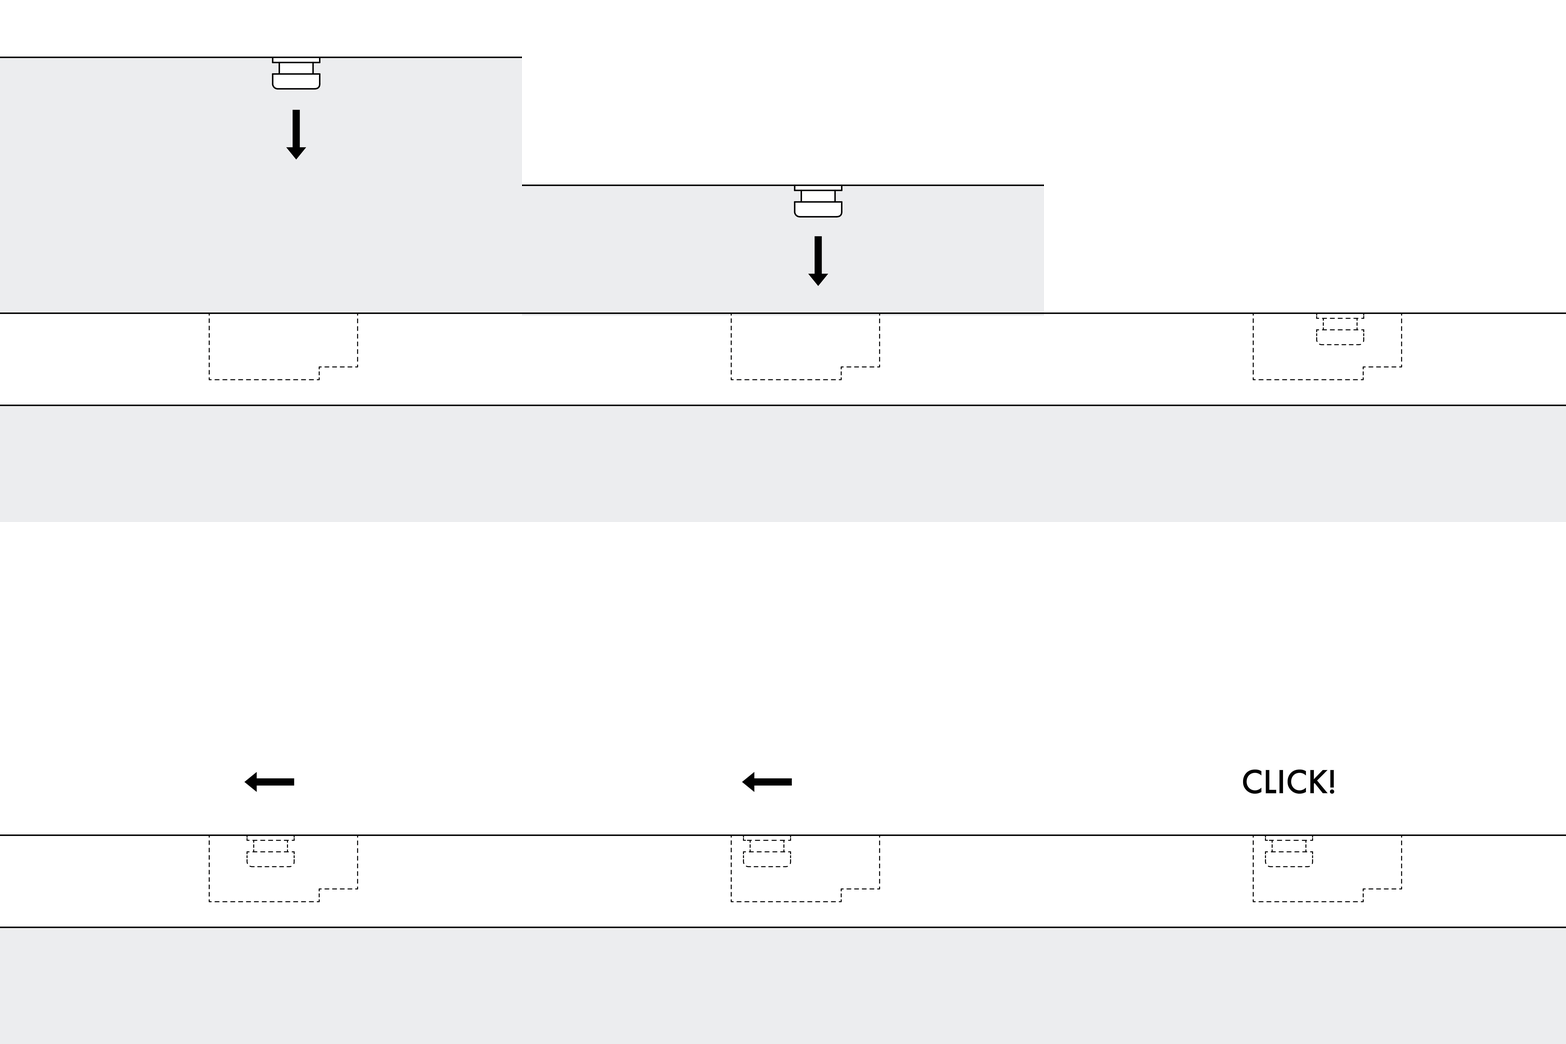
Connect parts HD1 and HD2 as shown in the illustration. Insert the pins into the holes, then slide the parts to the left until you hear a click. Repeat this step with parts HD3 and the second part HD2.
None
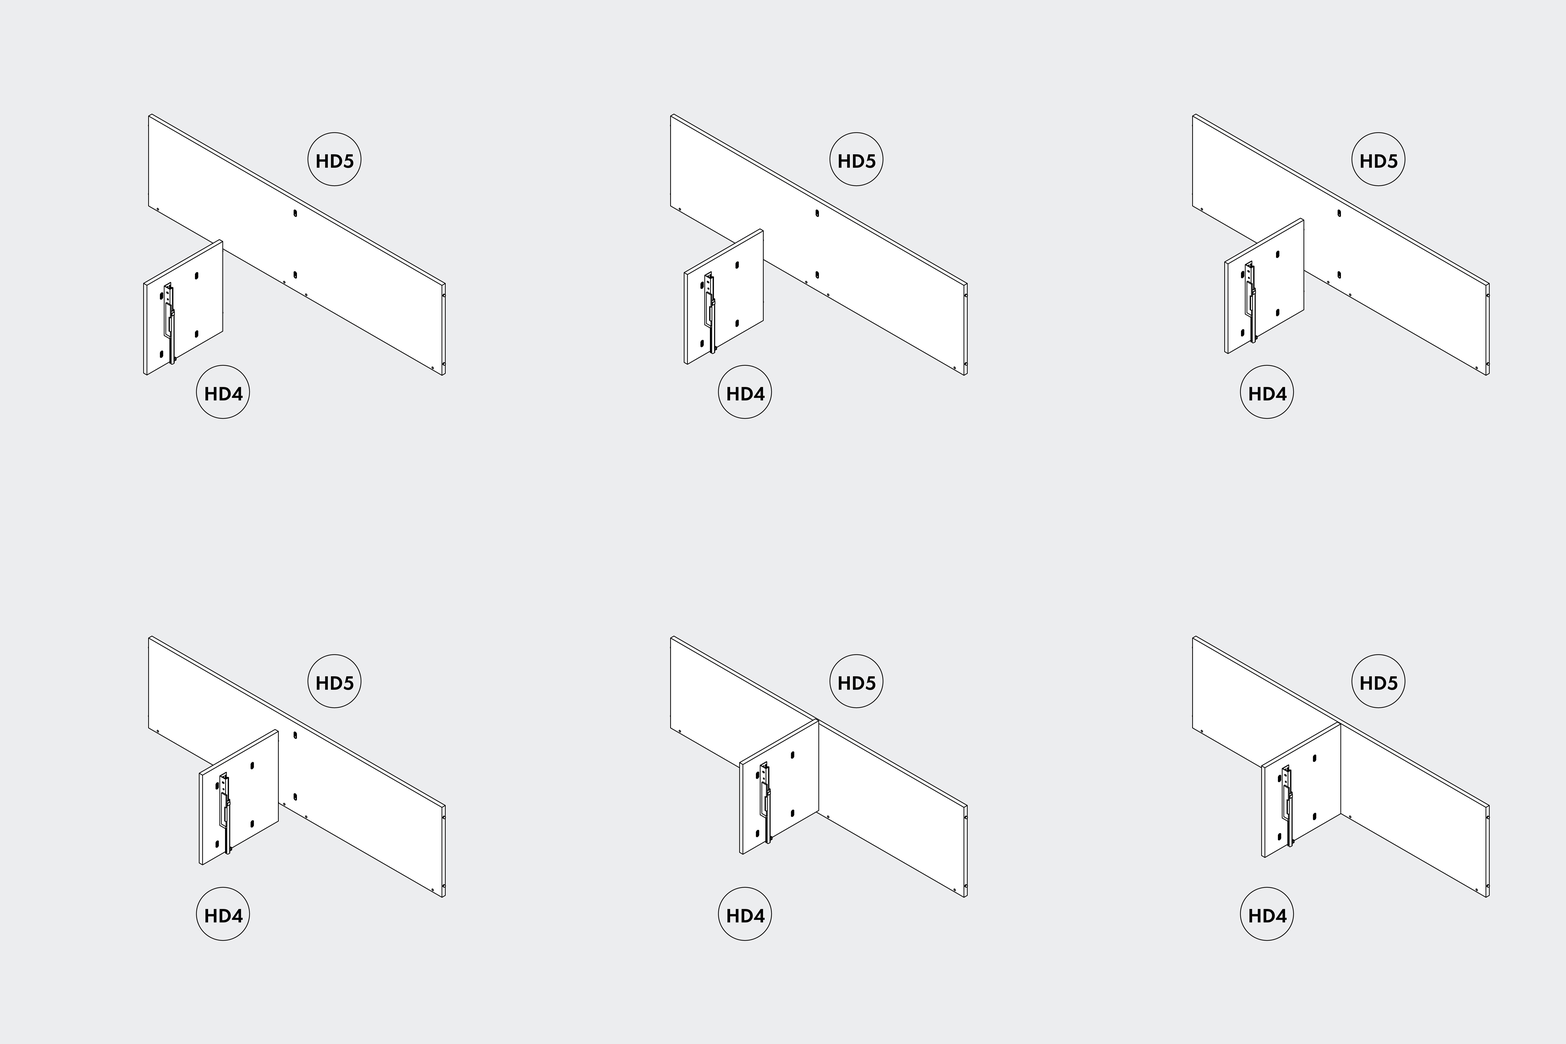
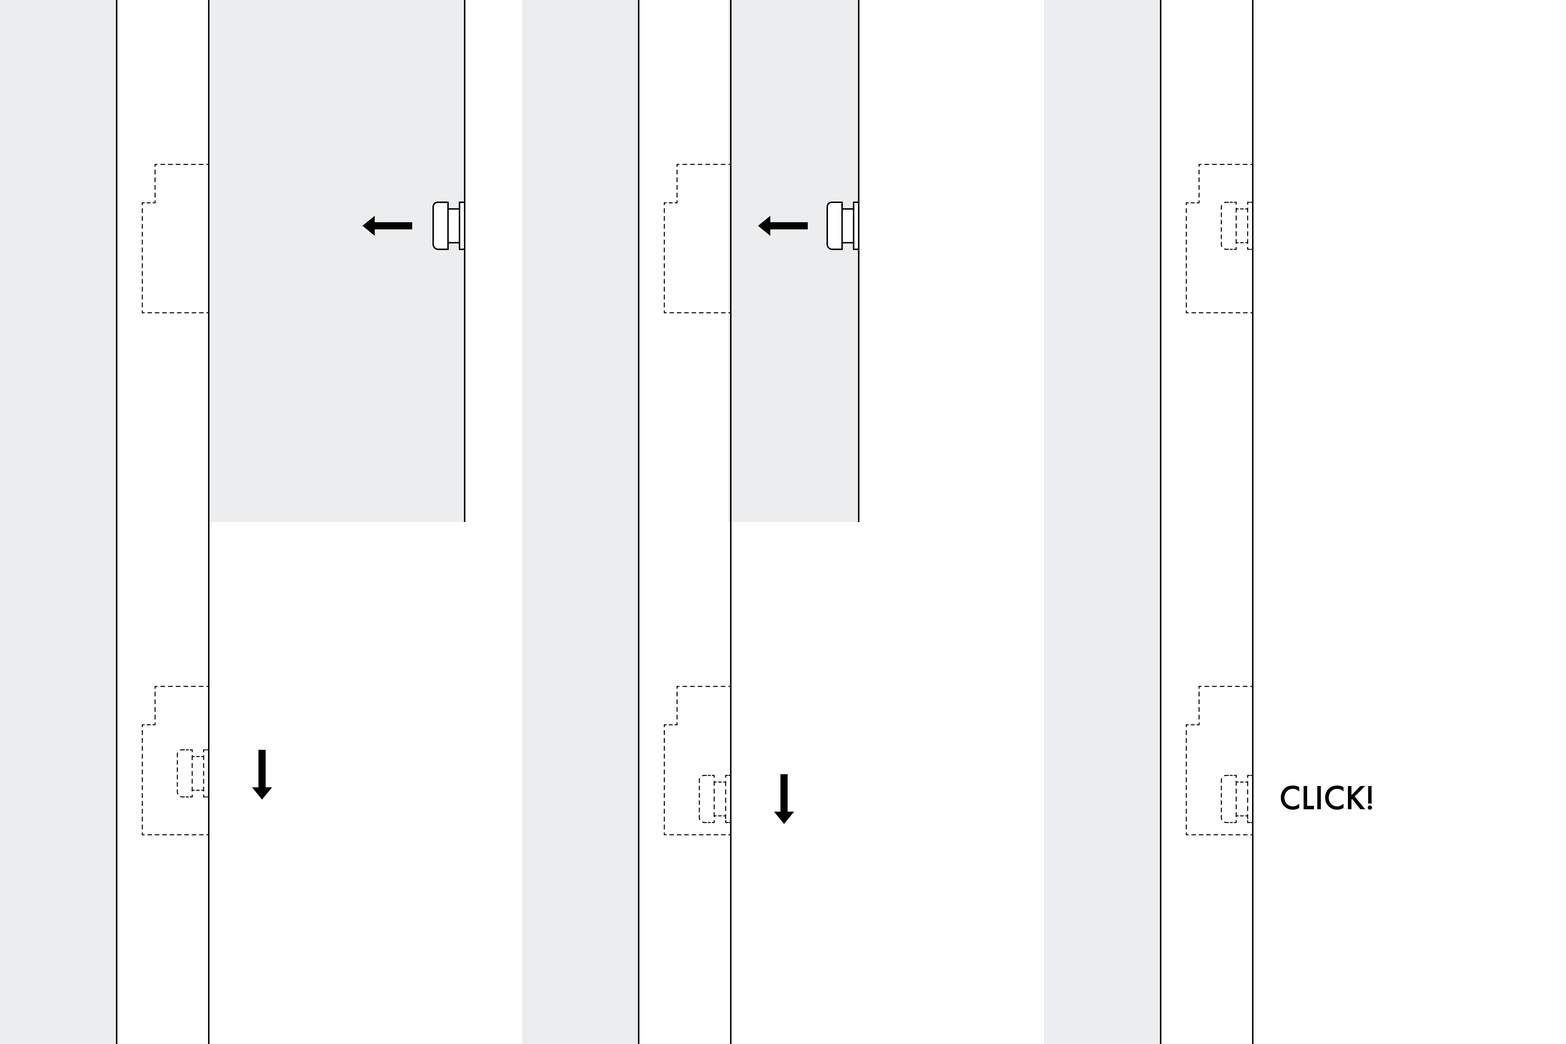
Connect parts HD4 and HD5 as shown in the illustration. Insert the pins into the holes, then push the parts down until you hear a click.
None
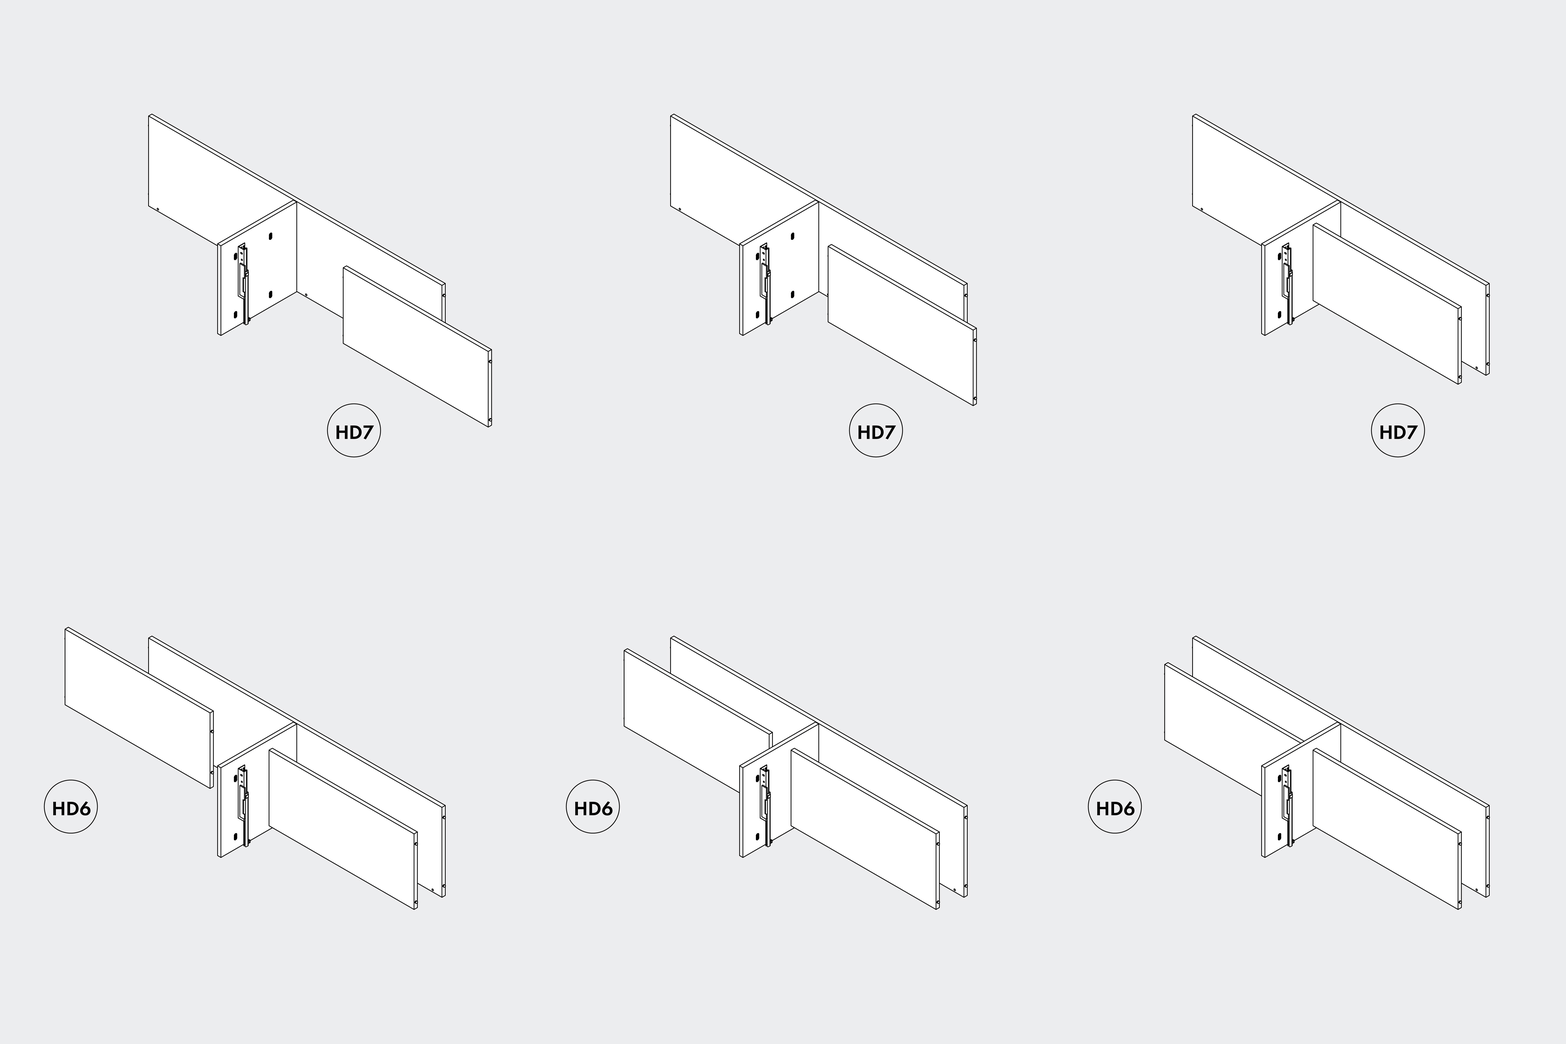
Next, install parts HD6 and HD7 as shown in the illustration. Insert the pins into the holes, then push the parts down until you hear a click.
None
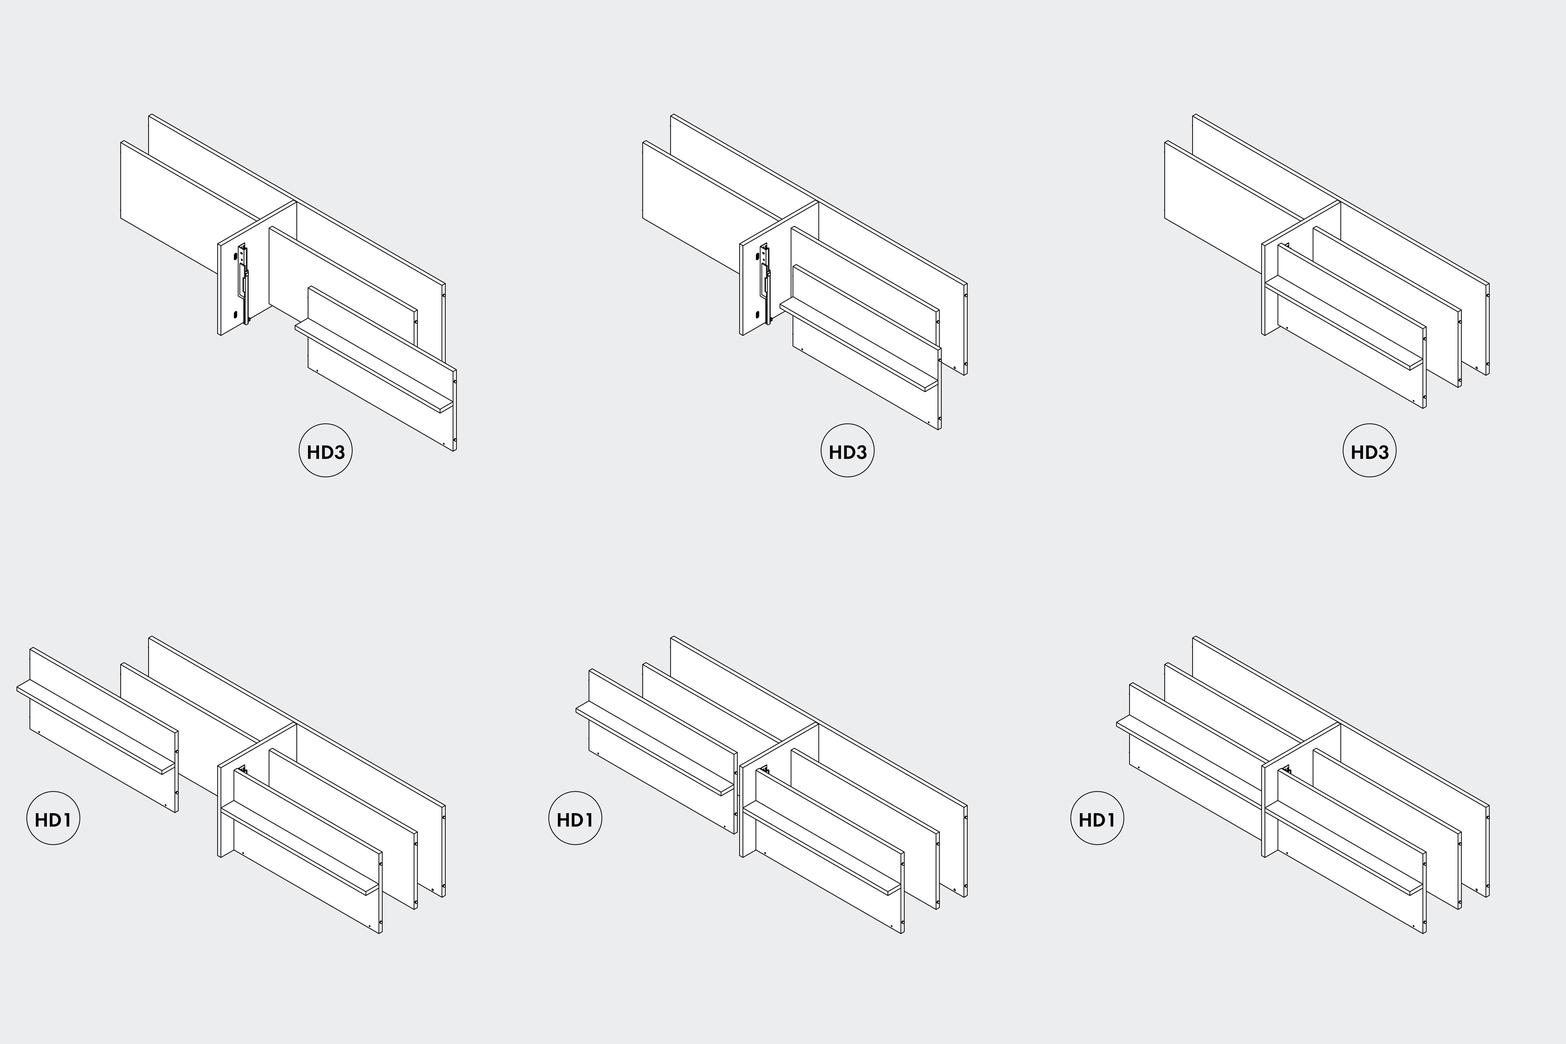
Attach the parts HD1 and HD3 prepared in step 2 as shown in the illustration. Insert the pins into the holes, then push the parts down until you hear a click.
None
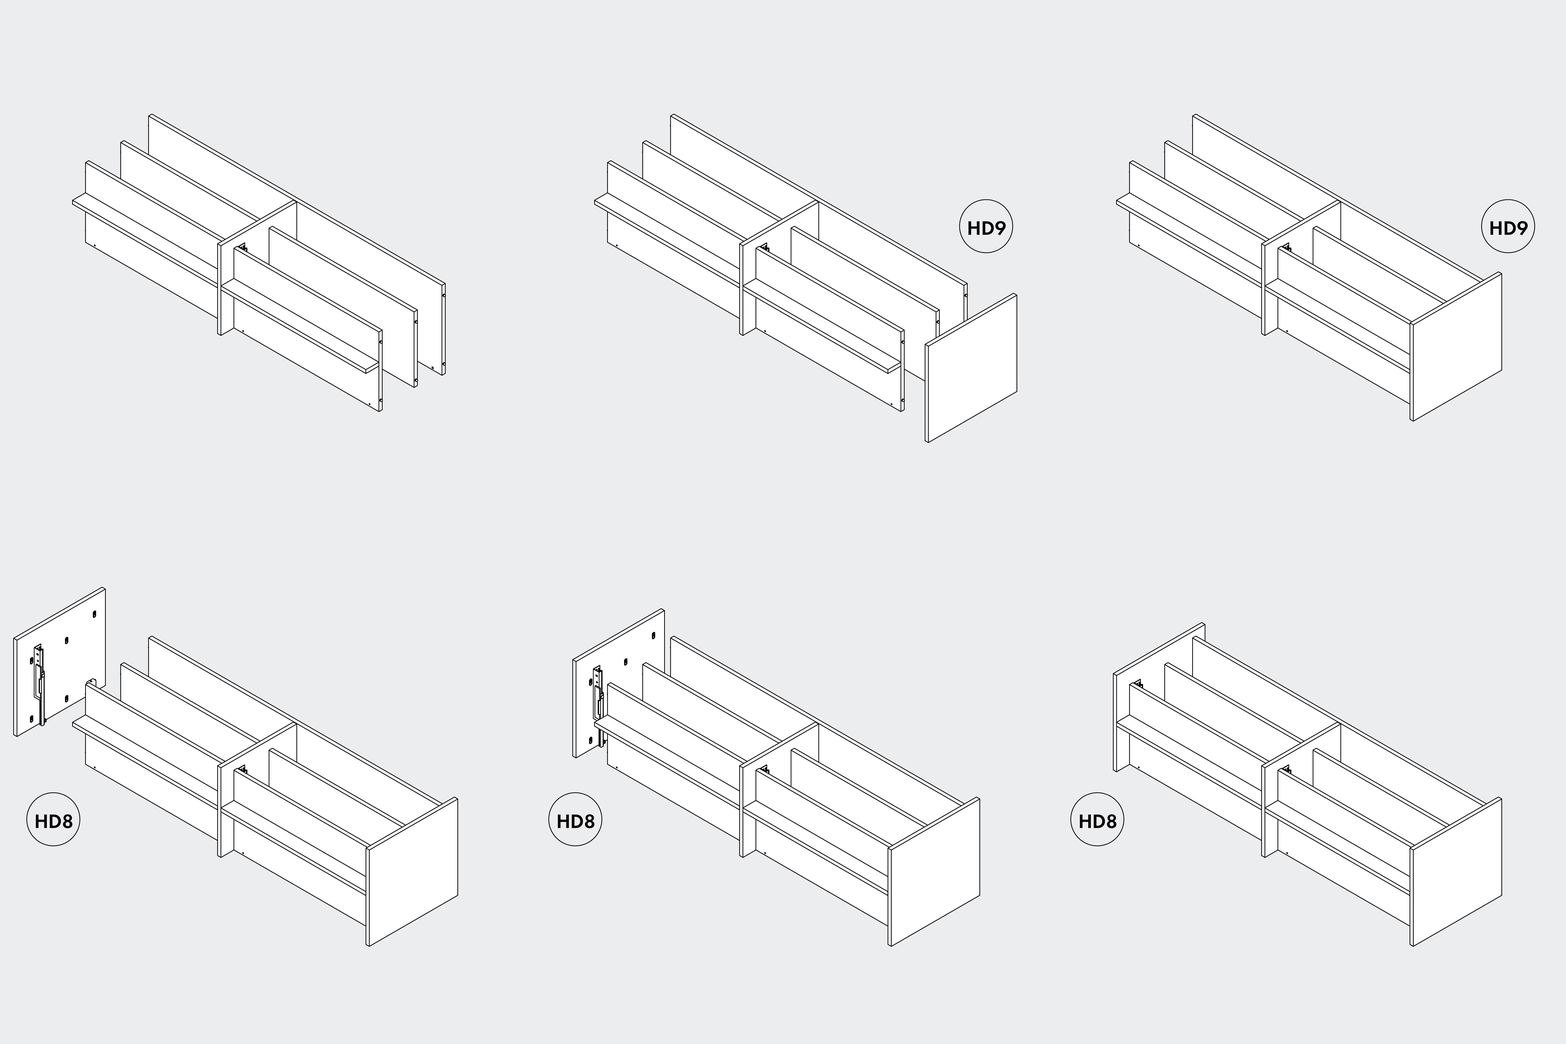
Next, install parts HD8 and HD9 as shown in the illustration. Insert the pins into the holes, then push the parts down until you hear a click.
None
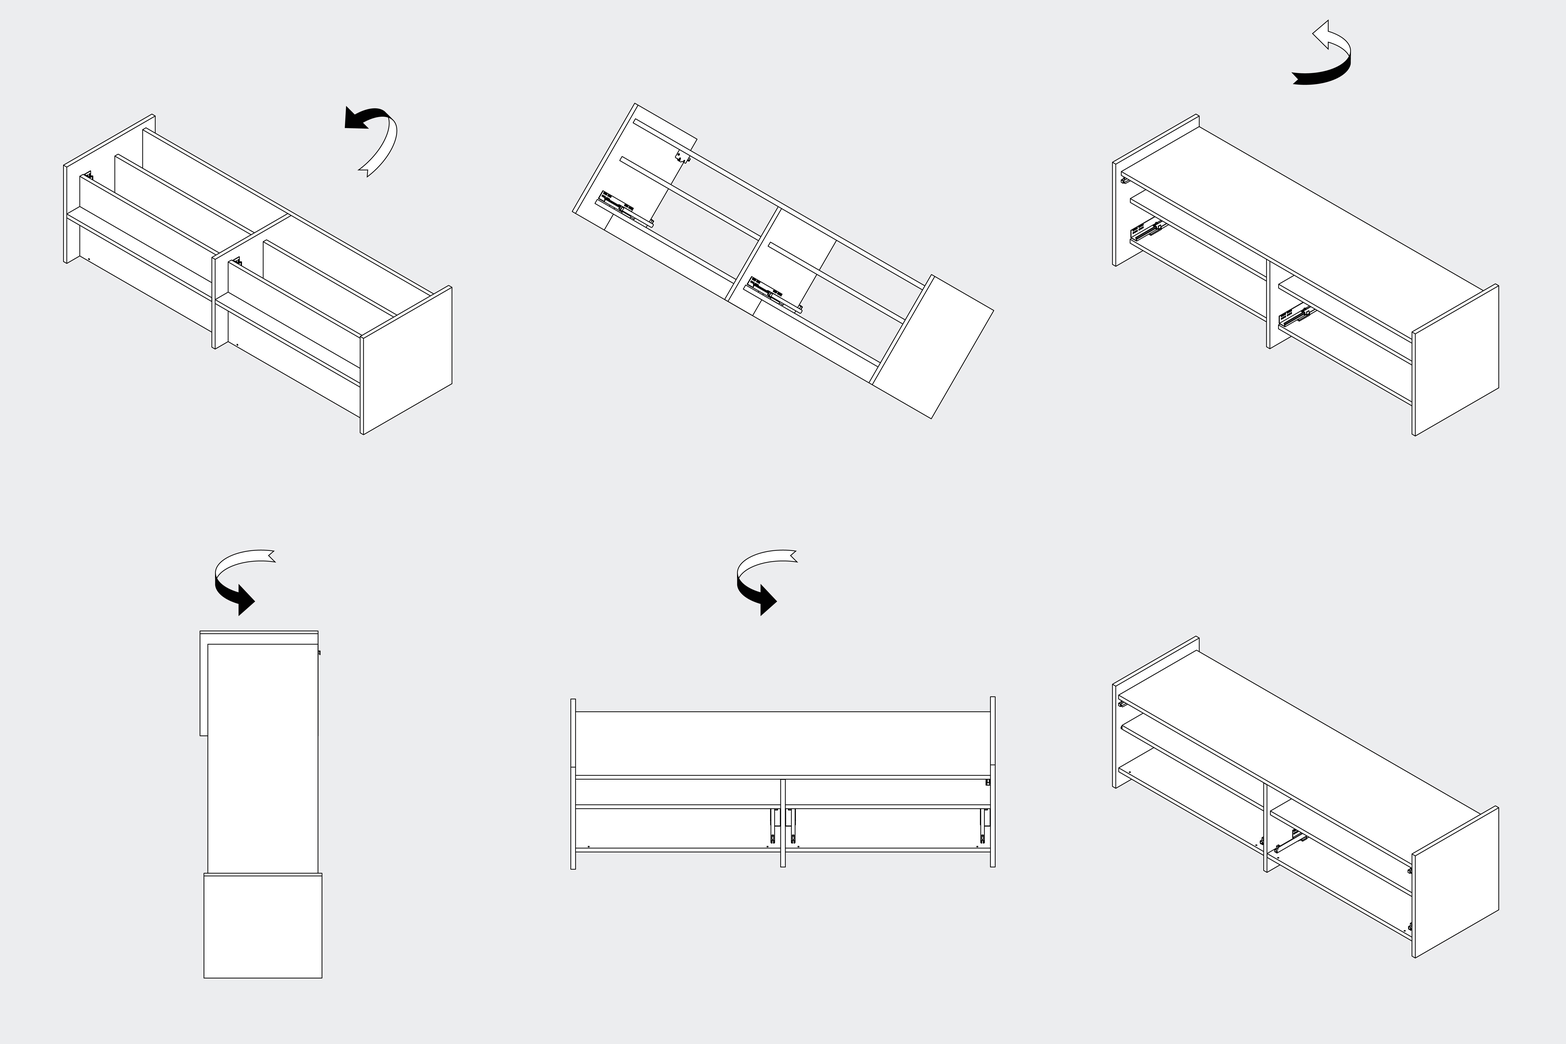
Turn the assembled structure over.
None
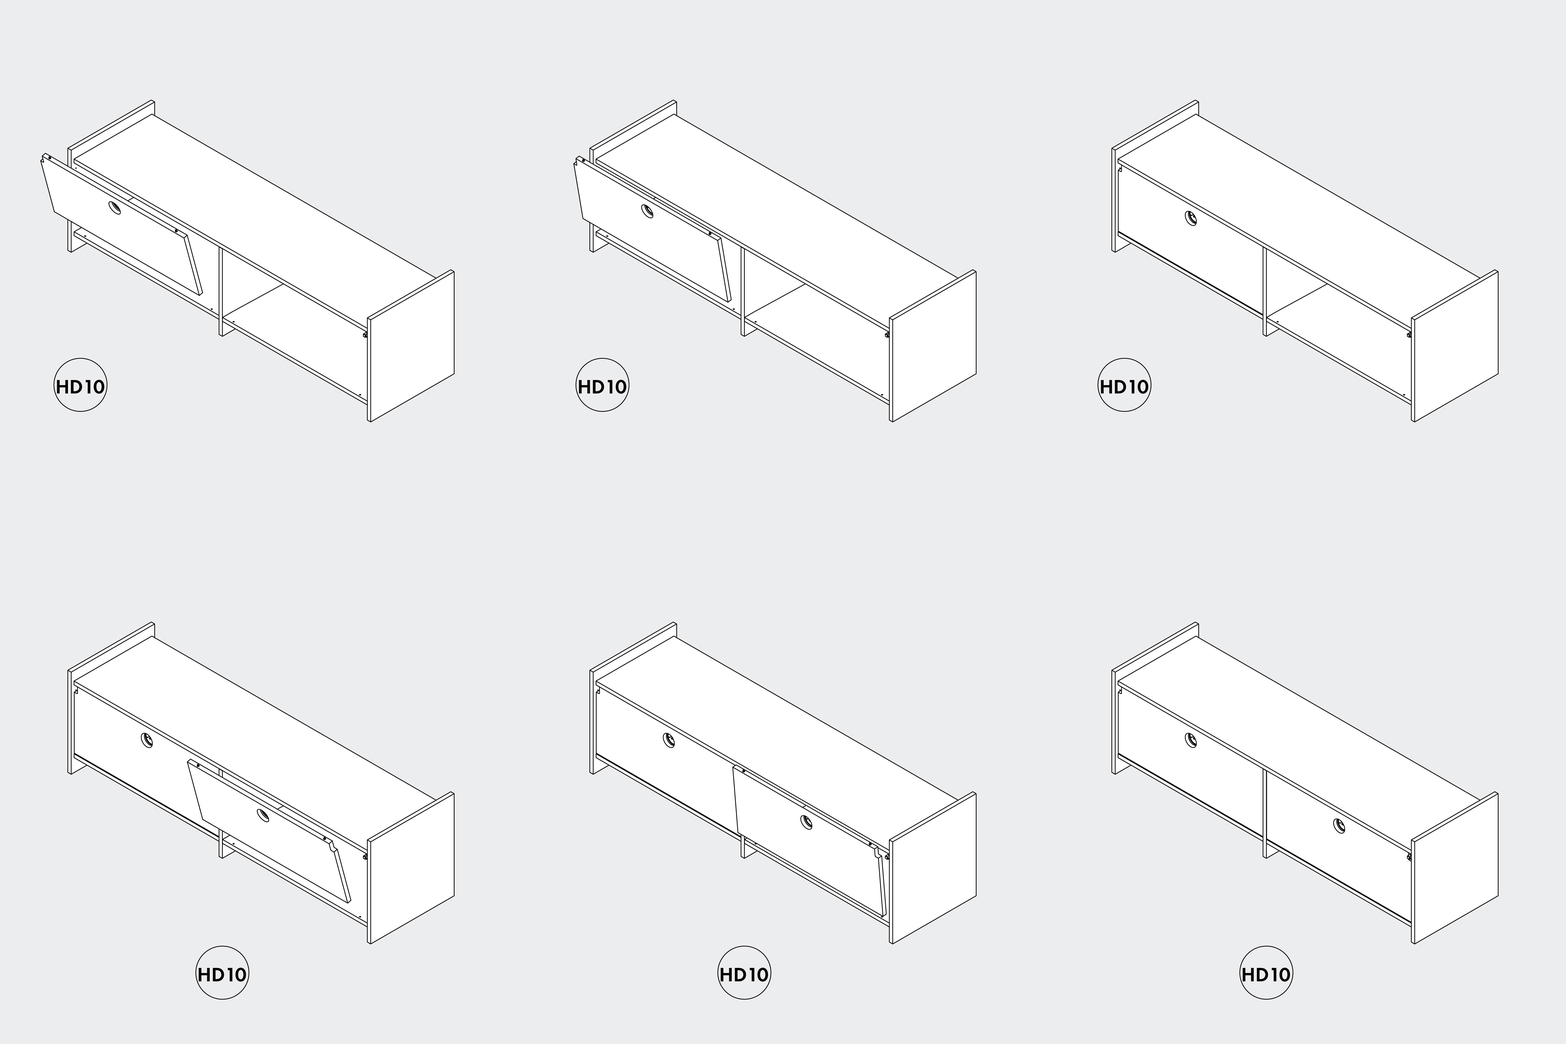
Install the two HD10 back panels. Insert the dowels into the lower section and slide the parts into place at an angle. Press in the pins located at the top and position each part correctly.

None
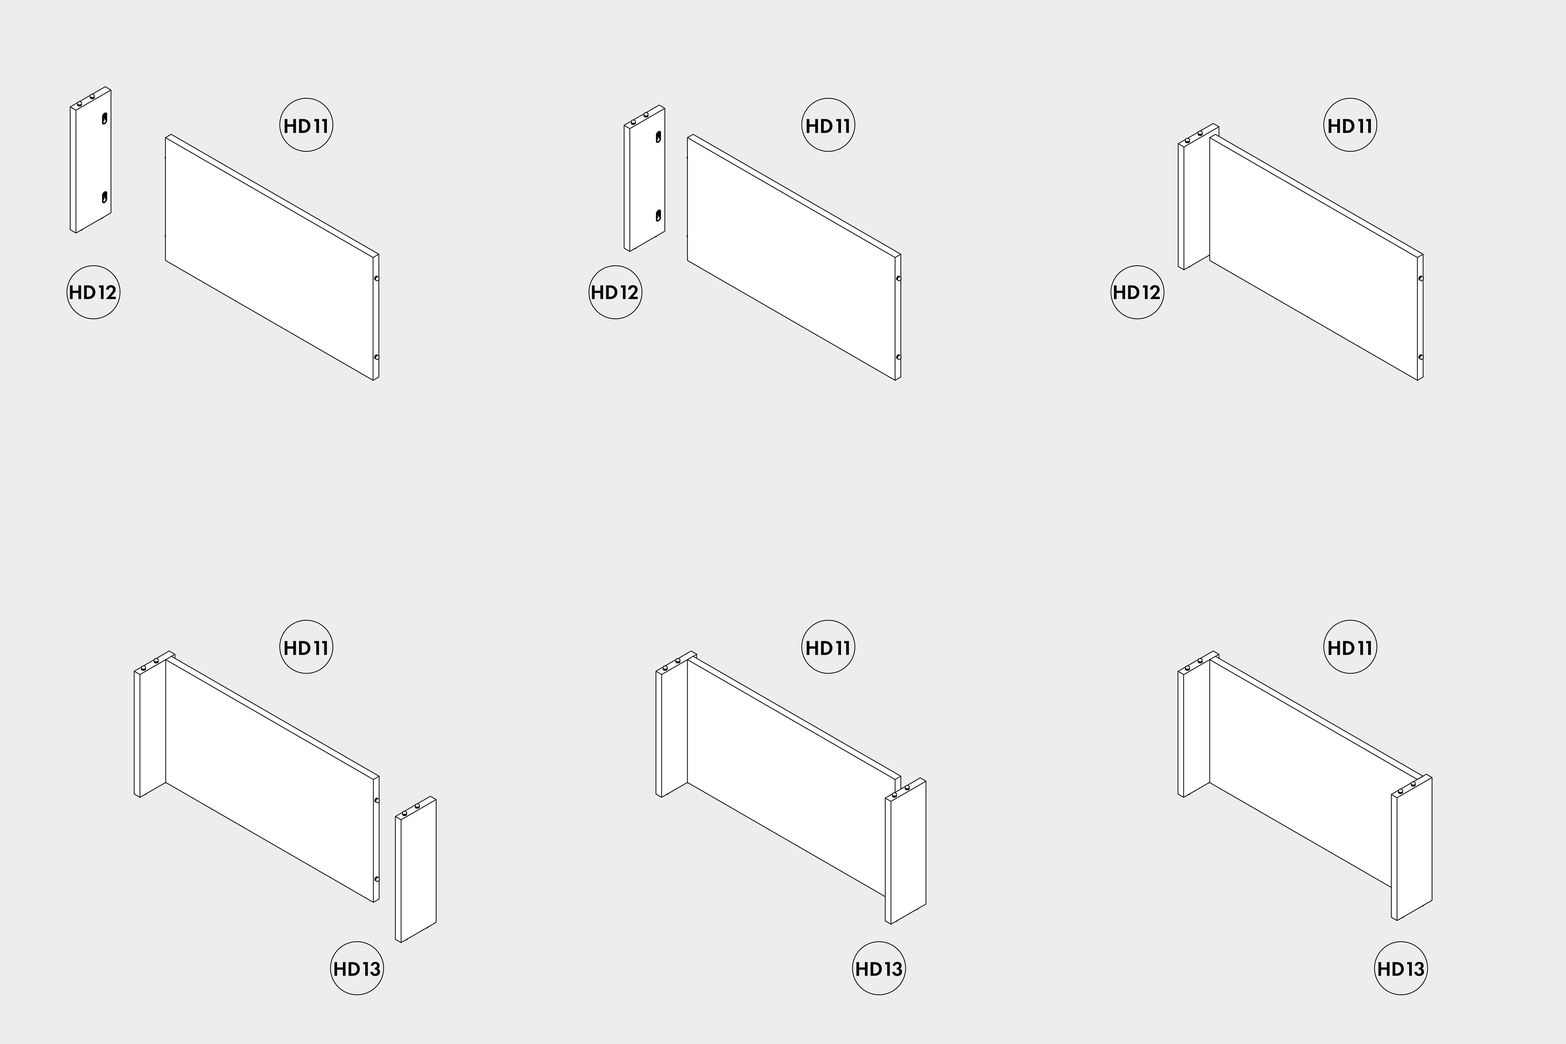
Connect parts HD11, HD12 and HD13 as shown in the illustration. Insert the pins into the holes, then push the parts down until you hear a click.
None
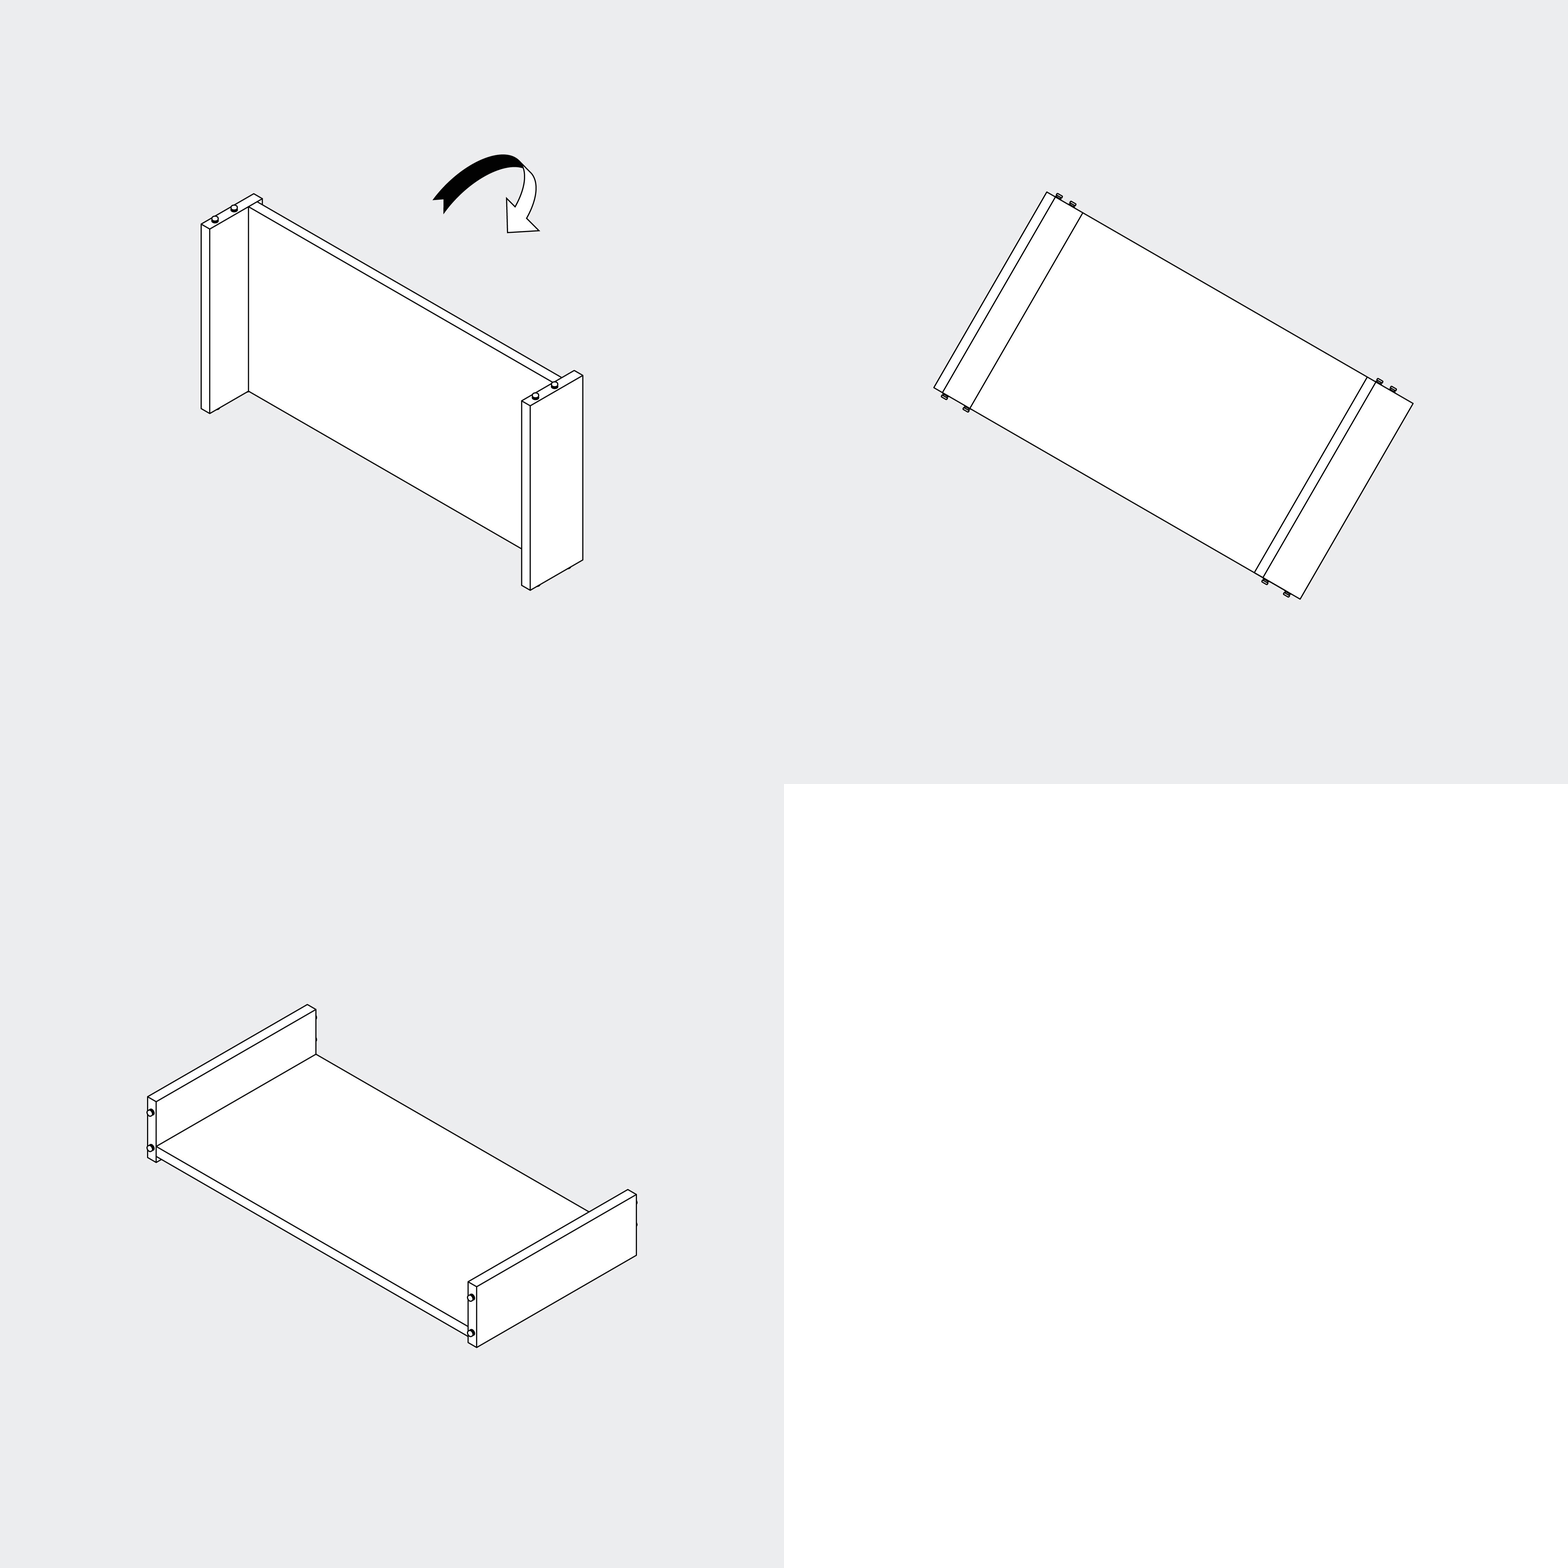
Turn the assembled structure over.
None
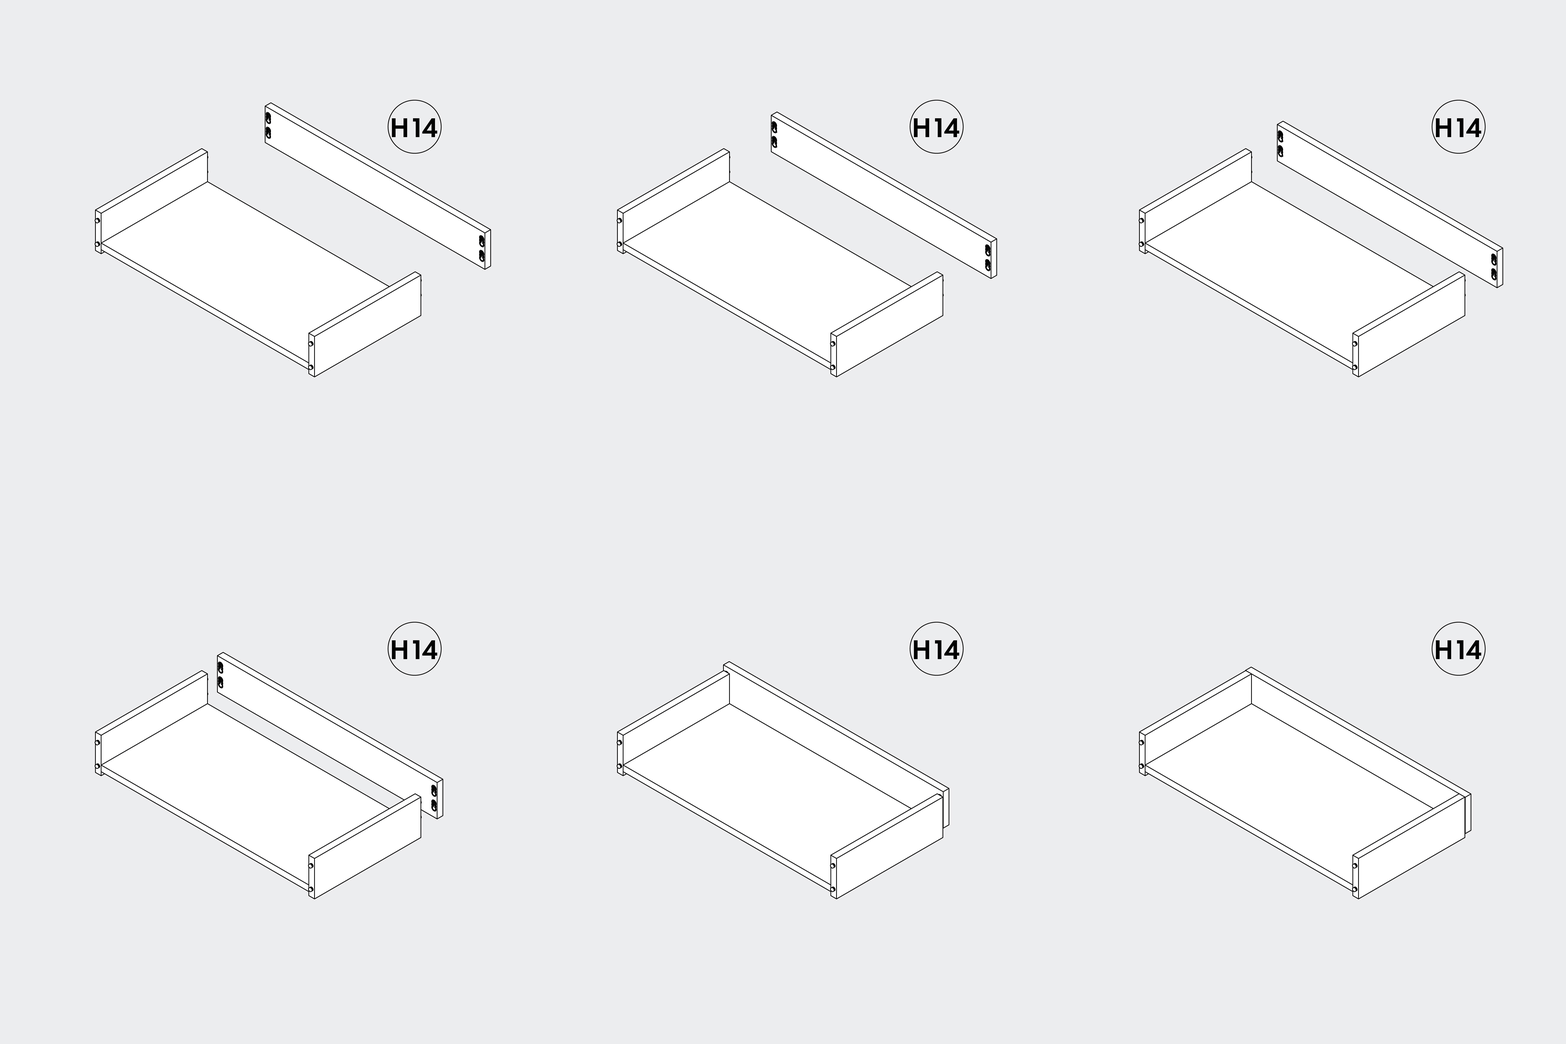
Install part HD14 as shown in the illustration. Insert the pins into the holes, then push the part down until you hear a click.
None
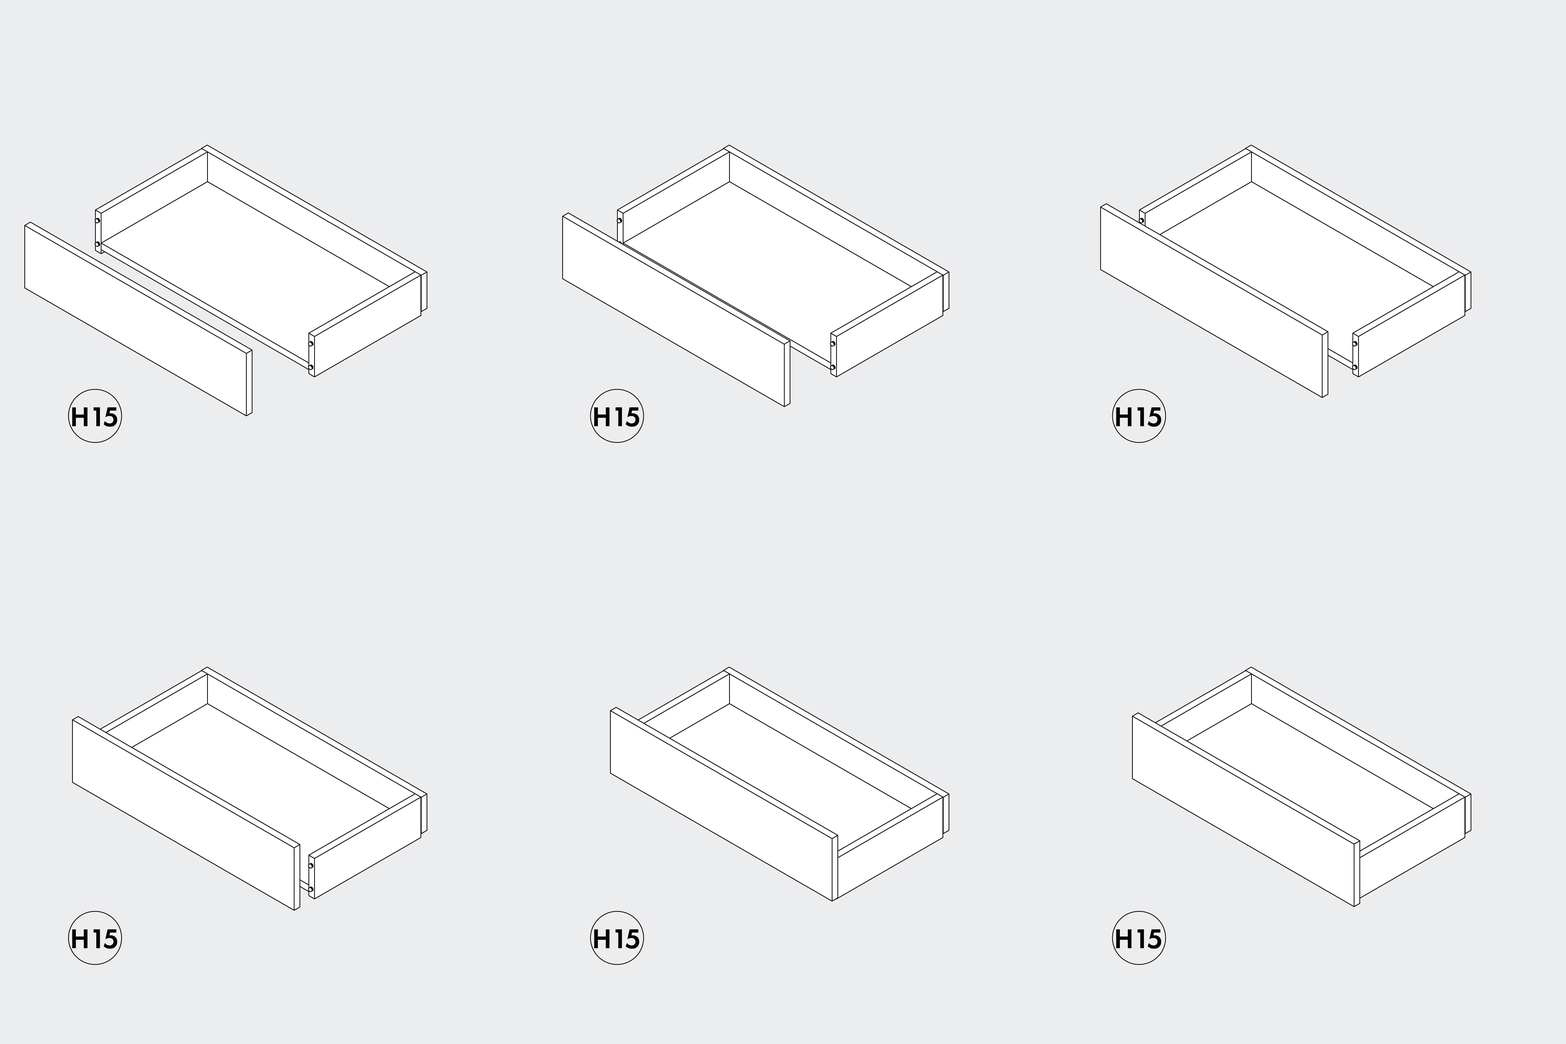
Install part HD15 as shown in the illustration. Insert the pins into the holes, then push the part down until you hear a click. After finishing the first drawer, repeat steps 9-12 to assemble the second one.
None
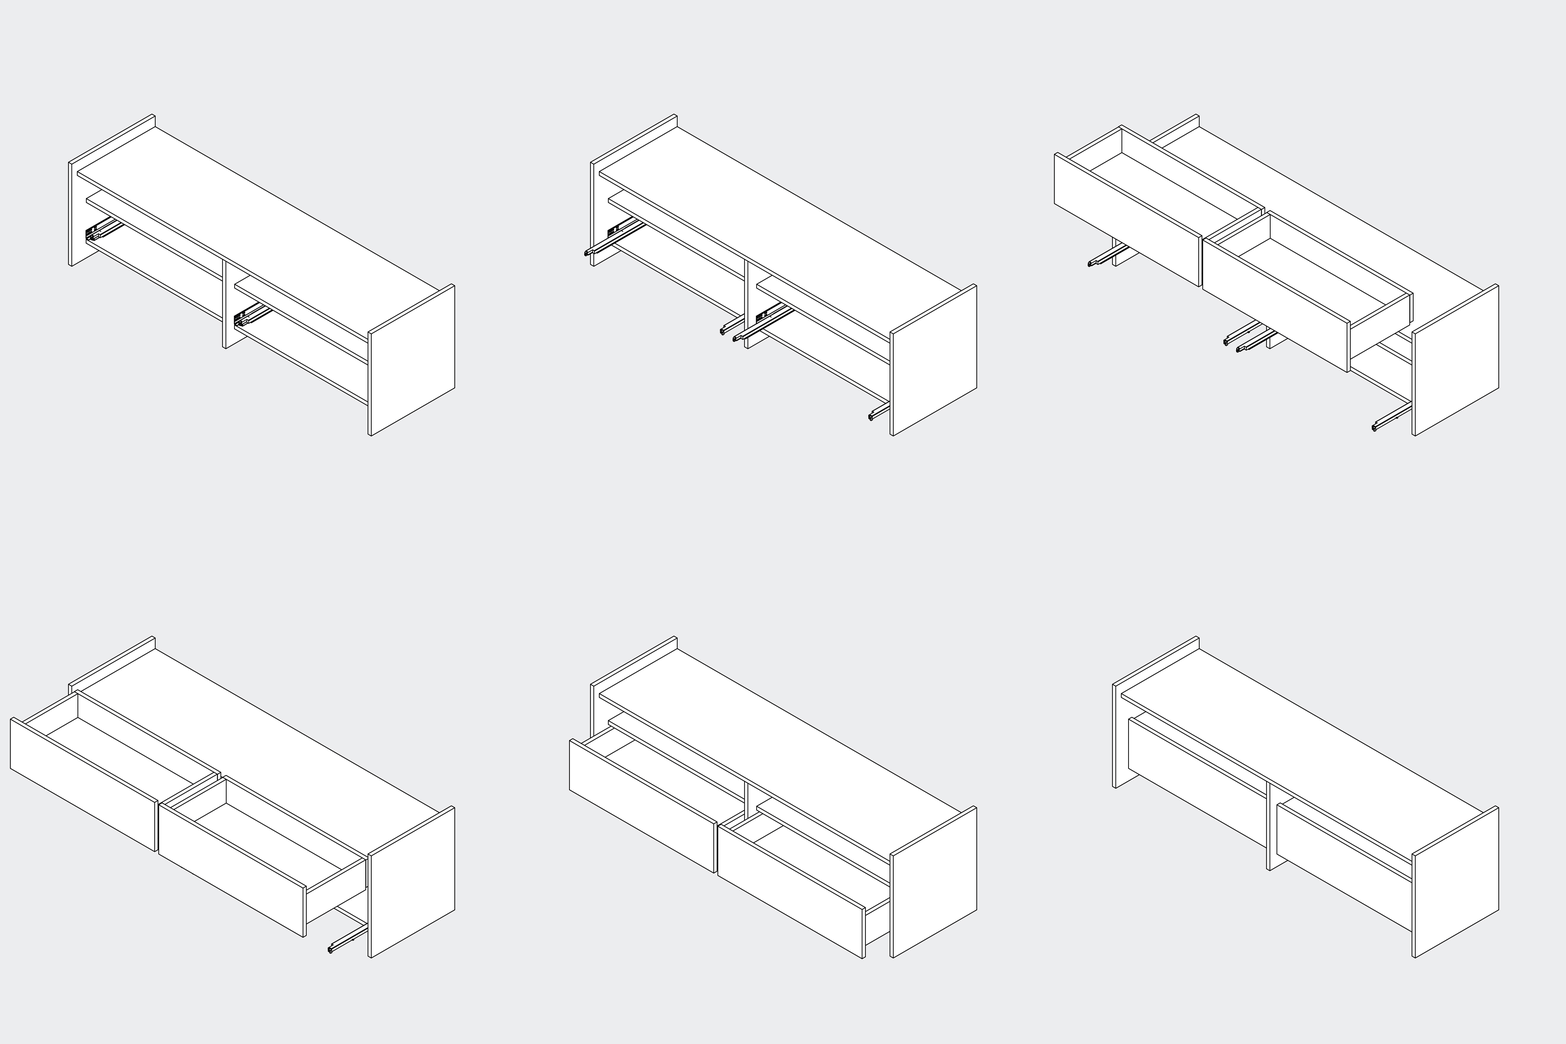
Pull the sliders as far as possible and place the drawer evenly on both of them. Push it inside till you hear a click and the front is fully hidden. To remove the drawer from slides just lay your fingers on the locking device and pull it.

None
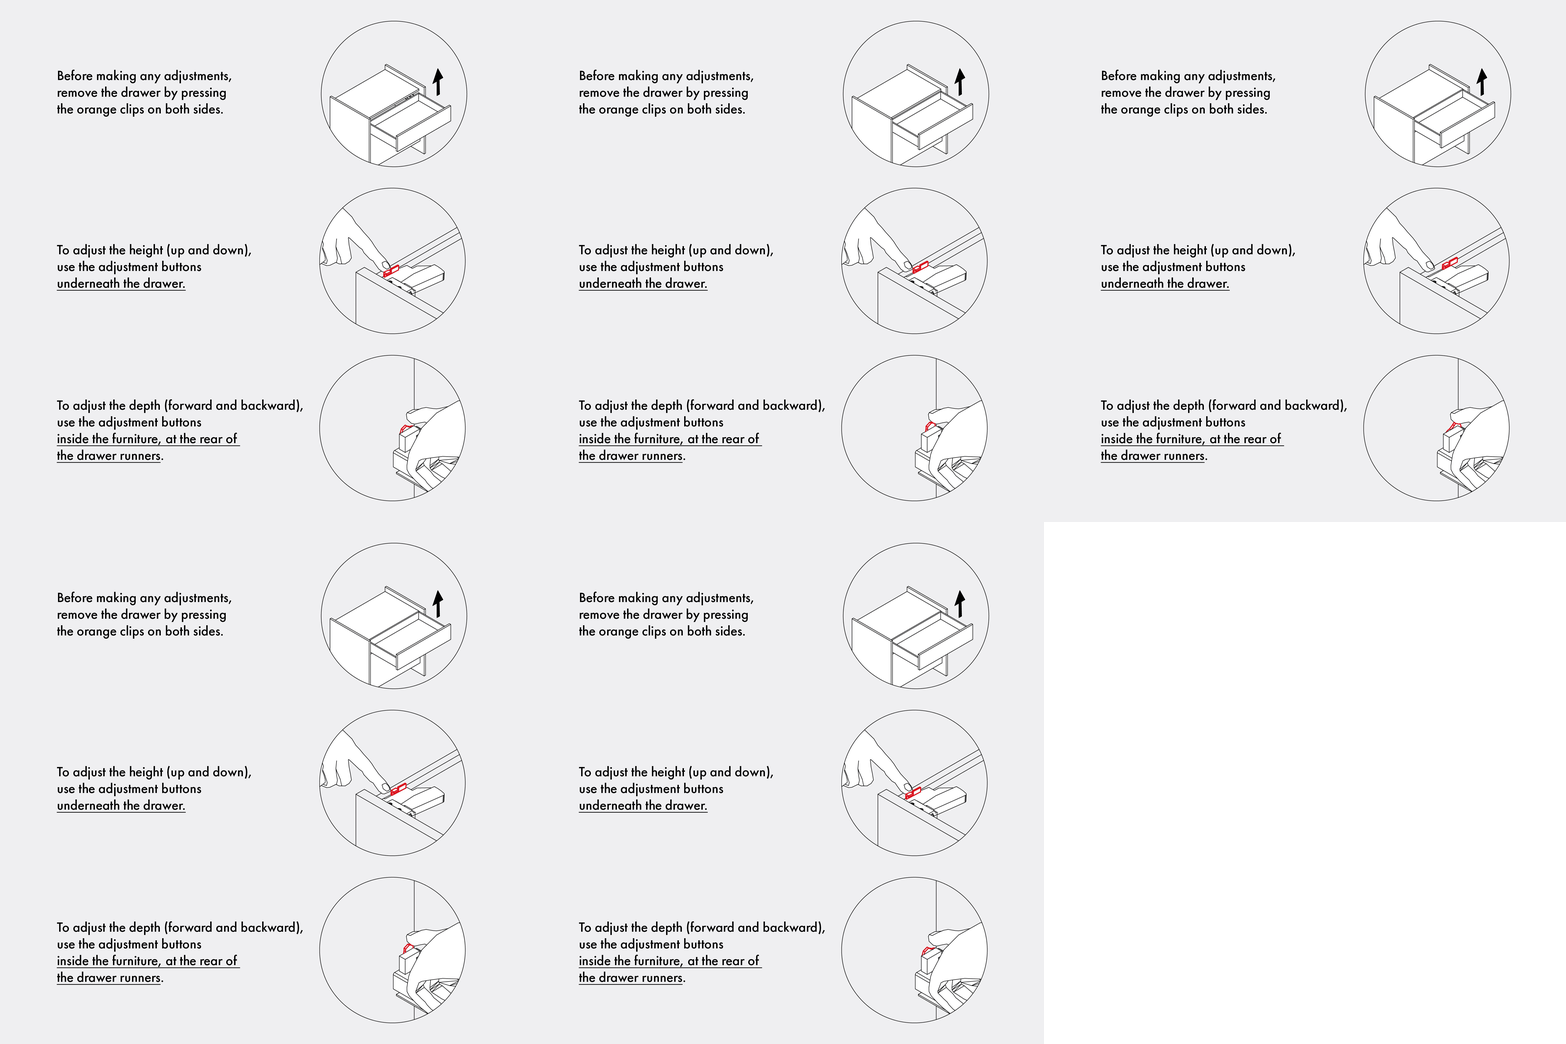
Adjust the drawers’ height and depth.
None
We’re super exited about every new piece of furniture in your home and we’d love to see it.
